Sculpture

Event Horizon. by Mark Leichliter

This project kind of came out of the blue, courtesy of the hard work of The National Sculptors’ Guild. The City of Paramount, California commissioned me to scale up this smaller, gallery-sized piece to add some pizzazz to their Progress Plaza at City Hall.

Below are some progress shots of the fabrication process.

Local Color. by Mark Leichliter

Delivered my latest public art piece to the City of Little Rock, Arkansas. I won a national competition to design a sculpture, with the criteria being wide open; they wanted the artists submitting to have free reign to create whatever they could dream up. I’m honored and humbled to have once again worked with the fine folks out there to build something cool to enhance the community.

"Local Color" came about after my discovery of the State Butterfly of Arkansas, the Diana Fritillary. I was intrigued by the startling contrast between the male and female of the species, and the complimentary hues of each. The Diana displays marked Sexual Dimorphism, wherein the sexes have dramatically different size or coloration. The sculpture consists of both forms of the Diana, realized in multiple metals with differing finishes, on opposite sides of a low relief–like a coin with heads and tails. The striking differences give the sculpture a built-in Eureka moment, as well providing a platform for discovering the beauty of Arkansas' natural world.

Below are some shots of the design and proposal for the project.

…and a bunch of photos from the actual fabrication:


Local Color finished - male side

Local Color finished - the female side

Interwoven: Installed! by markleichliter

Interwoven - INSTALLED!

Ran down to Little Rock on Sunday/Monday with Interwoven in tow. Stayed with new friends Mike and Marty, then got up Tuesday morning and bolted it down to the base. As usual, the City Parks crew were a huge help, and have become some of the best art handlers/installers in the country. I love the bridge as a backdrop: the piece was at least partially inspired by the multiple bridges across the Arkansas river, and their riveted, industrial aura.

See below for some more photos:

255AA202-4CDF-4FD1-9743-FFC523CA7B13.jpeg
970C2432-5E0B-4D6B-851C-0170563340C8.jpeg
interwoven-huddle.jpg
DB33A01B-C364-41AF-A186-6505B77724D3.jpeg

Overcome. by Mark Leichliter

"Overcome" installed in Little Rock, Arkansas.

"Overcome" installed in Little Rock, Arkansas.

“We are not afraid, we are not afraid. We are not afraid today. Deep in my heart I do believe. We shall overcome someday.”

On September 25th, 1957, nine brave schoolchildren walked into Central High School and became symbols for a nation. They symbolized the righteous striving for equality and justice that continues to this day. I have chosen to refer symbolically to this event in my sculpture “Overcome” to honor both these students and what they represent to us all as a society and a culture.Nine shapes begin, caged by a lattice of injustice and segregation. They rise up and come together, and, leaning upon their collective strength, break their bonds to soar free. Each form is an arrow pointing skyward in continued aspiration for the greater good and an indication that more is yet to be done. 

Here's some shots of the installation. Hover over the image for a brief description.

Below are some more photos from the fabrication process.

What's Happening Now? by Mark Leichliter

I'm currently working on my largest and most complex design to date: "Overcome" for Little Rock, Arkansas. Below is a rendering of the 3d design in Solidworks.

"Overcome"

"Overcome"

And here is a gallery of my progress over the last few weeks:

Split Infinitive, re-worked. by Mark Leichliter

I designed this piece way back when Sketch-Up was my main software for modeling. I was pretty happy with the way it turned out, but over the course of its fabrication the first time around, I discovered a pile of things that could have been done better to yield a smoother and less laborious process. Chief among the changes was making the thing symmetrical vertically, which enabled me to eliminate two entire butt joints in the sheet metal, which means significantly less grinding - which means a much happier Humble Narrator. I used my original Sketch-Up model, importing it into Rhino so I could have a starting place for the geometry:

Mesh edges from Sketch-Up.

Mesh edges from Sketch-Up.

After a whole bunch of mucking about and snapping new construction curves to that stuff, I was able to get a cleaner version that had the added benefits of being easier to fab AND better aesthetics.

Fixed up in Rhino - and natively on my Mac in the Rhino Beta for OSX.

Fixed up in Rhino - and natively on my Mac in the Rhino Beta for OSX.

From there, I used Rhino's Unroll command and some patience to arrive at a 2d pattern, ready to send off to the laser for cutting out of stainless steel.

Unrolled surfaces of the 3d model, colored for identification.

Unrolled surfaces of the 3d model, colored for identification.

The Gallery below shows some of the initial stages of the assembly. I made a gumby little wooden jig to bend the tight inside curves; the outside curves bend against the "sides", so don't need to be pre-rolled.

More action shots, and an artsy filter a la Instagram:

I LOVED the piece with just the sanded metal surface, but this one is actually sold, and the client wanted a yellow powder coat. Yellow? :– {

Turns out, yellow is SPECTACULAR on this thing. The first image above shows the piece fresh from the powder coater, followed by some shots of the edges being filed back to reveal the shiny stainless underneath. I love the way this iteration came out. Hopefully my clients feel the same - shipped it off a while ago and wondering what they think.

Dutch angle with Japanese maple. Artsiness.

Dutch angle with Japanese maple. Artsiness.

PS: I posted quite bit about the first iteration. Some linkage:

Here, here, over there, and here, too.
 

"Beginning" from the beginning by Mark Leichliter

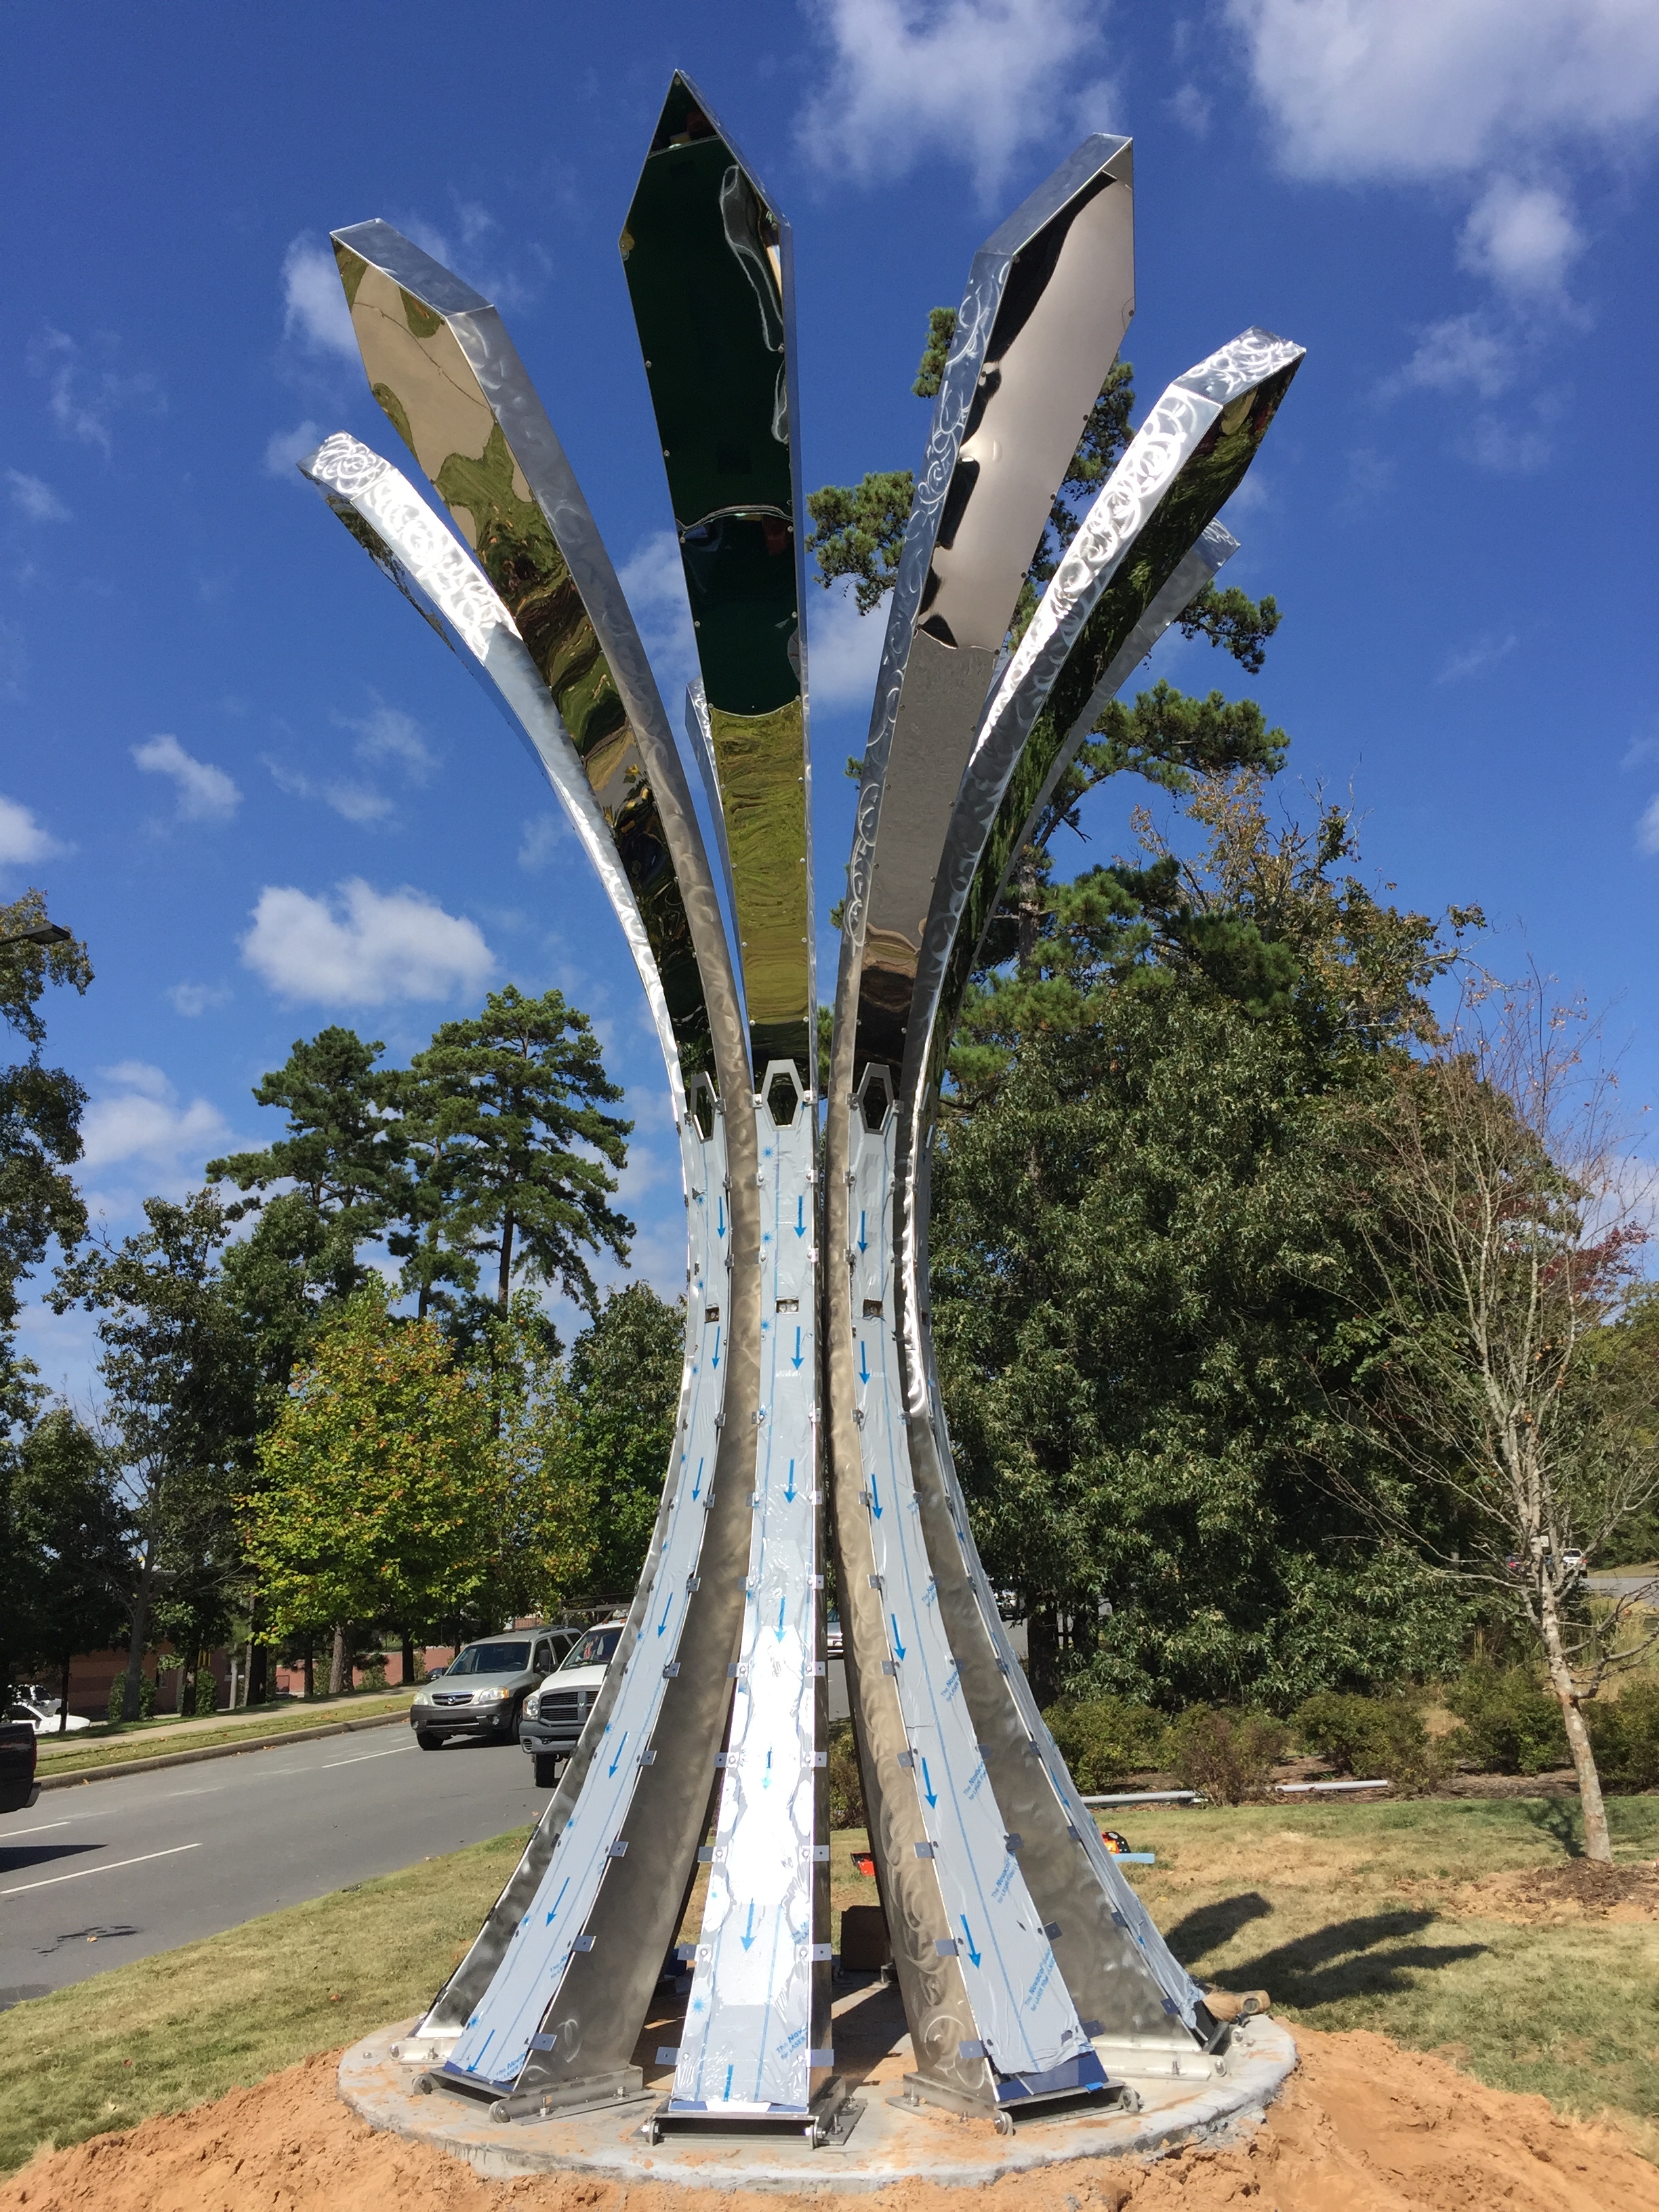
What, two blog posts in a week? Am I feeling OK? Yep - just finally have some time to sit down and update things. Here's another piece I got done over the summer:

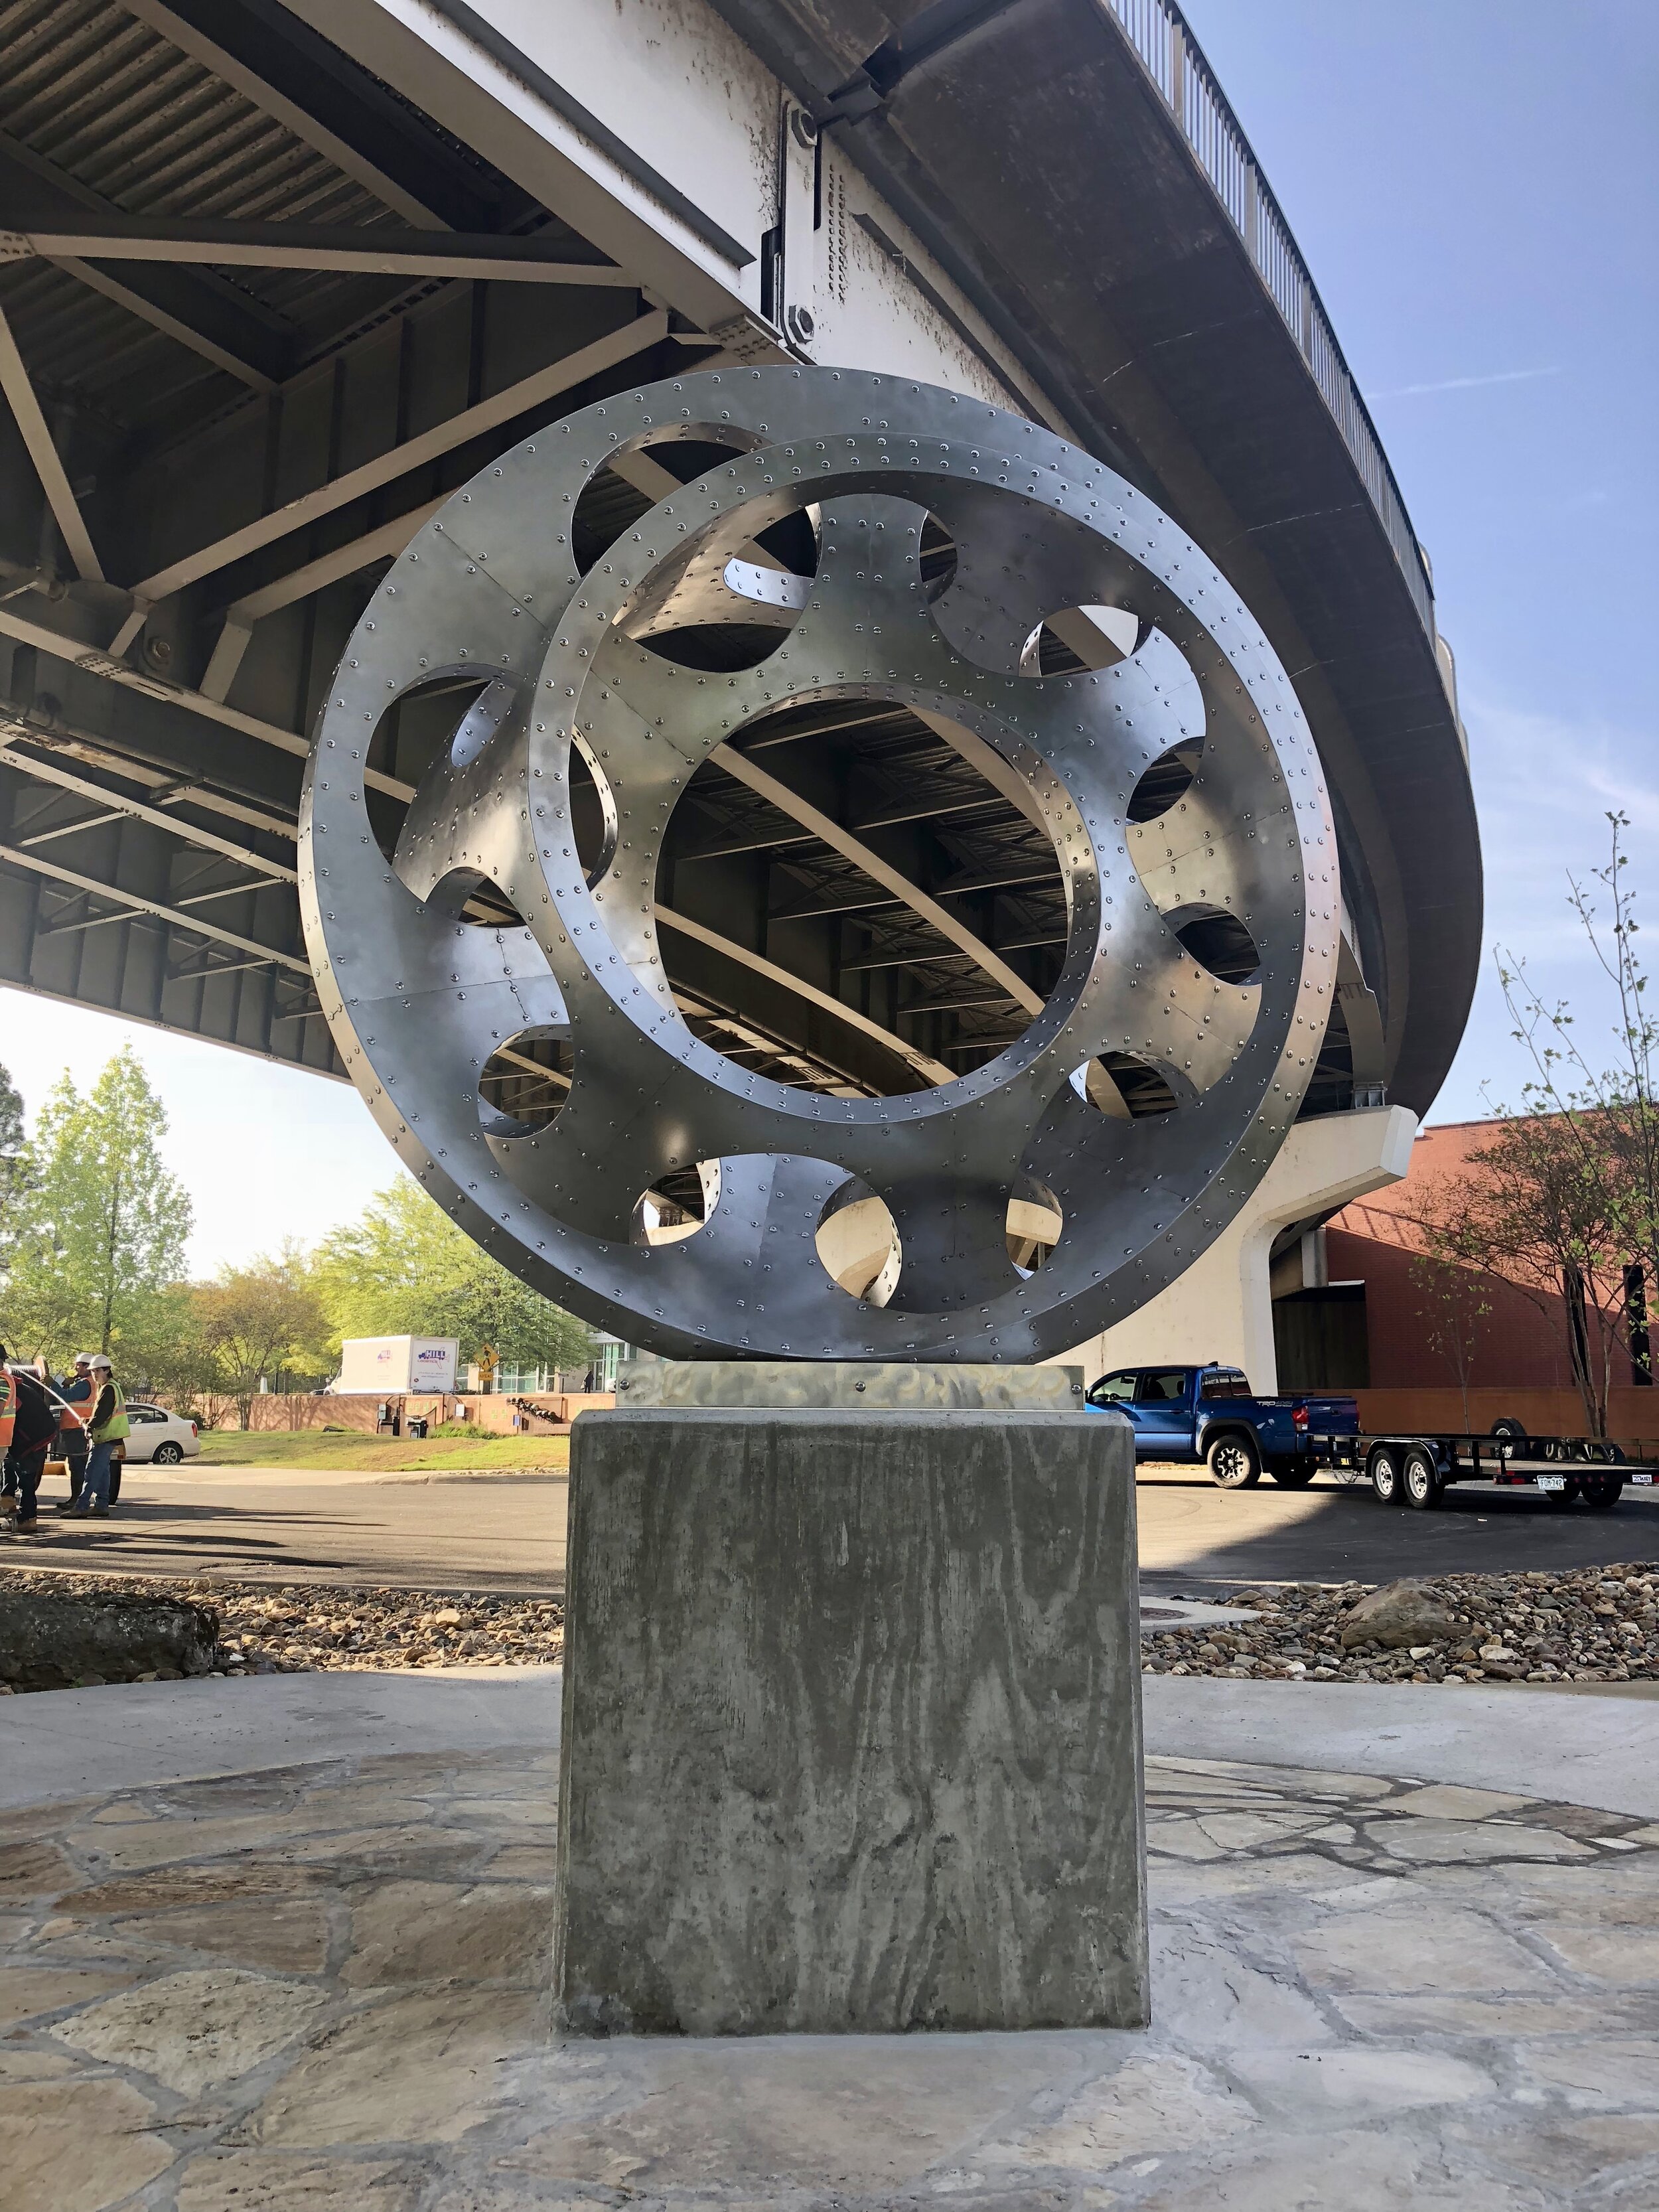
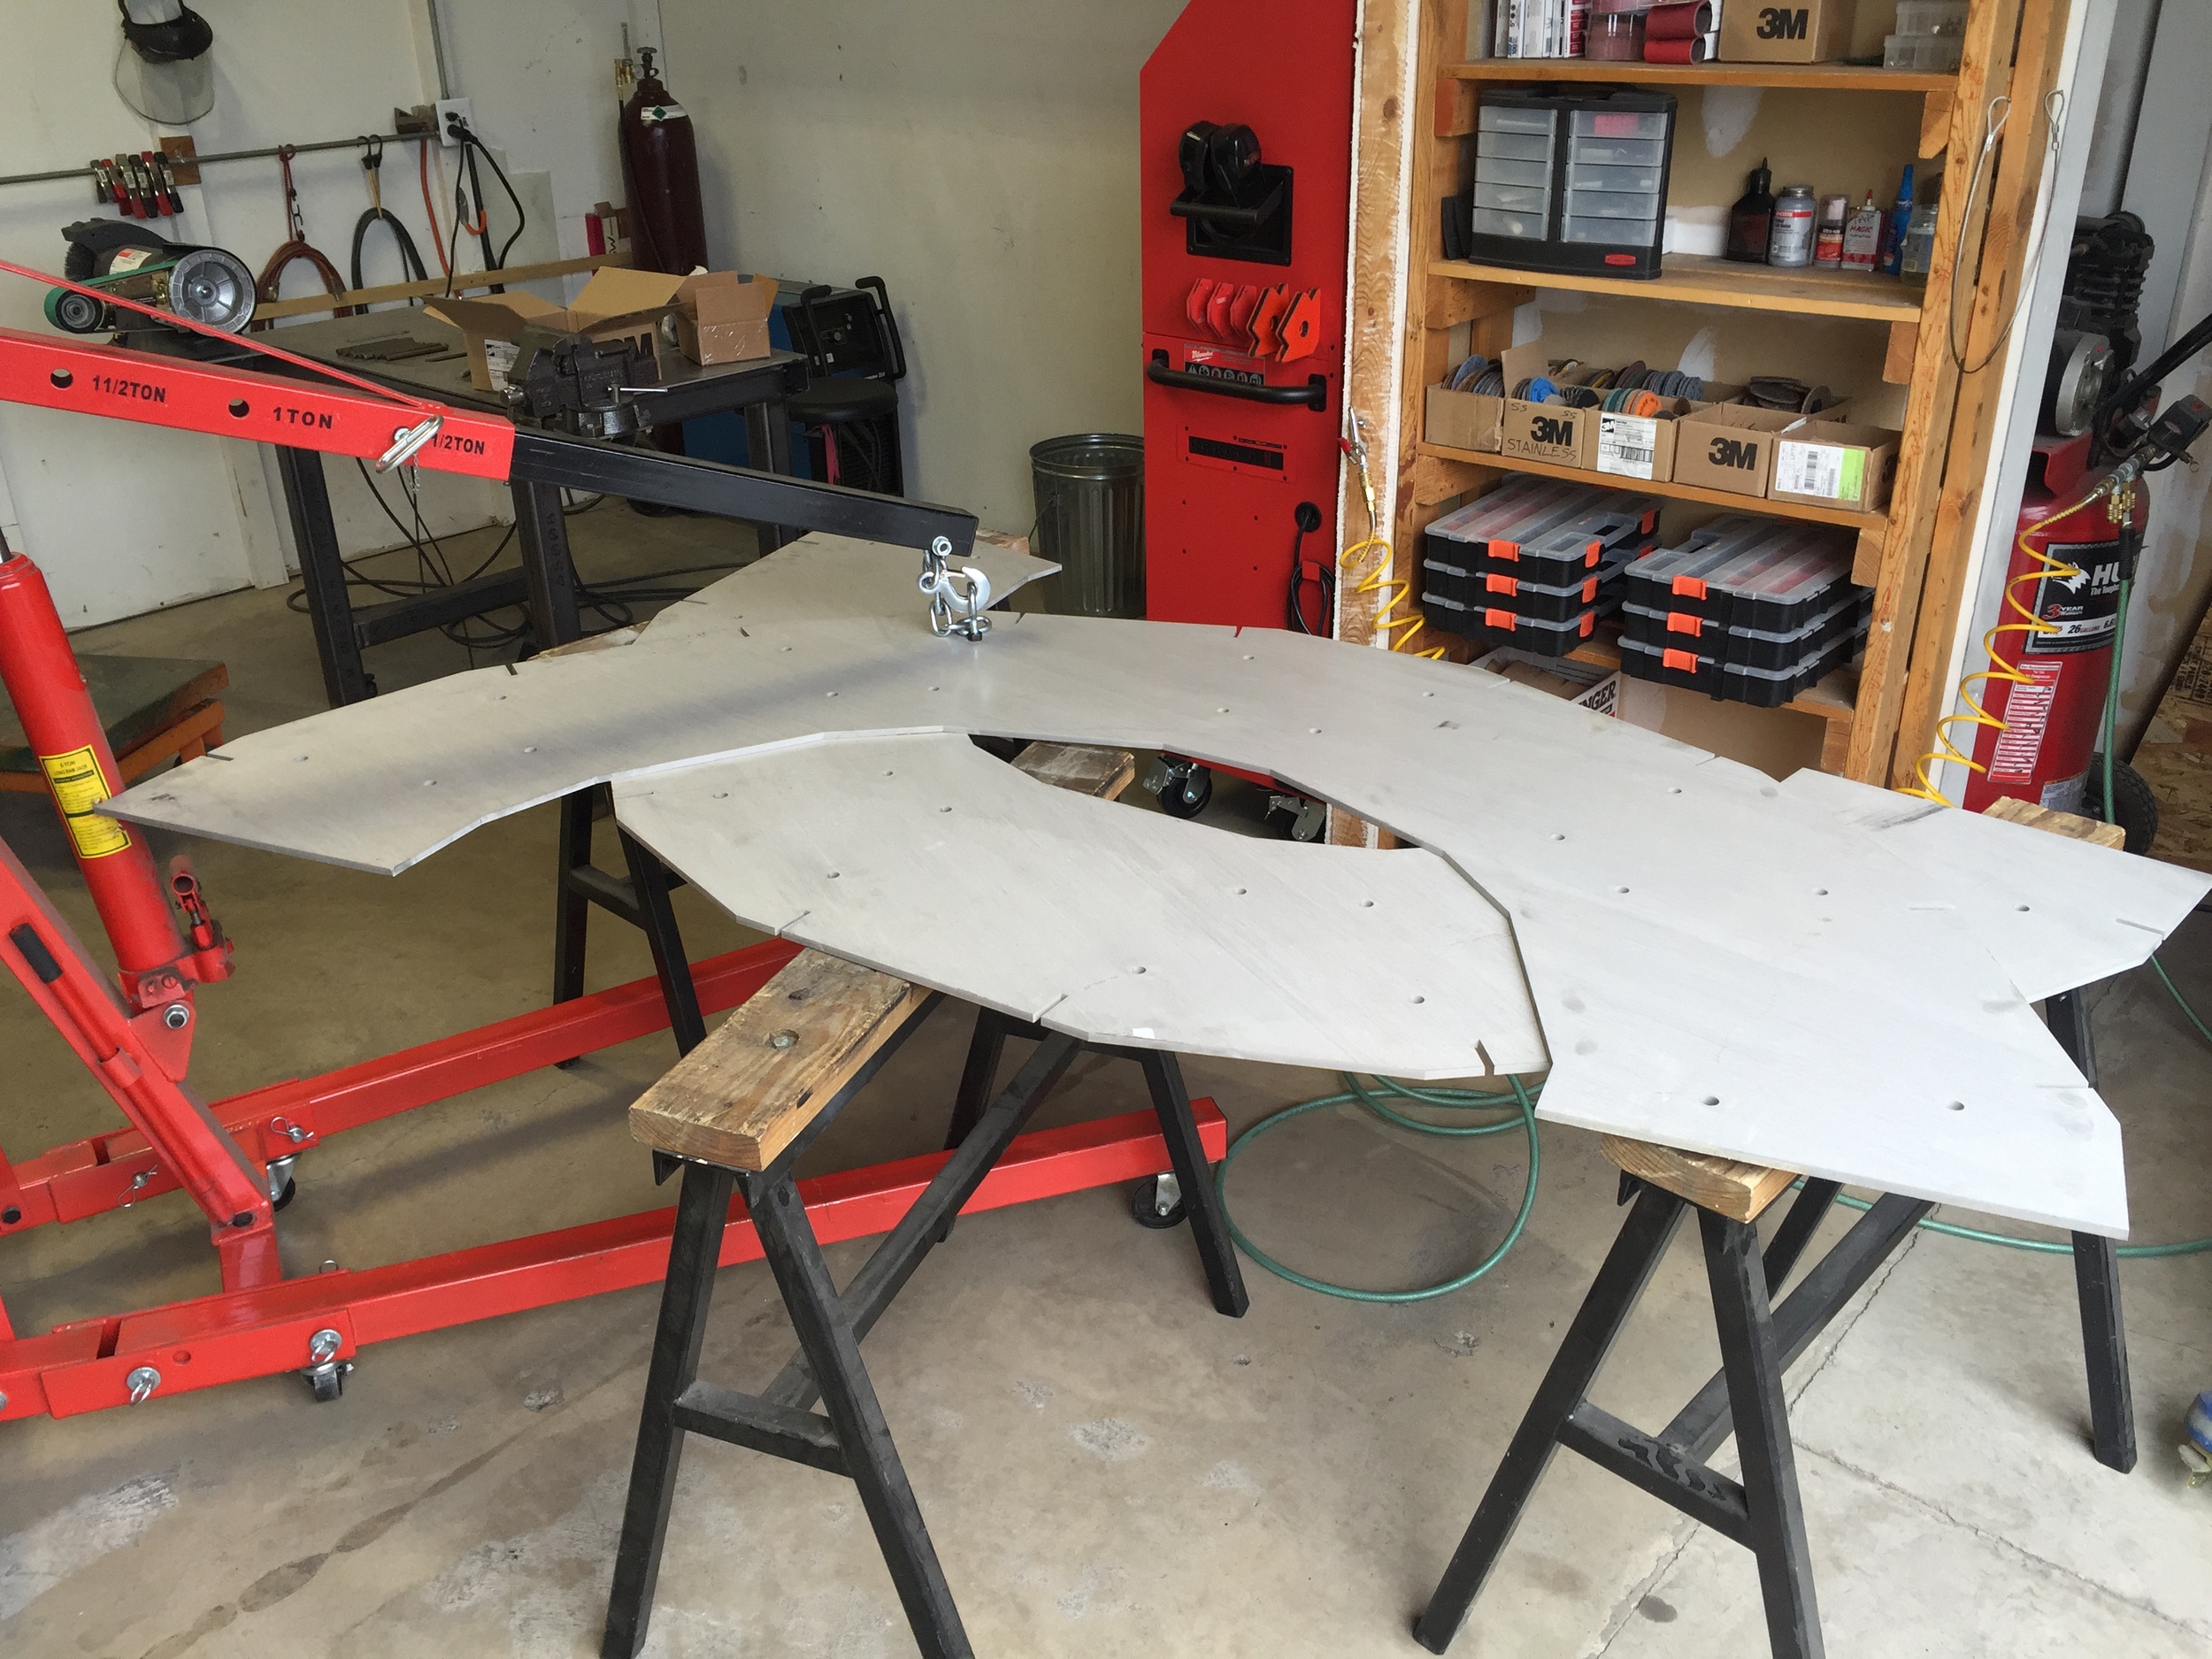
I batted around the idea of titling this one "Just After the Big Bang" or "Origin of the Universe" or some such - but I decided to simplify. Nonetheless, to me it represents what the Universe could have looked like just a few Planck Time units after the Big Bang, with a lot of artistic license thrown in for good measure. I started with a simple egg-shaped surface in Rhino, then used the built-in Paneling Tools to array the hexagonal base unit over said surface. LOTS of flailing around and reiterating until I finally got something that would work. One complication of this particular design that normally doesn't occur in my Rhino work is the thickness of the material - because it incorporates repeating components, the thickness of each one must be allowed for in order for the pieces to properly form the correct final shape. This is one area that Rhino struggles in, as it employs surfaces that are zero-thickness rather than solids with volume like real-world sheet metal. I imported the surfaces into Solidworks and added the appropiate thickness, but then had to pull them back into Rhino to produce the correct patterns for the laser cutter - Solidworks is just too rigid to allow my crazy shapes to be modeled with its sheet metal tools. Go figure. Anyway, this is what I ended up with, pared down to a quarter of the whole form:

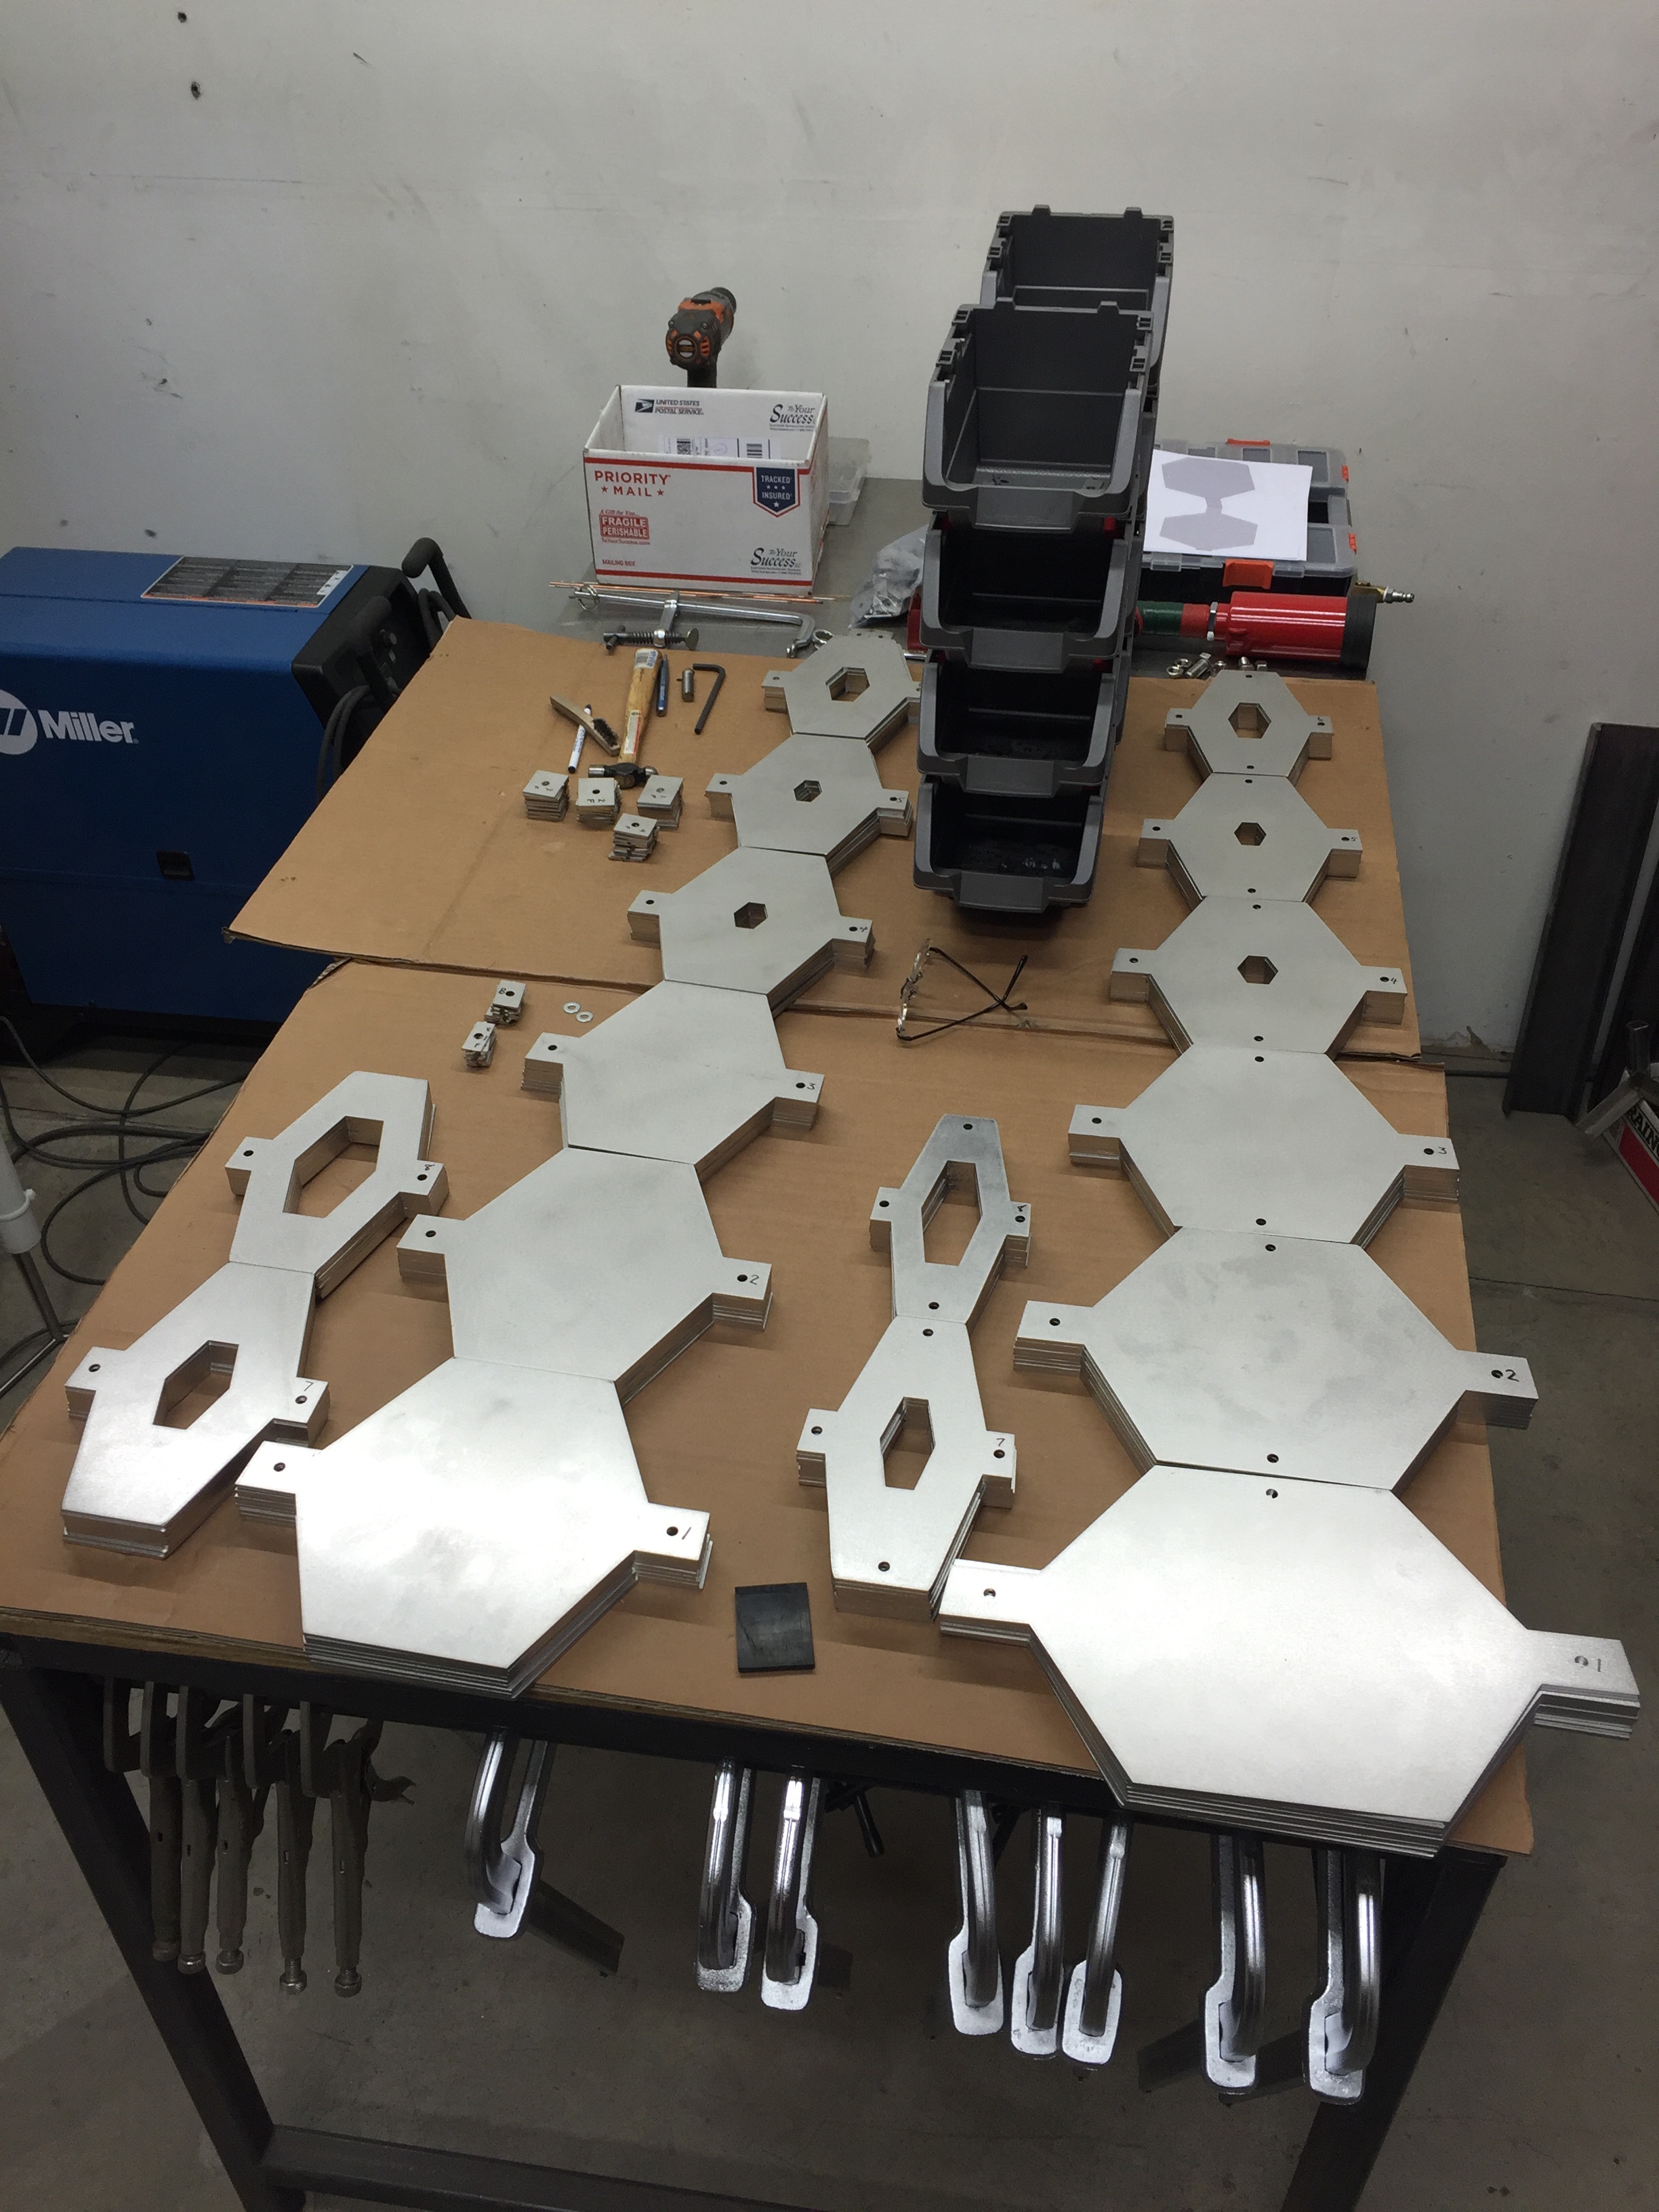
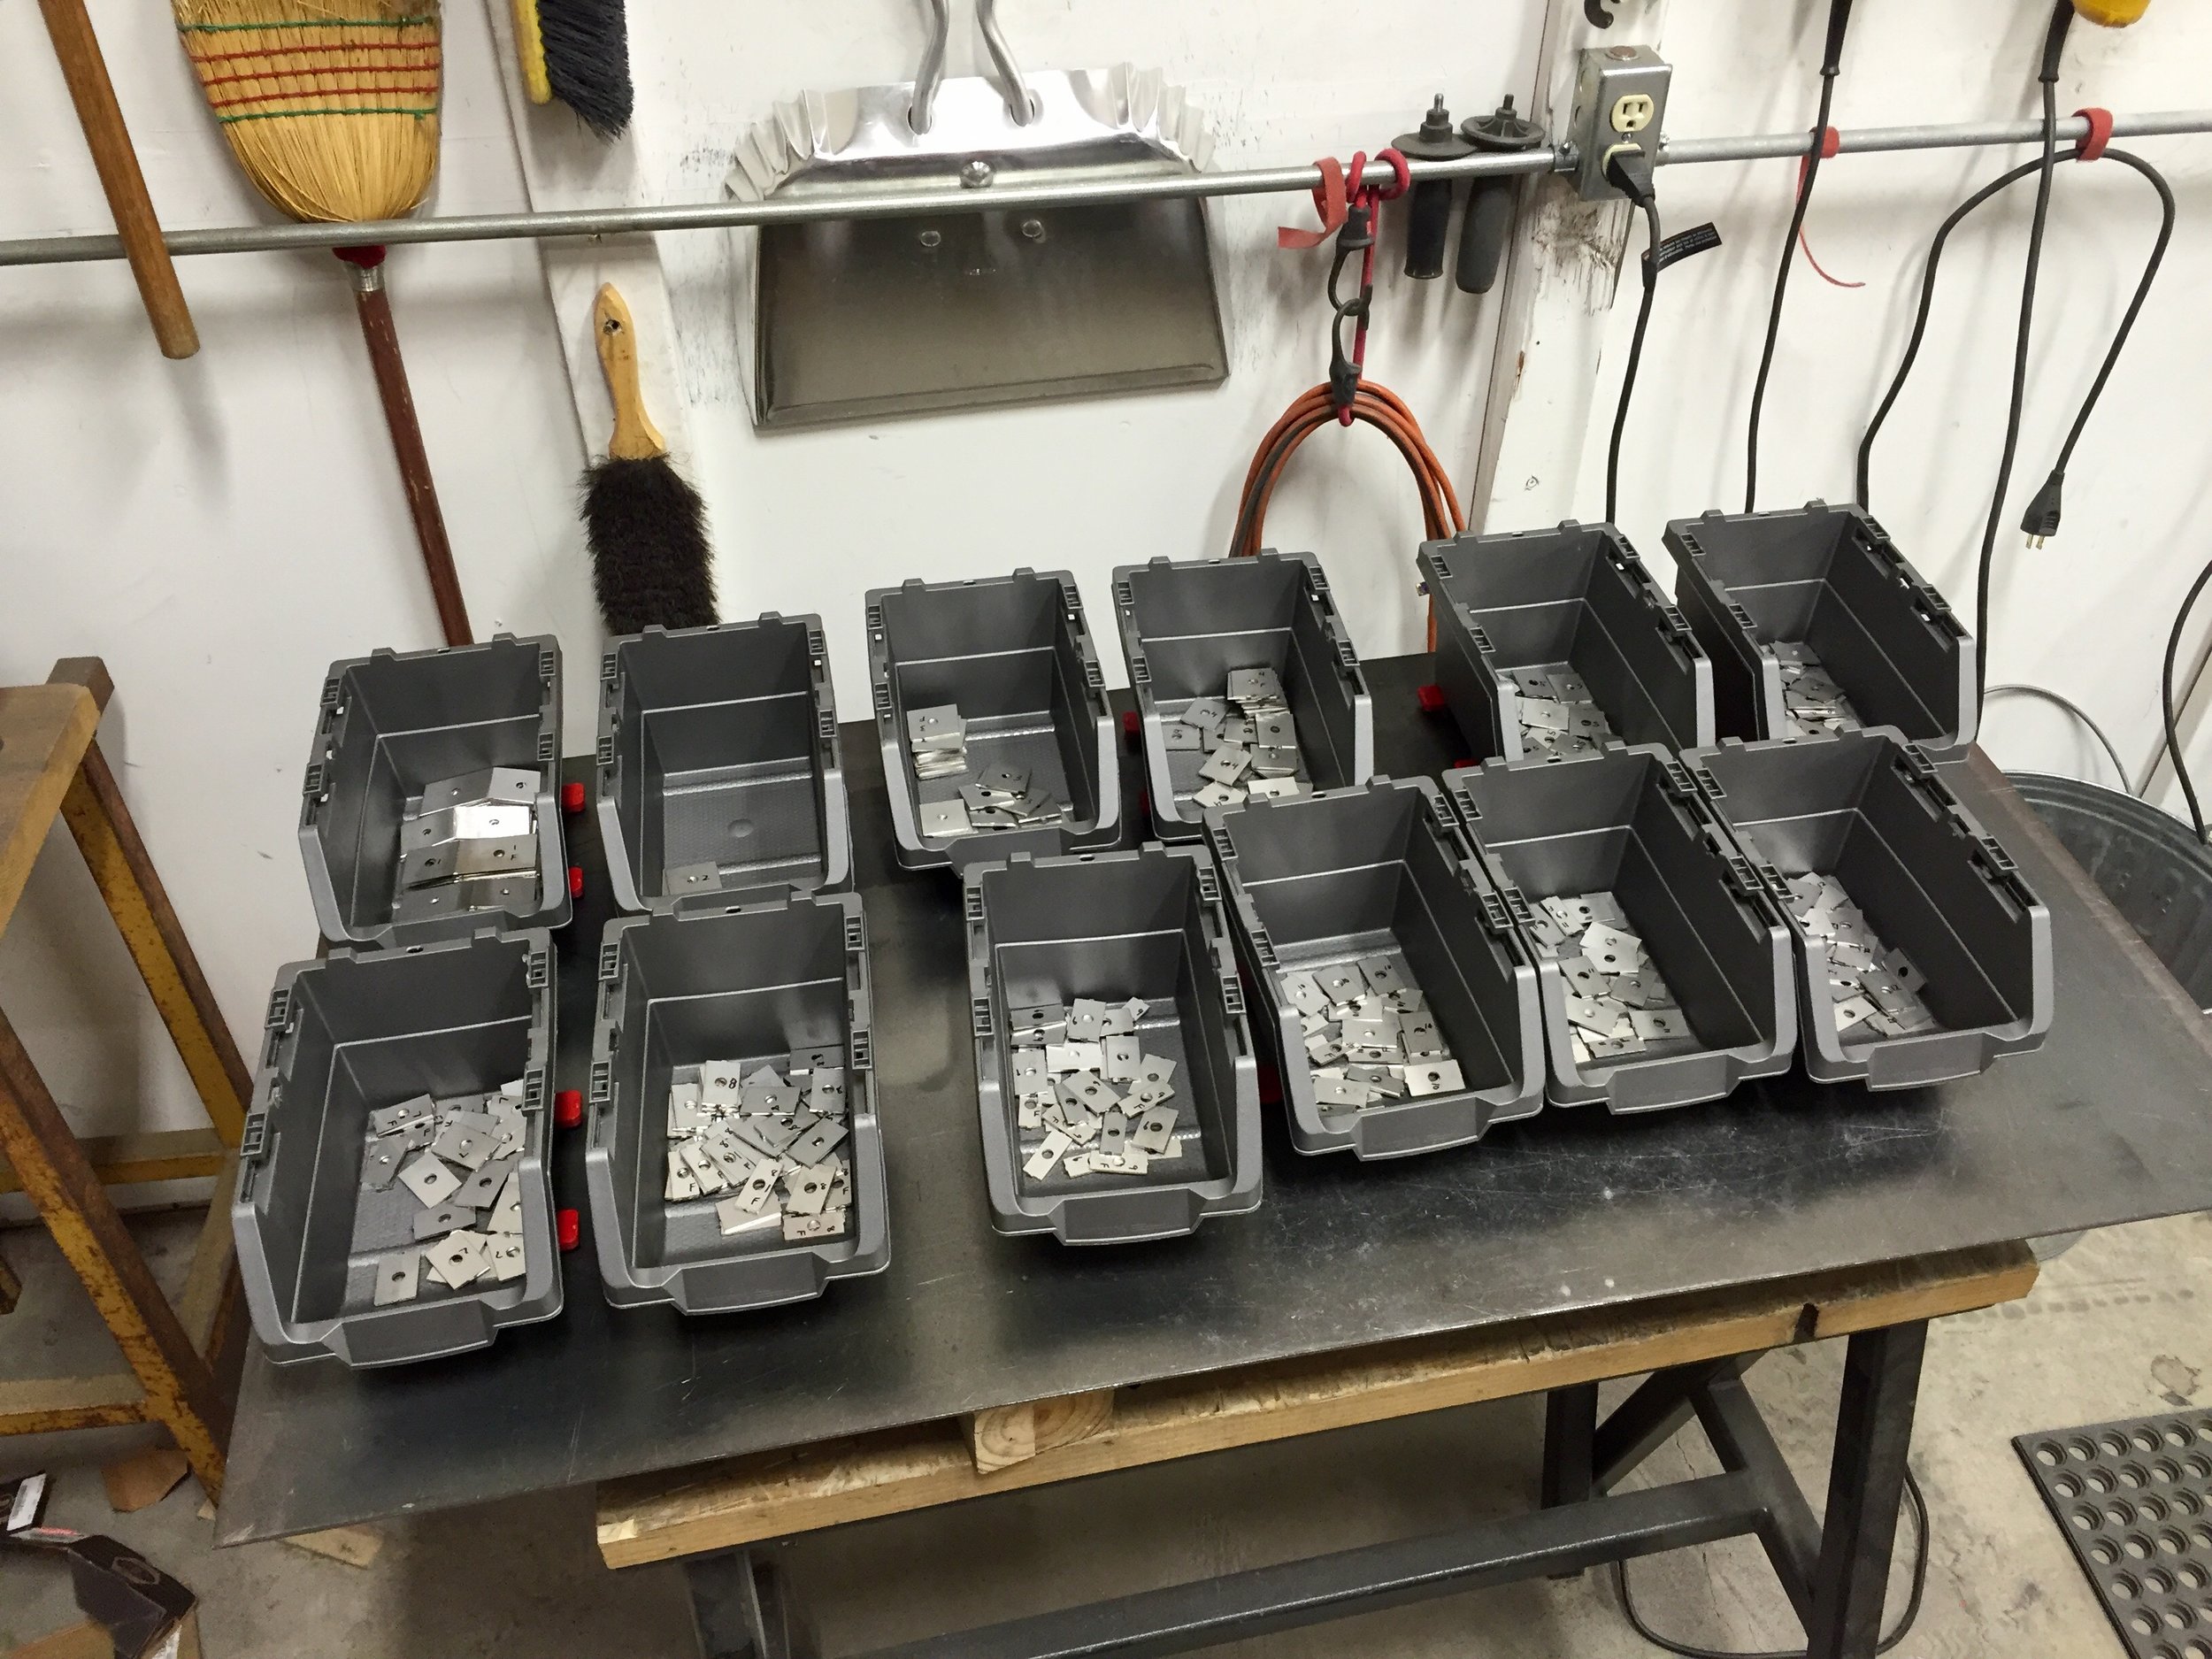
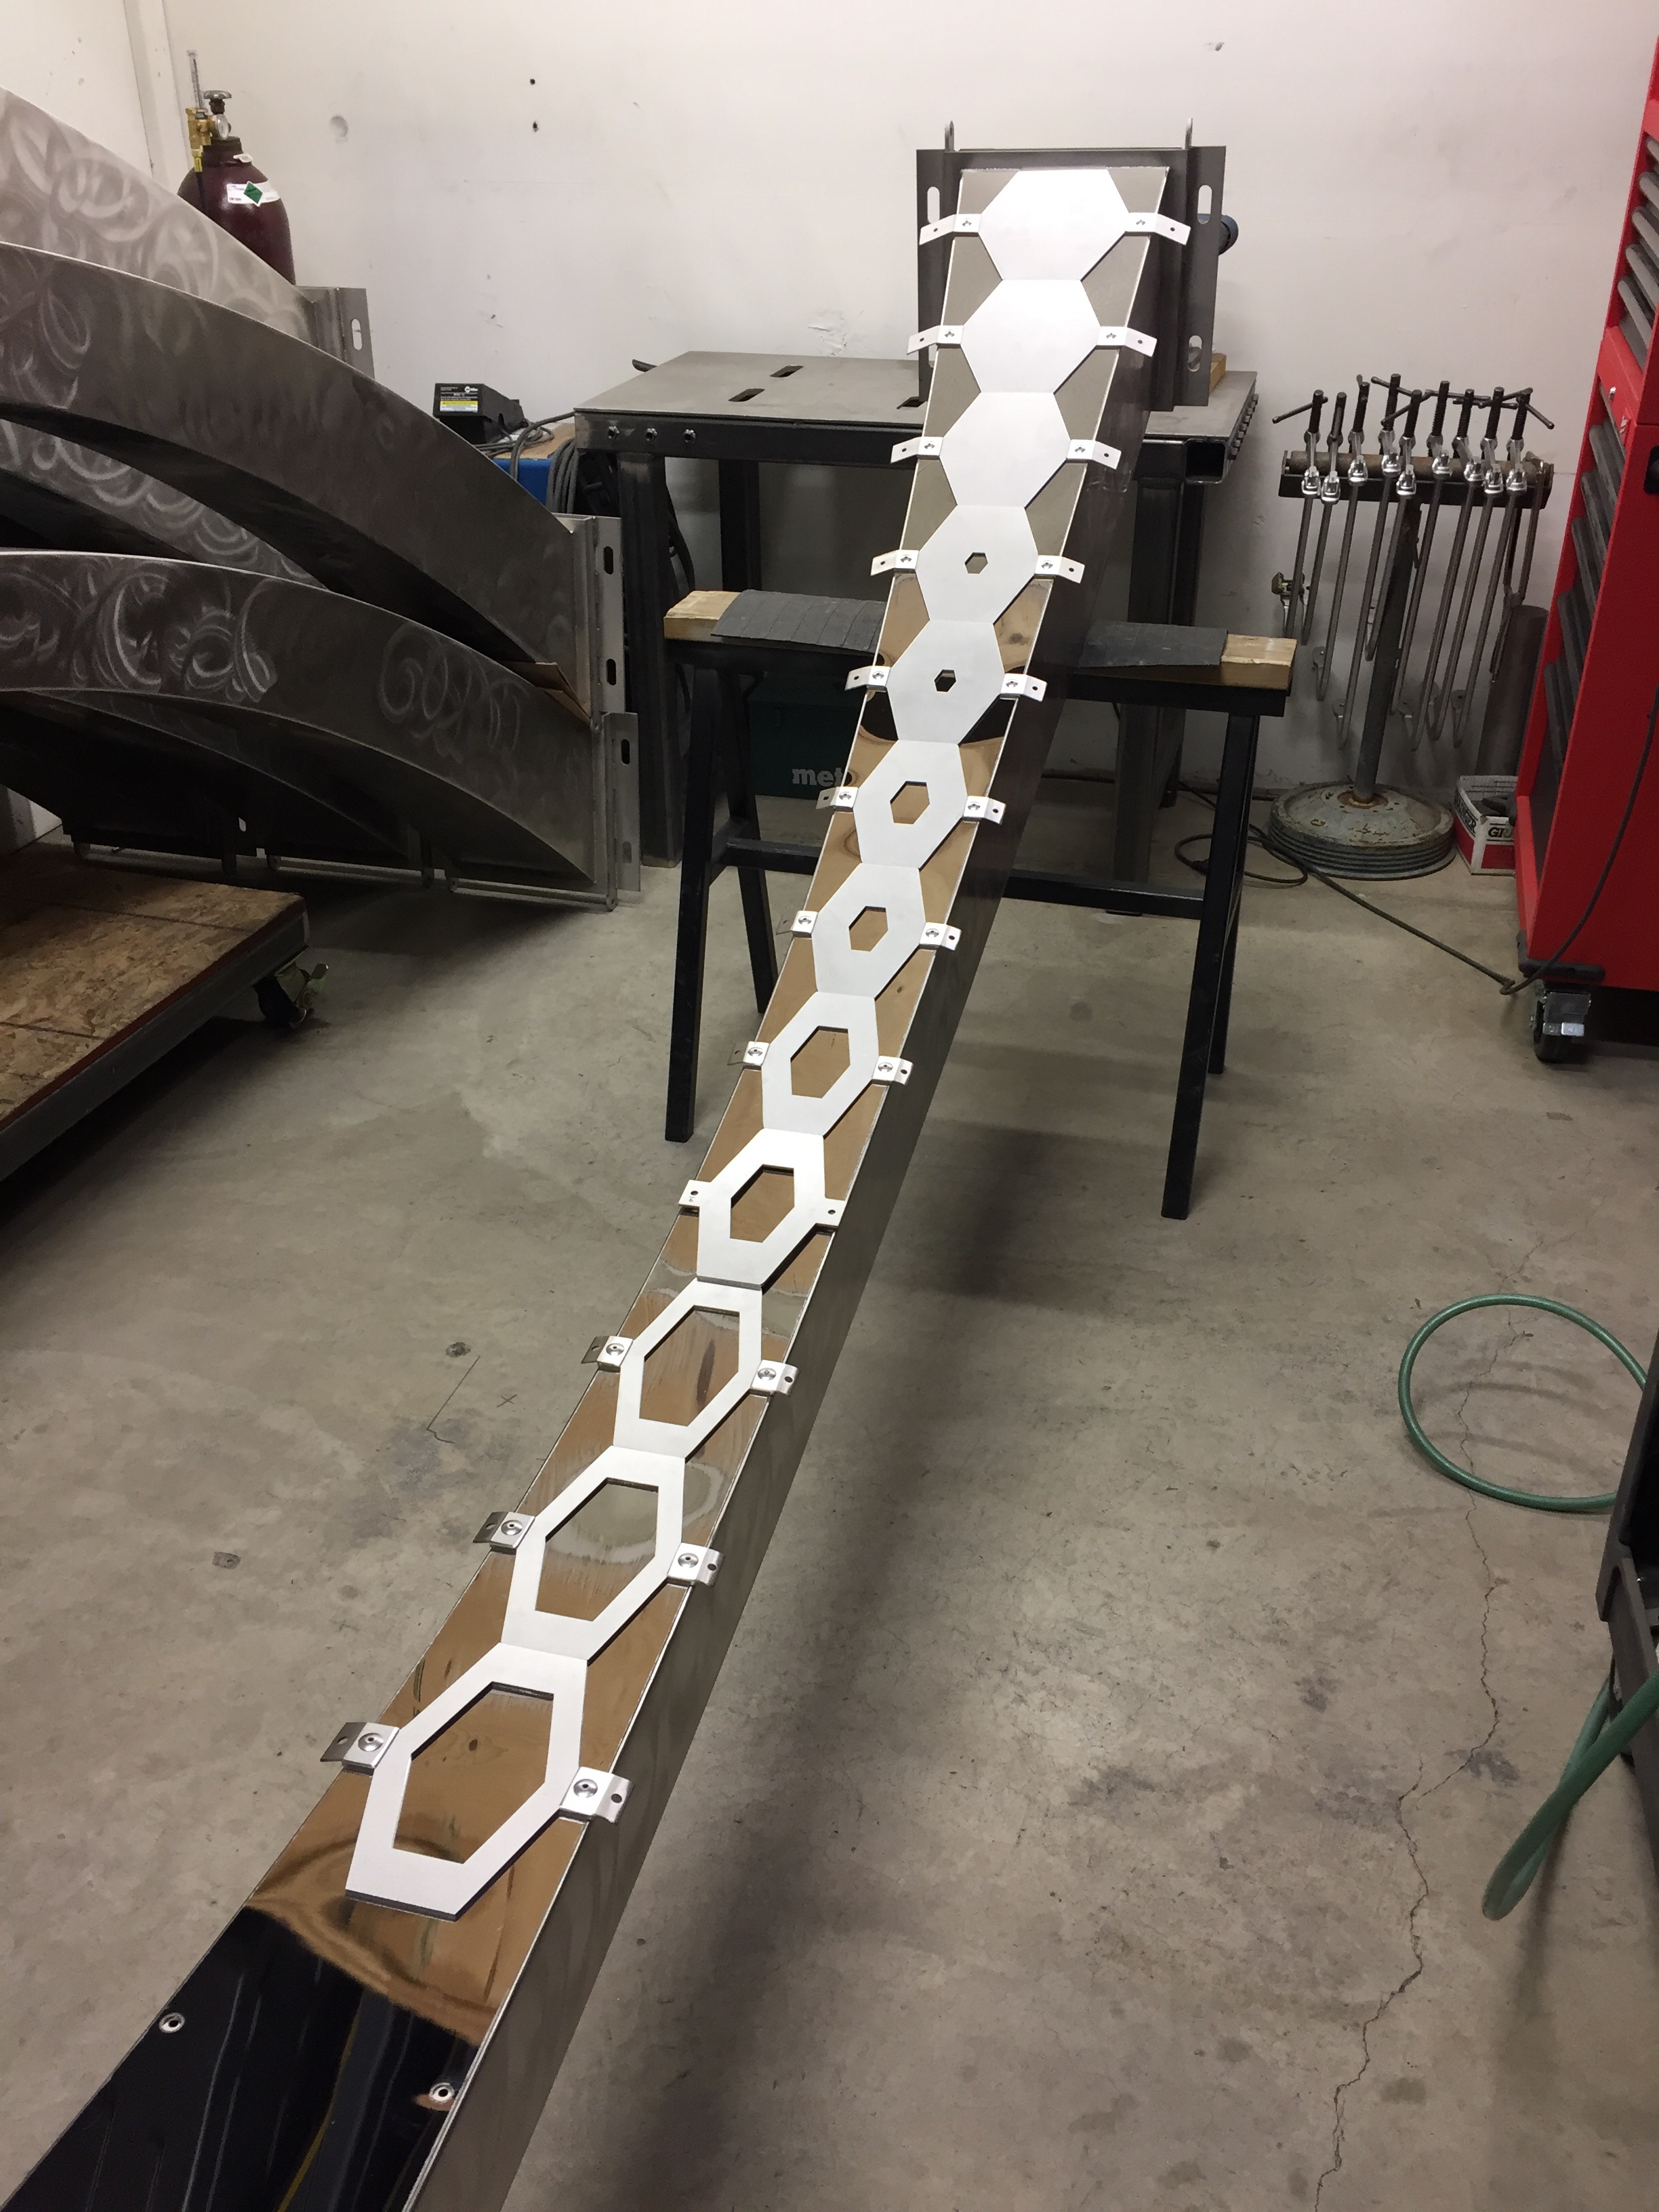
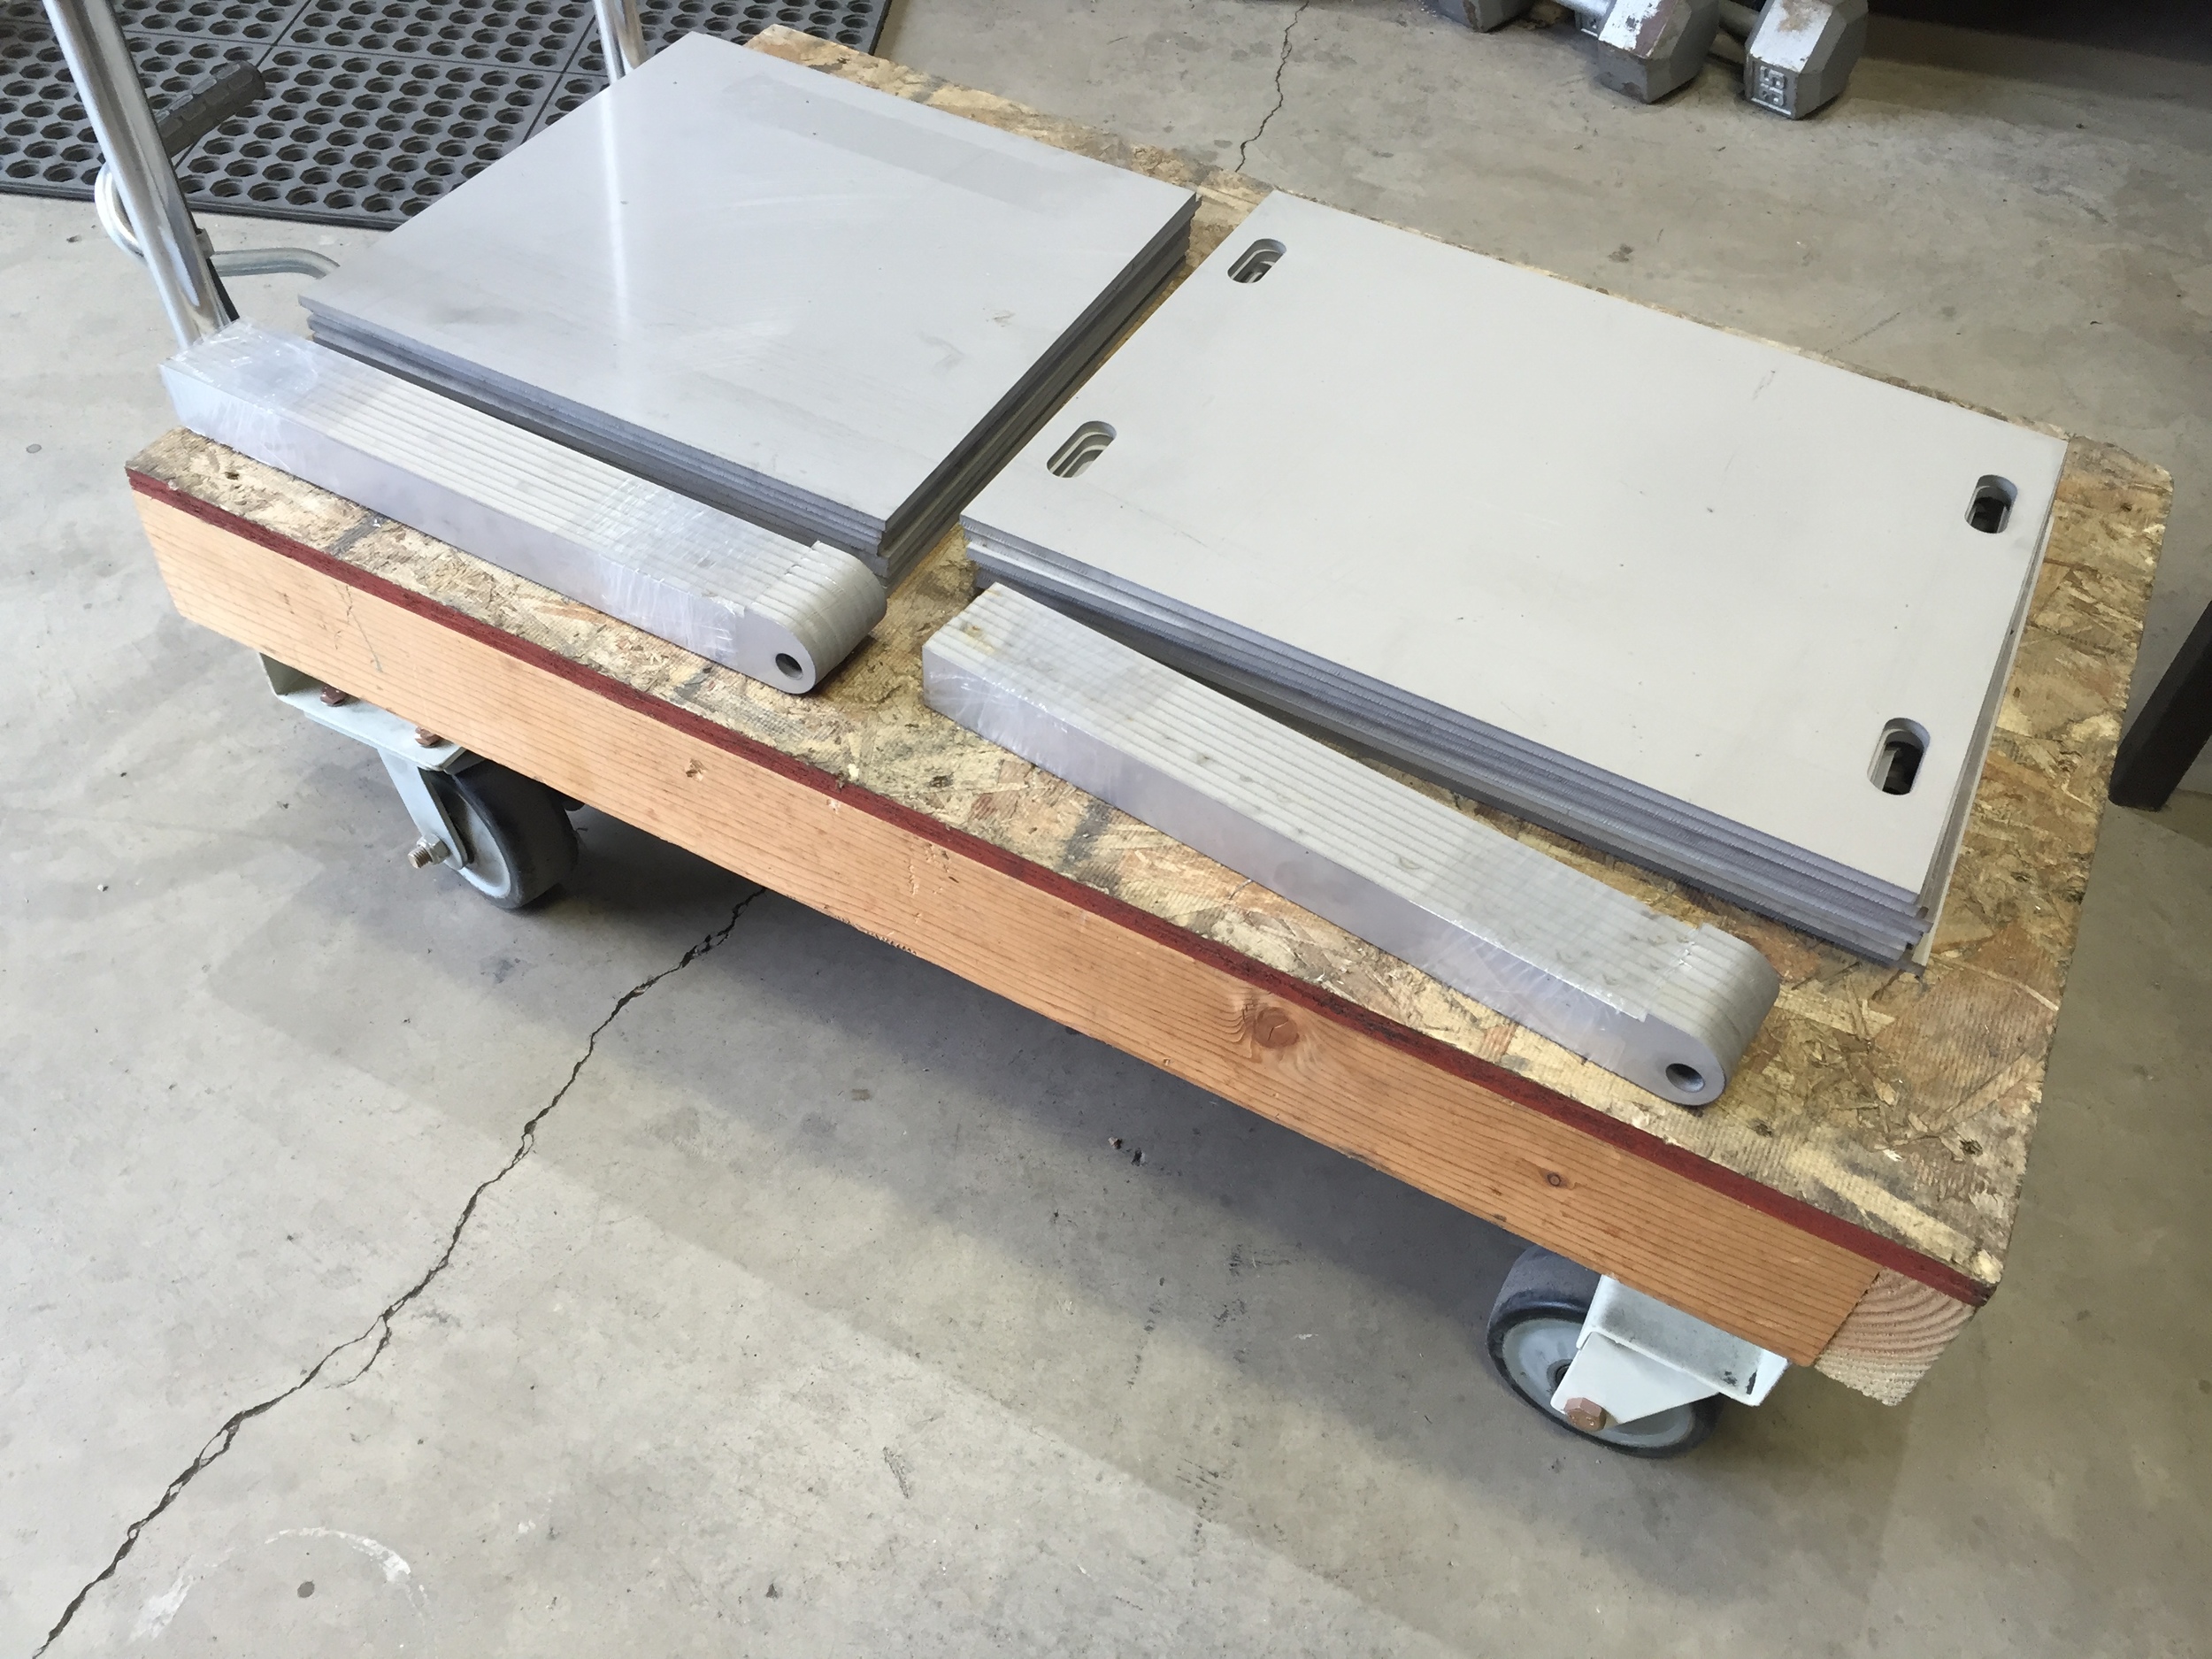
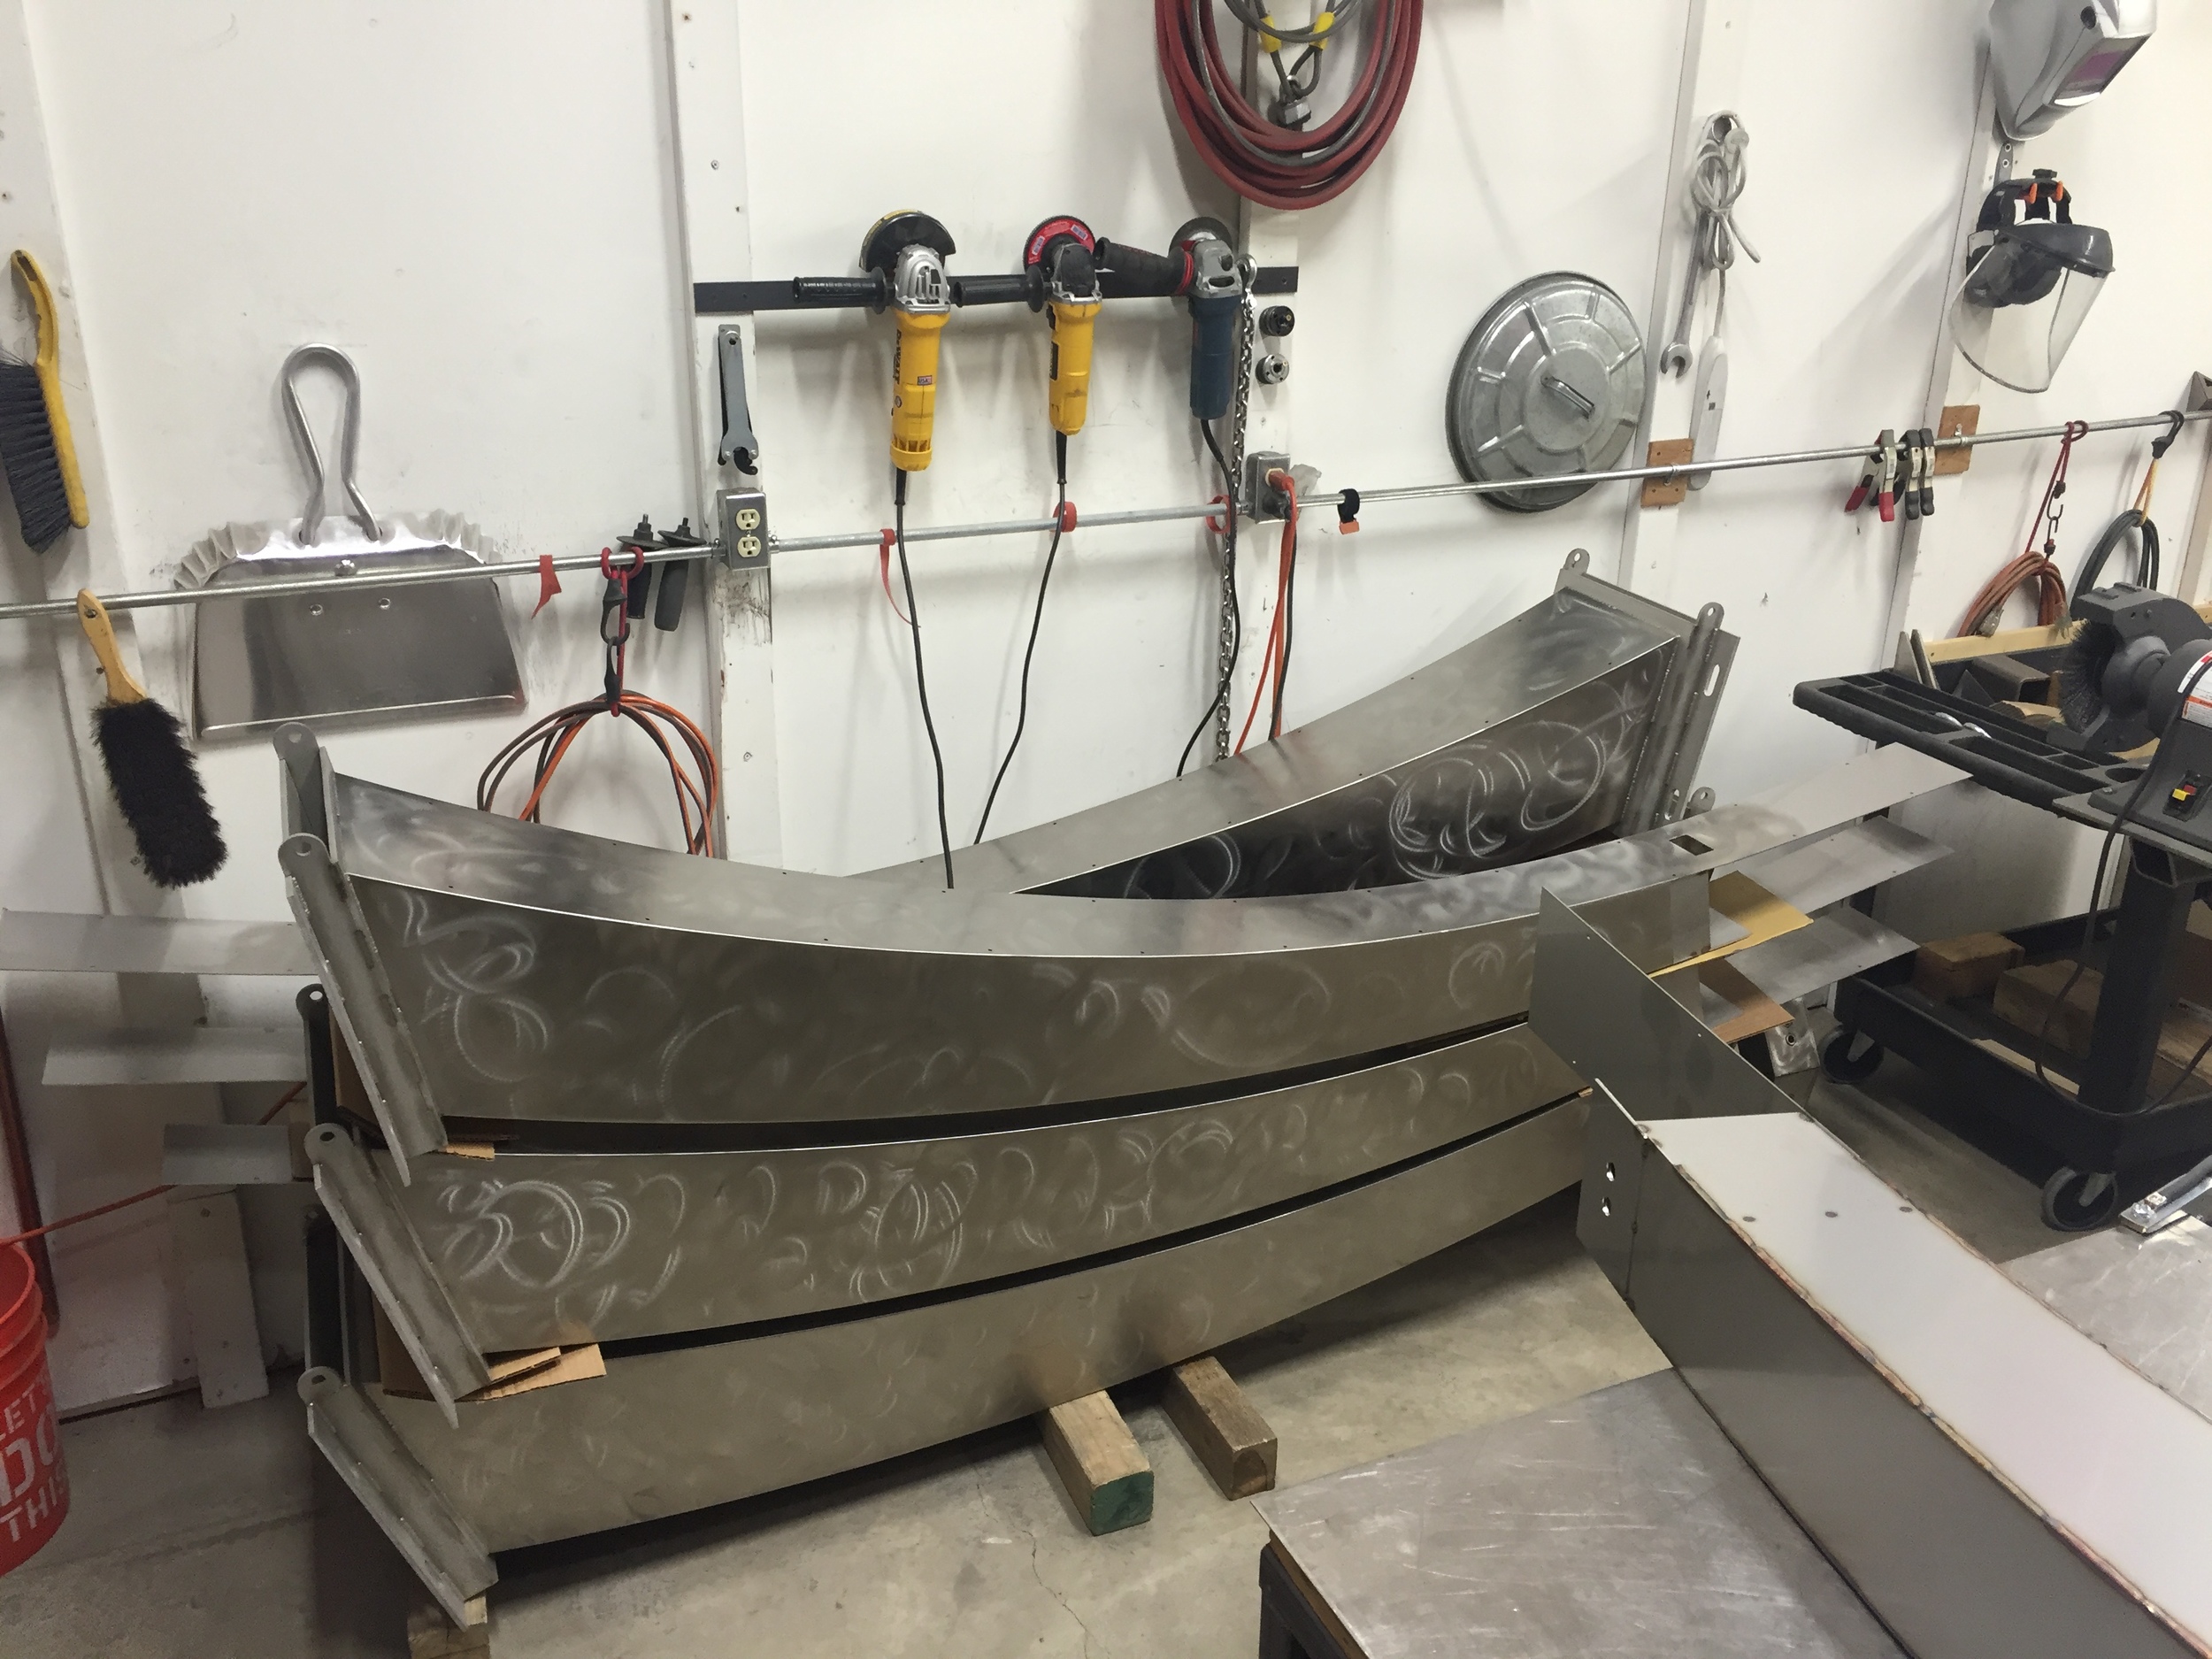
As you can see, each strip (color coded for clarity) is just slightly different from its neighbor, necessitating careful labeling in order to keep it all straight. It also takes someone who can handle simple arithmetic, like how many quarters it takes to make a whole - which I goofed on and had to order the other half after the fact. Oops. 2 X .25 is NOT 1. Below is the unrolled strips - half of them, anyway.

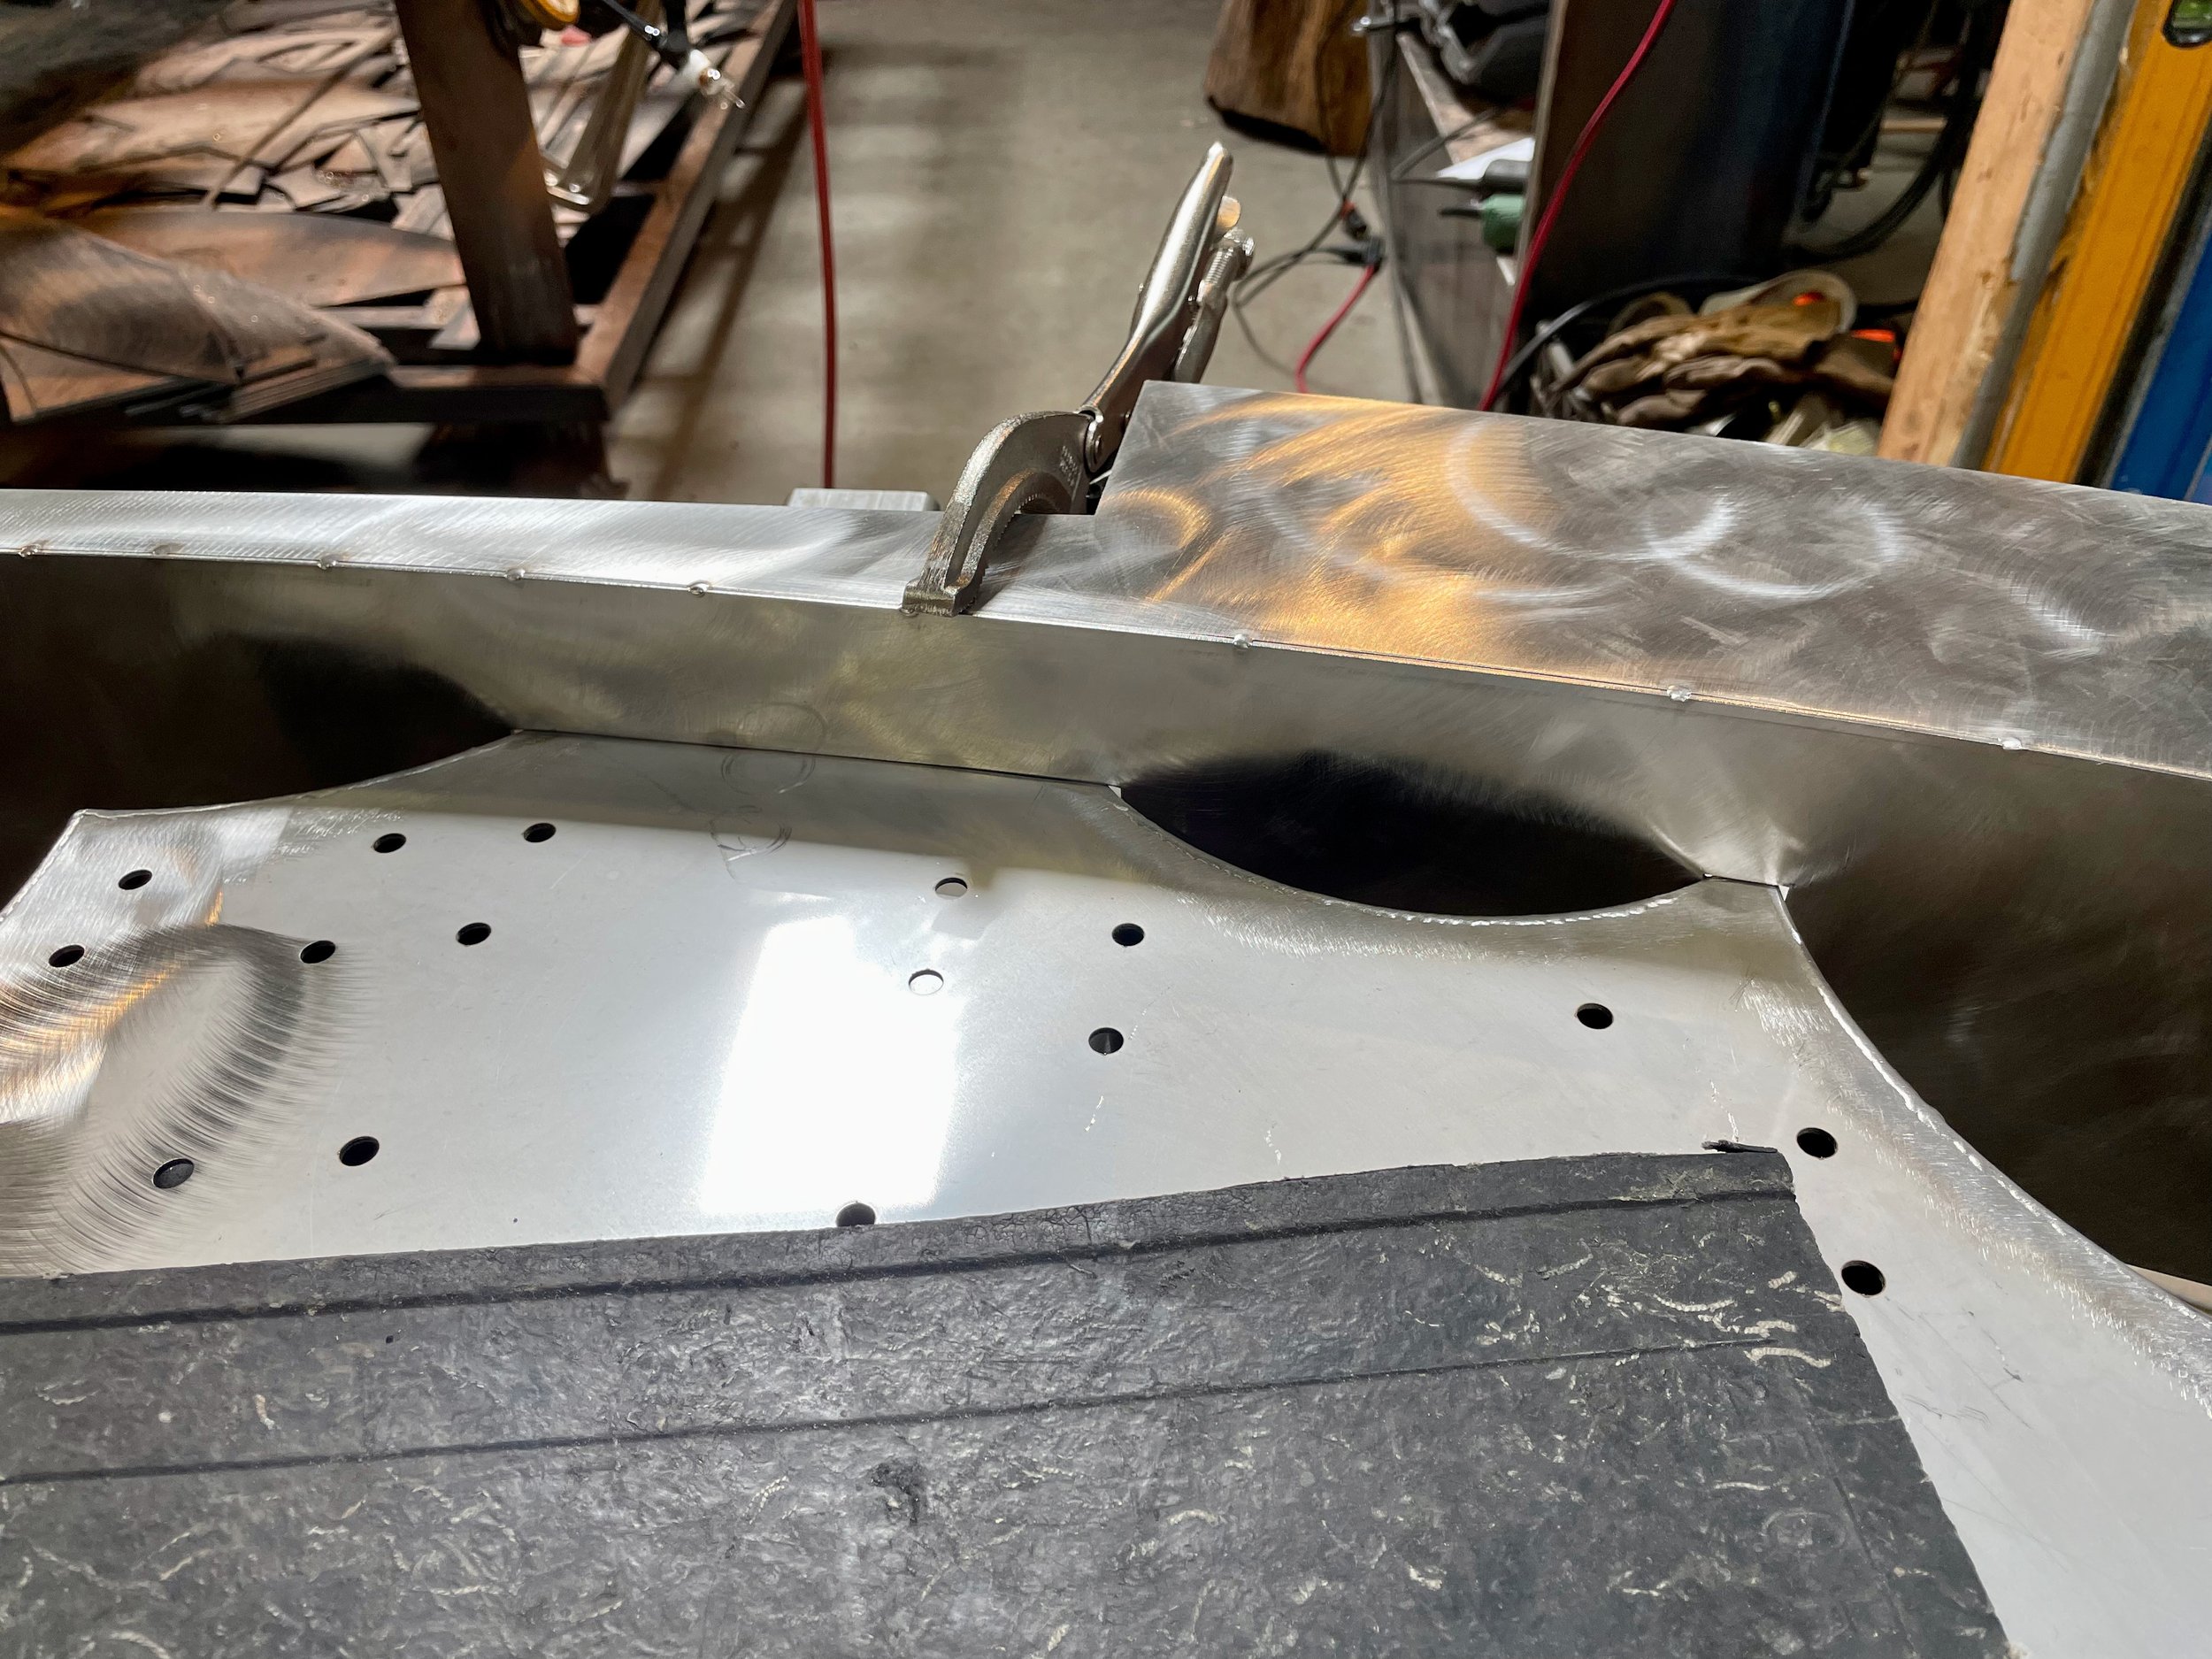
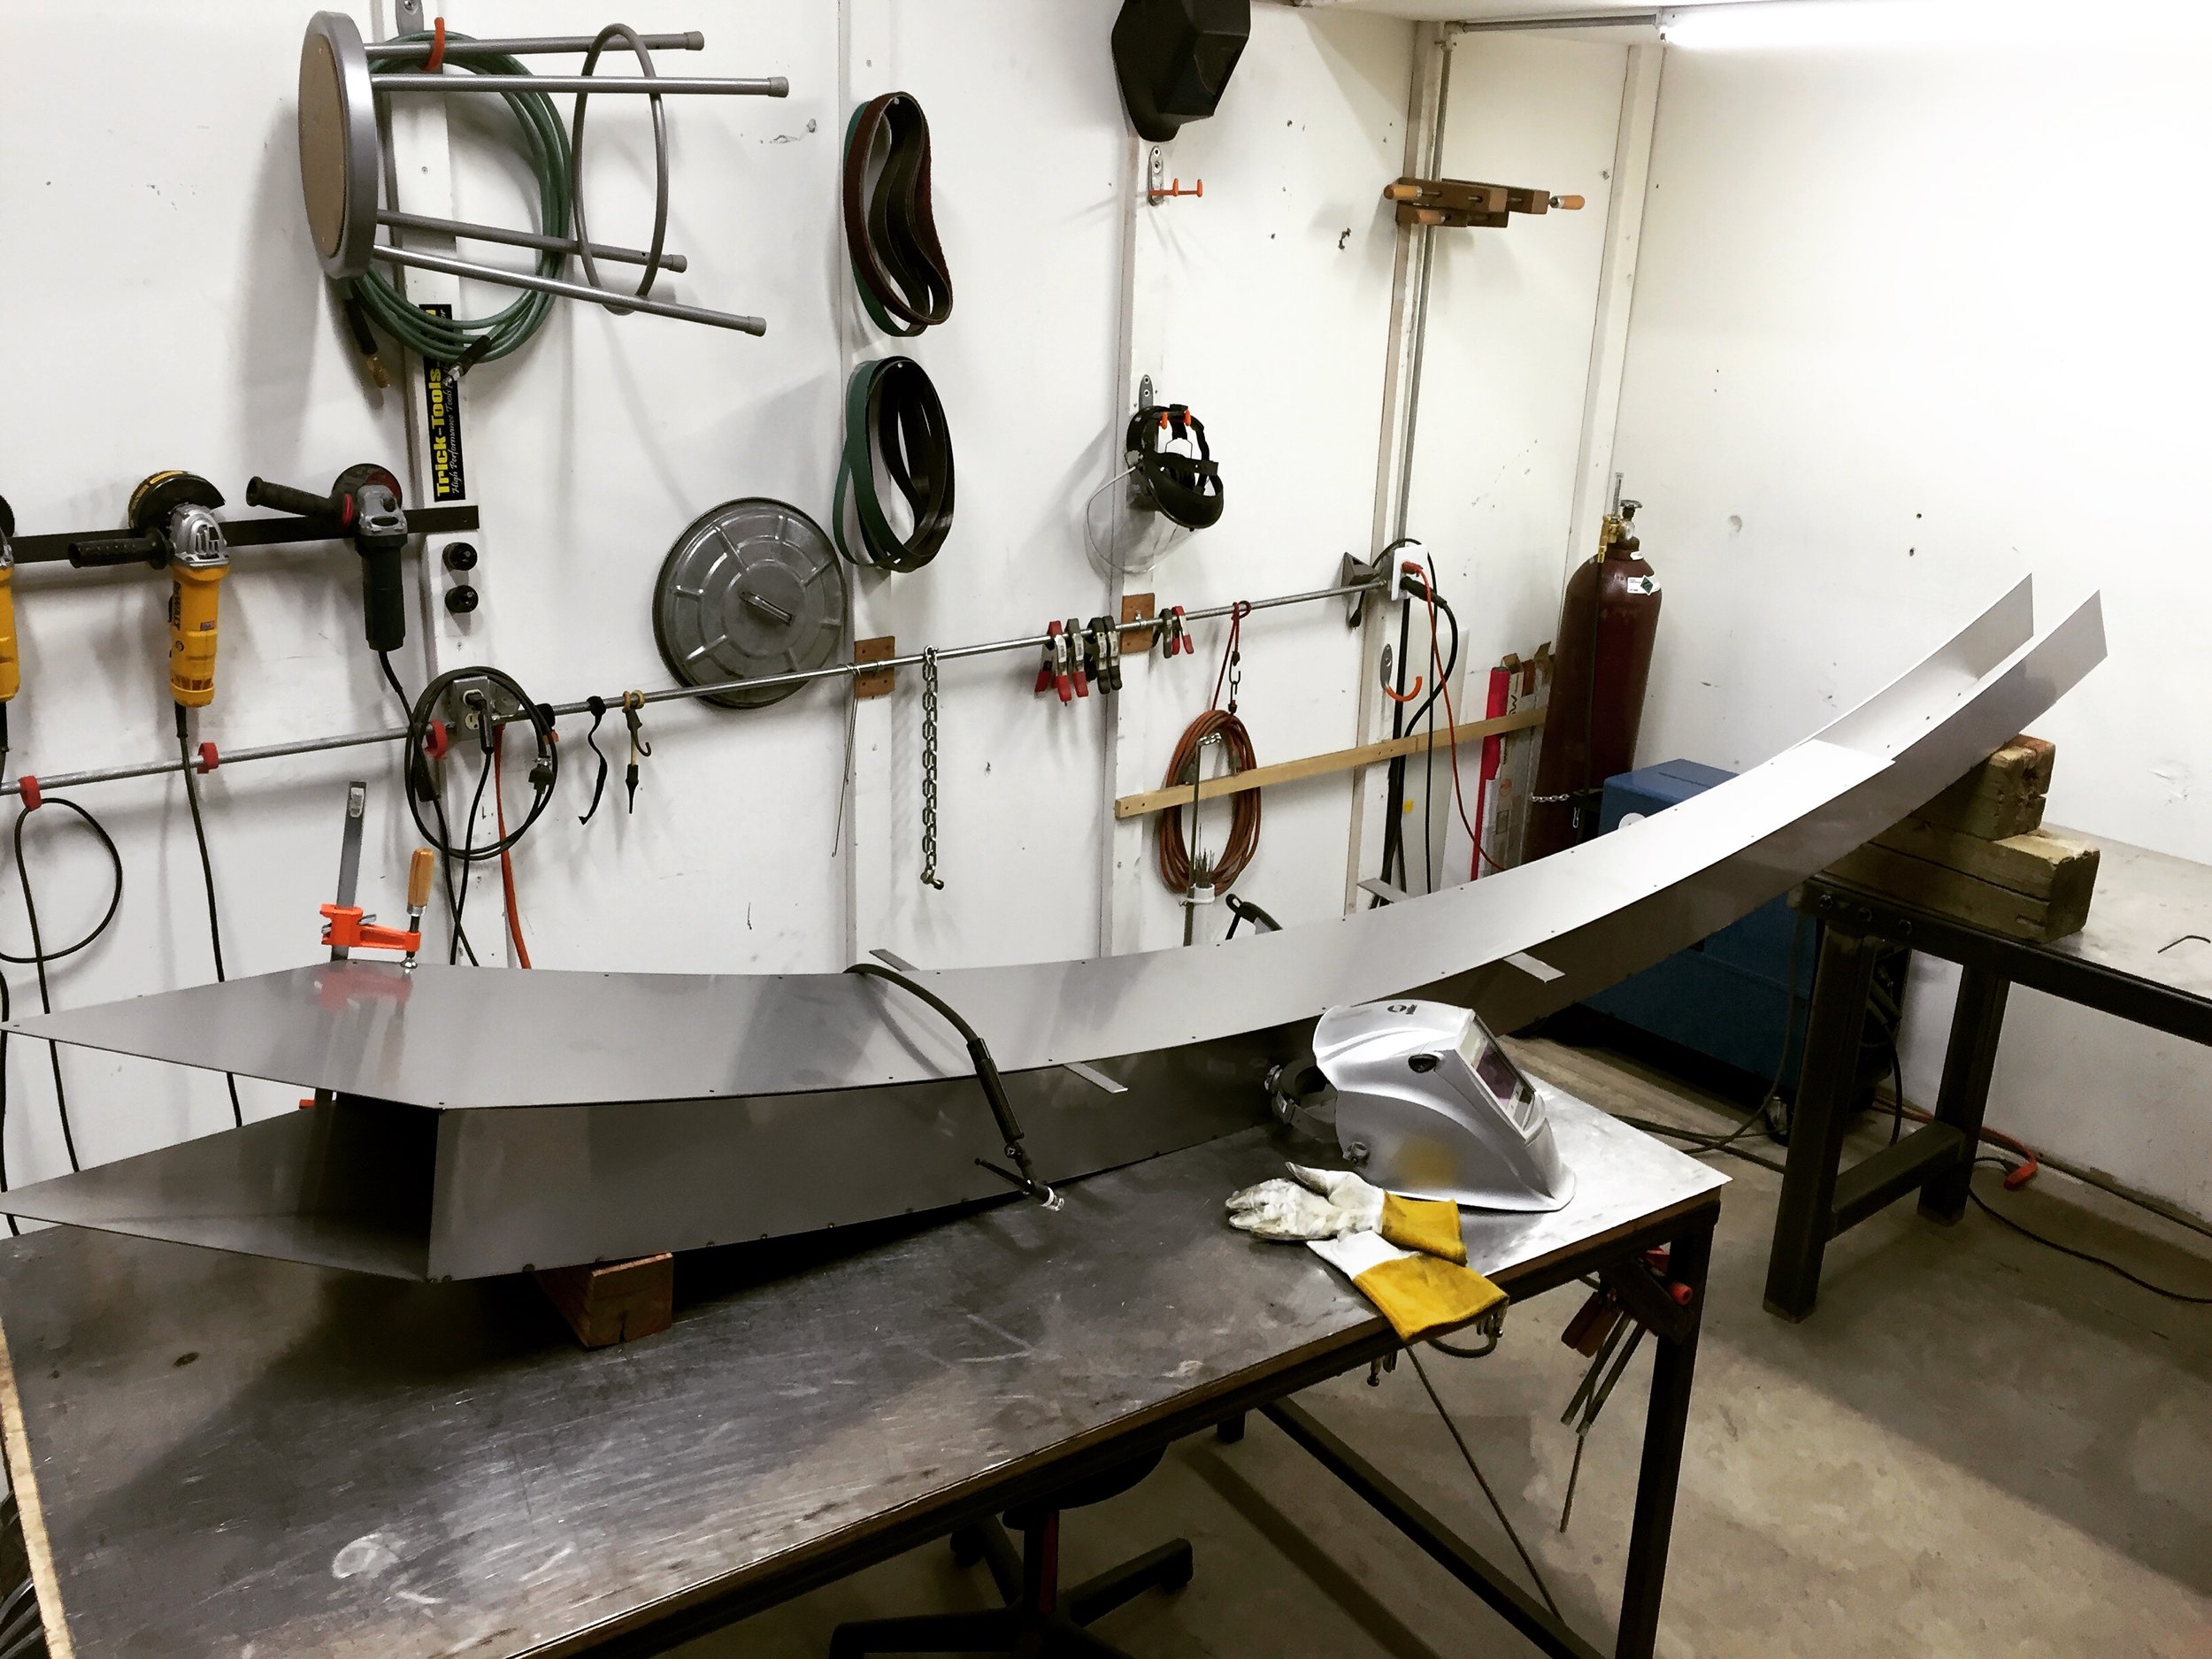
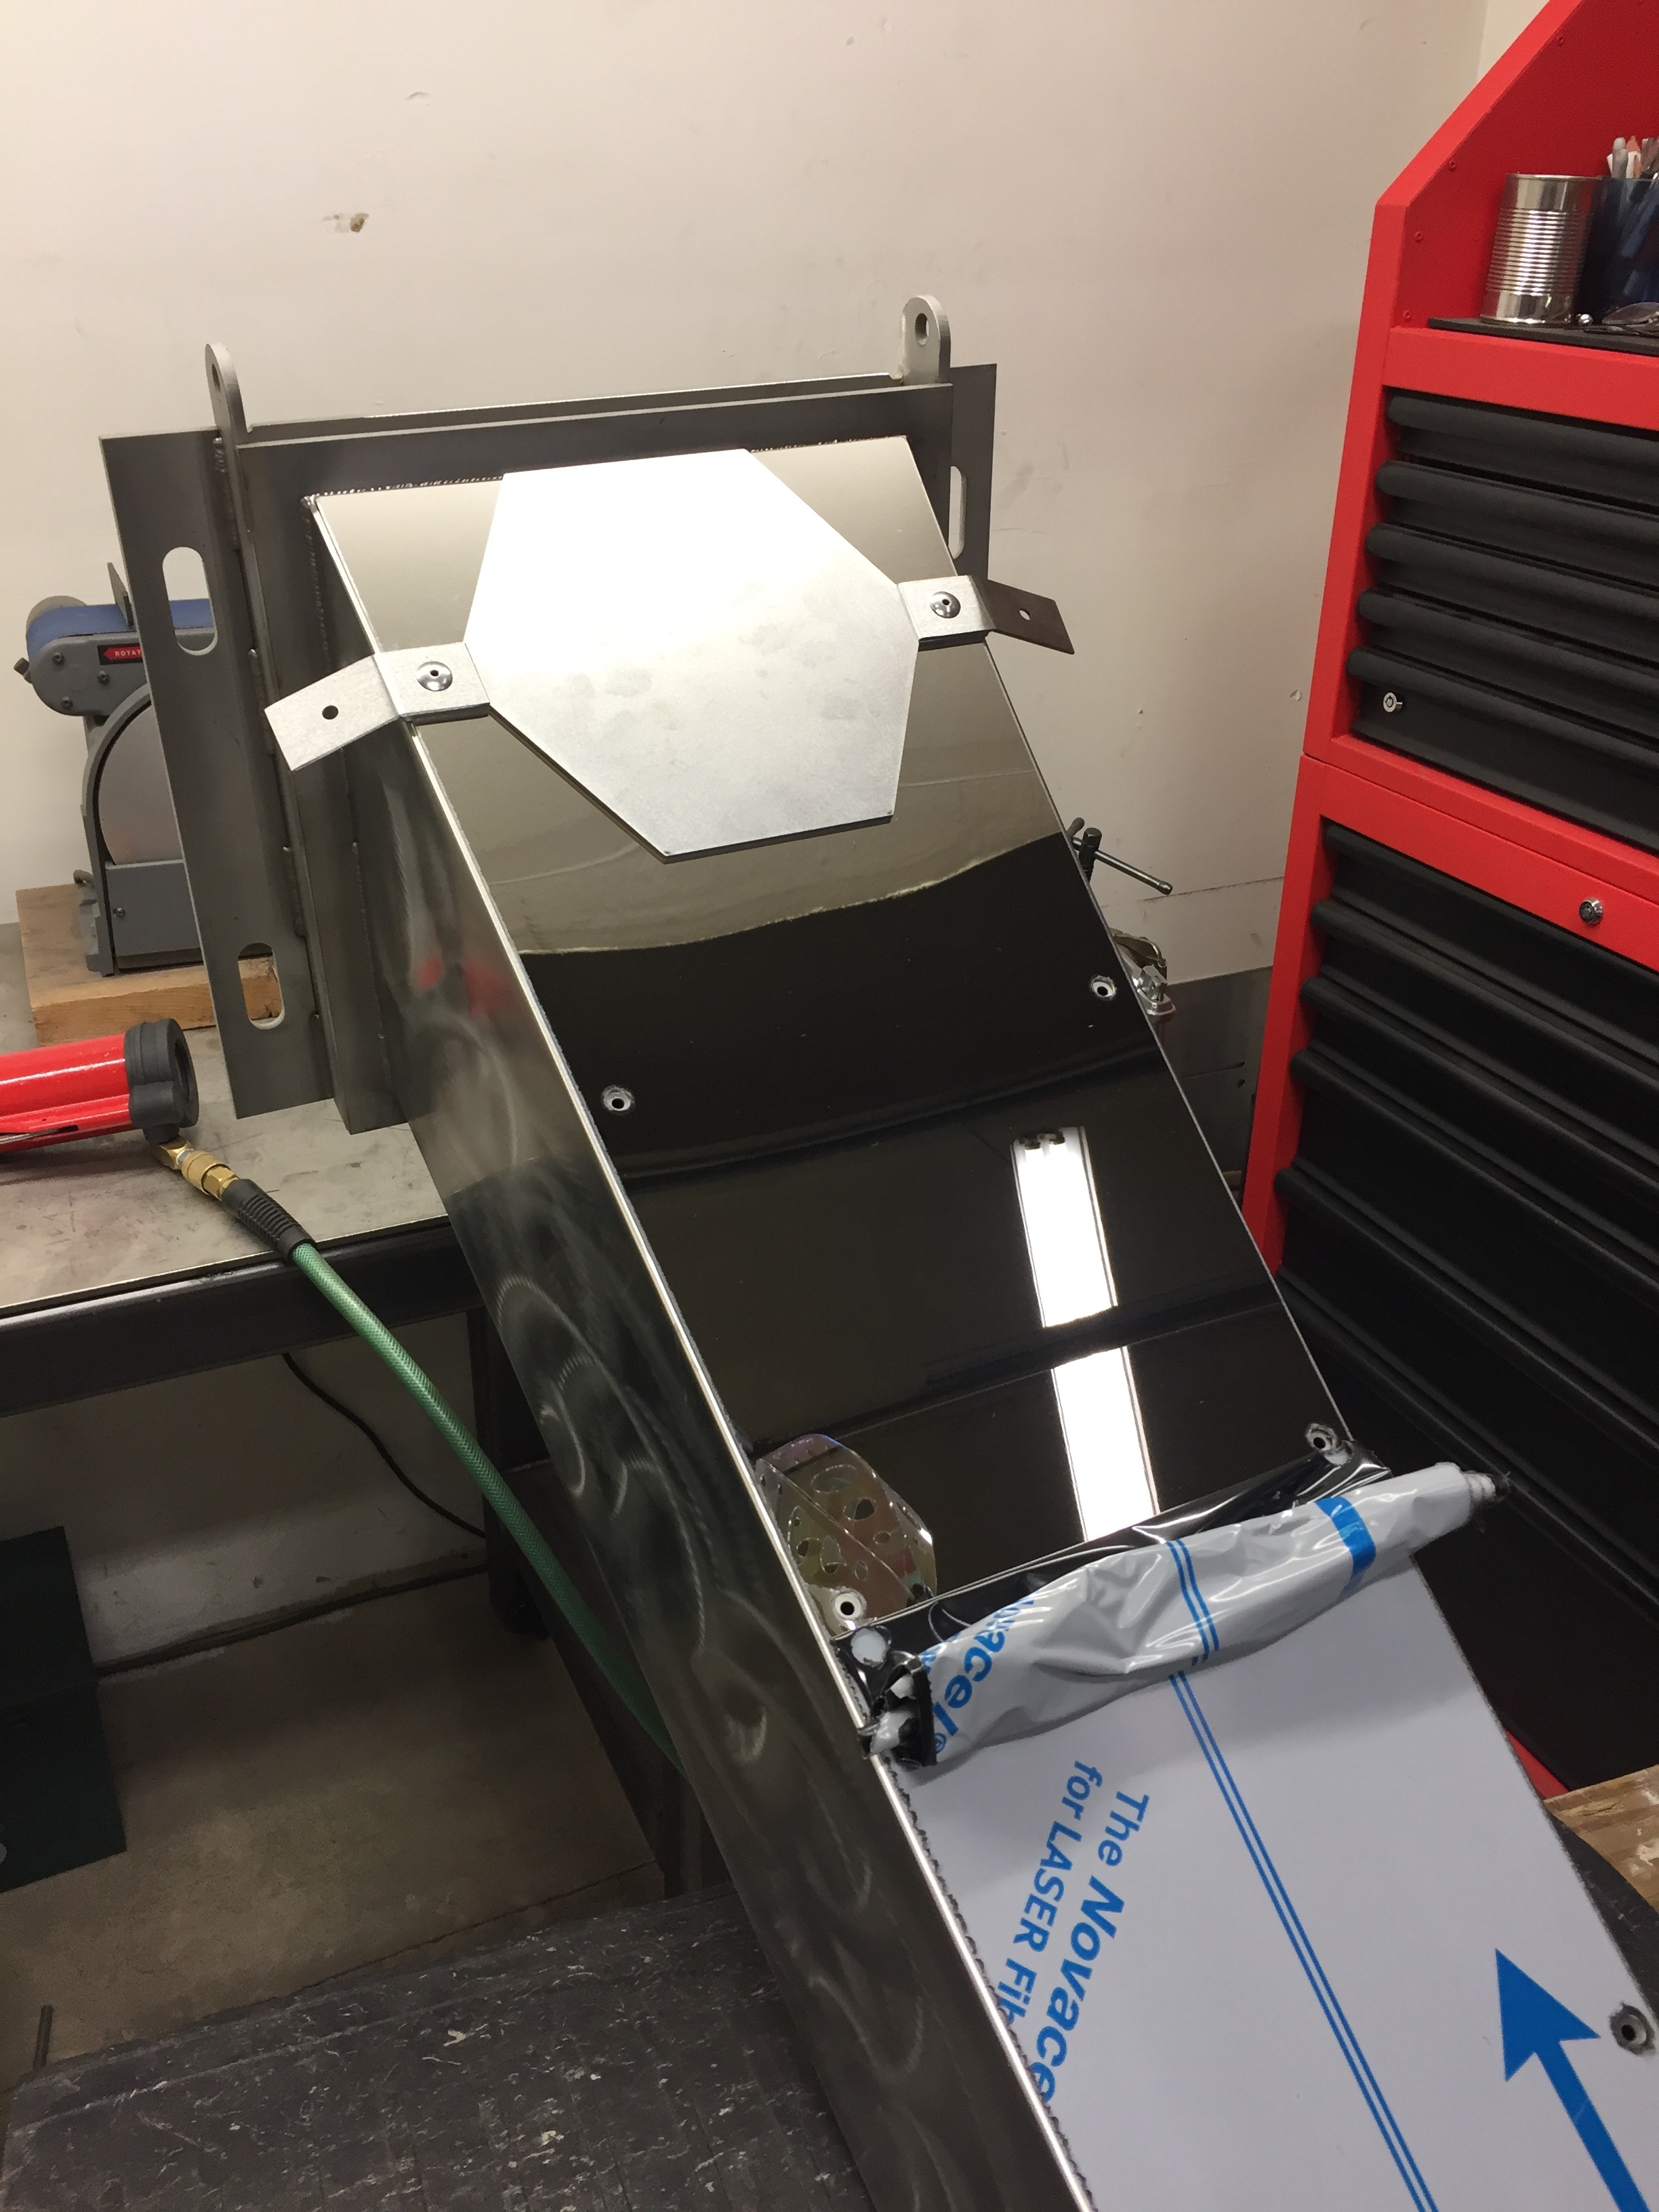
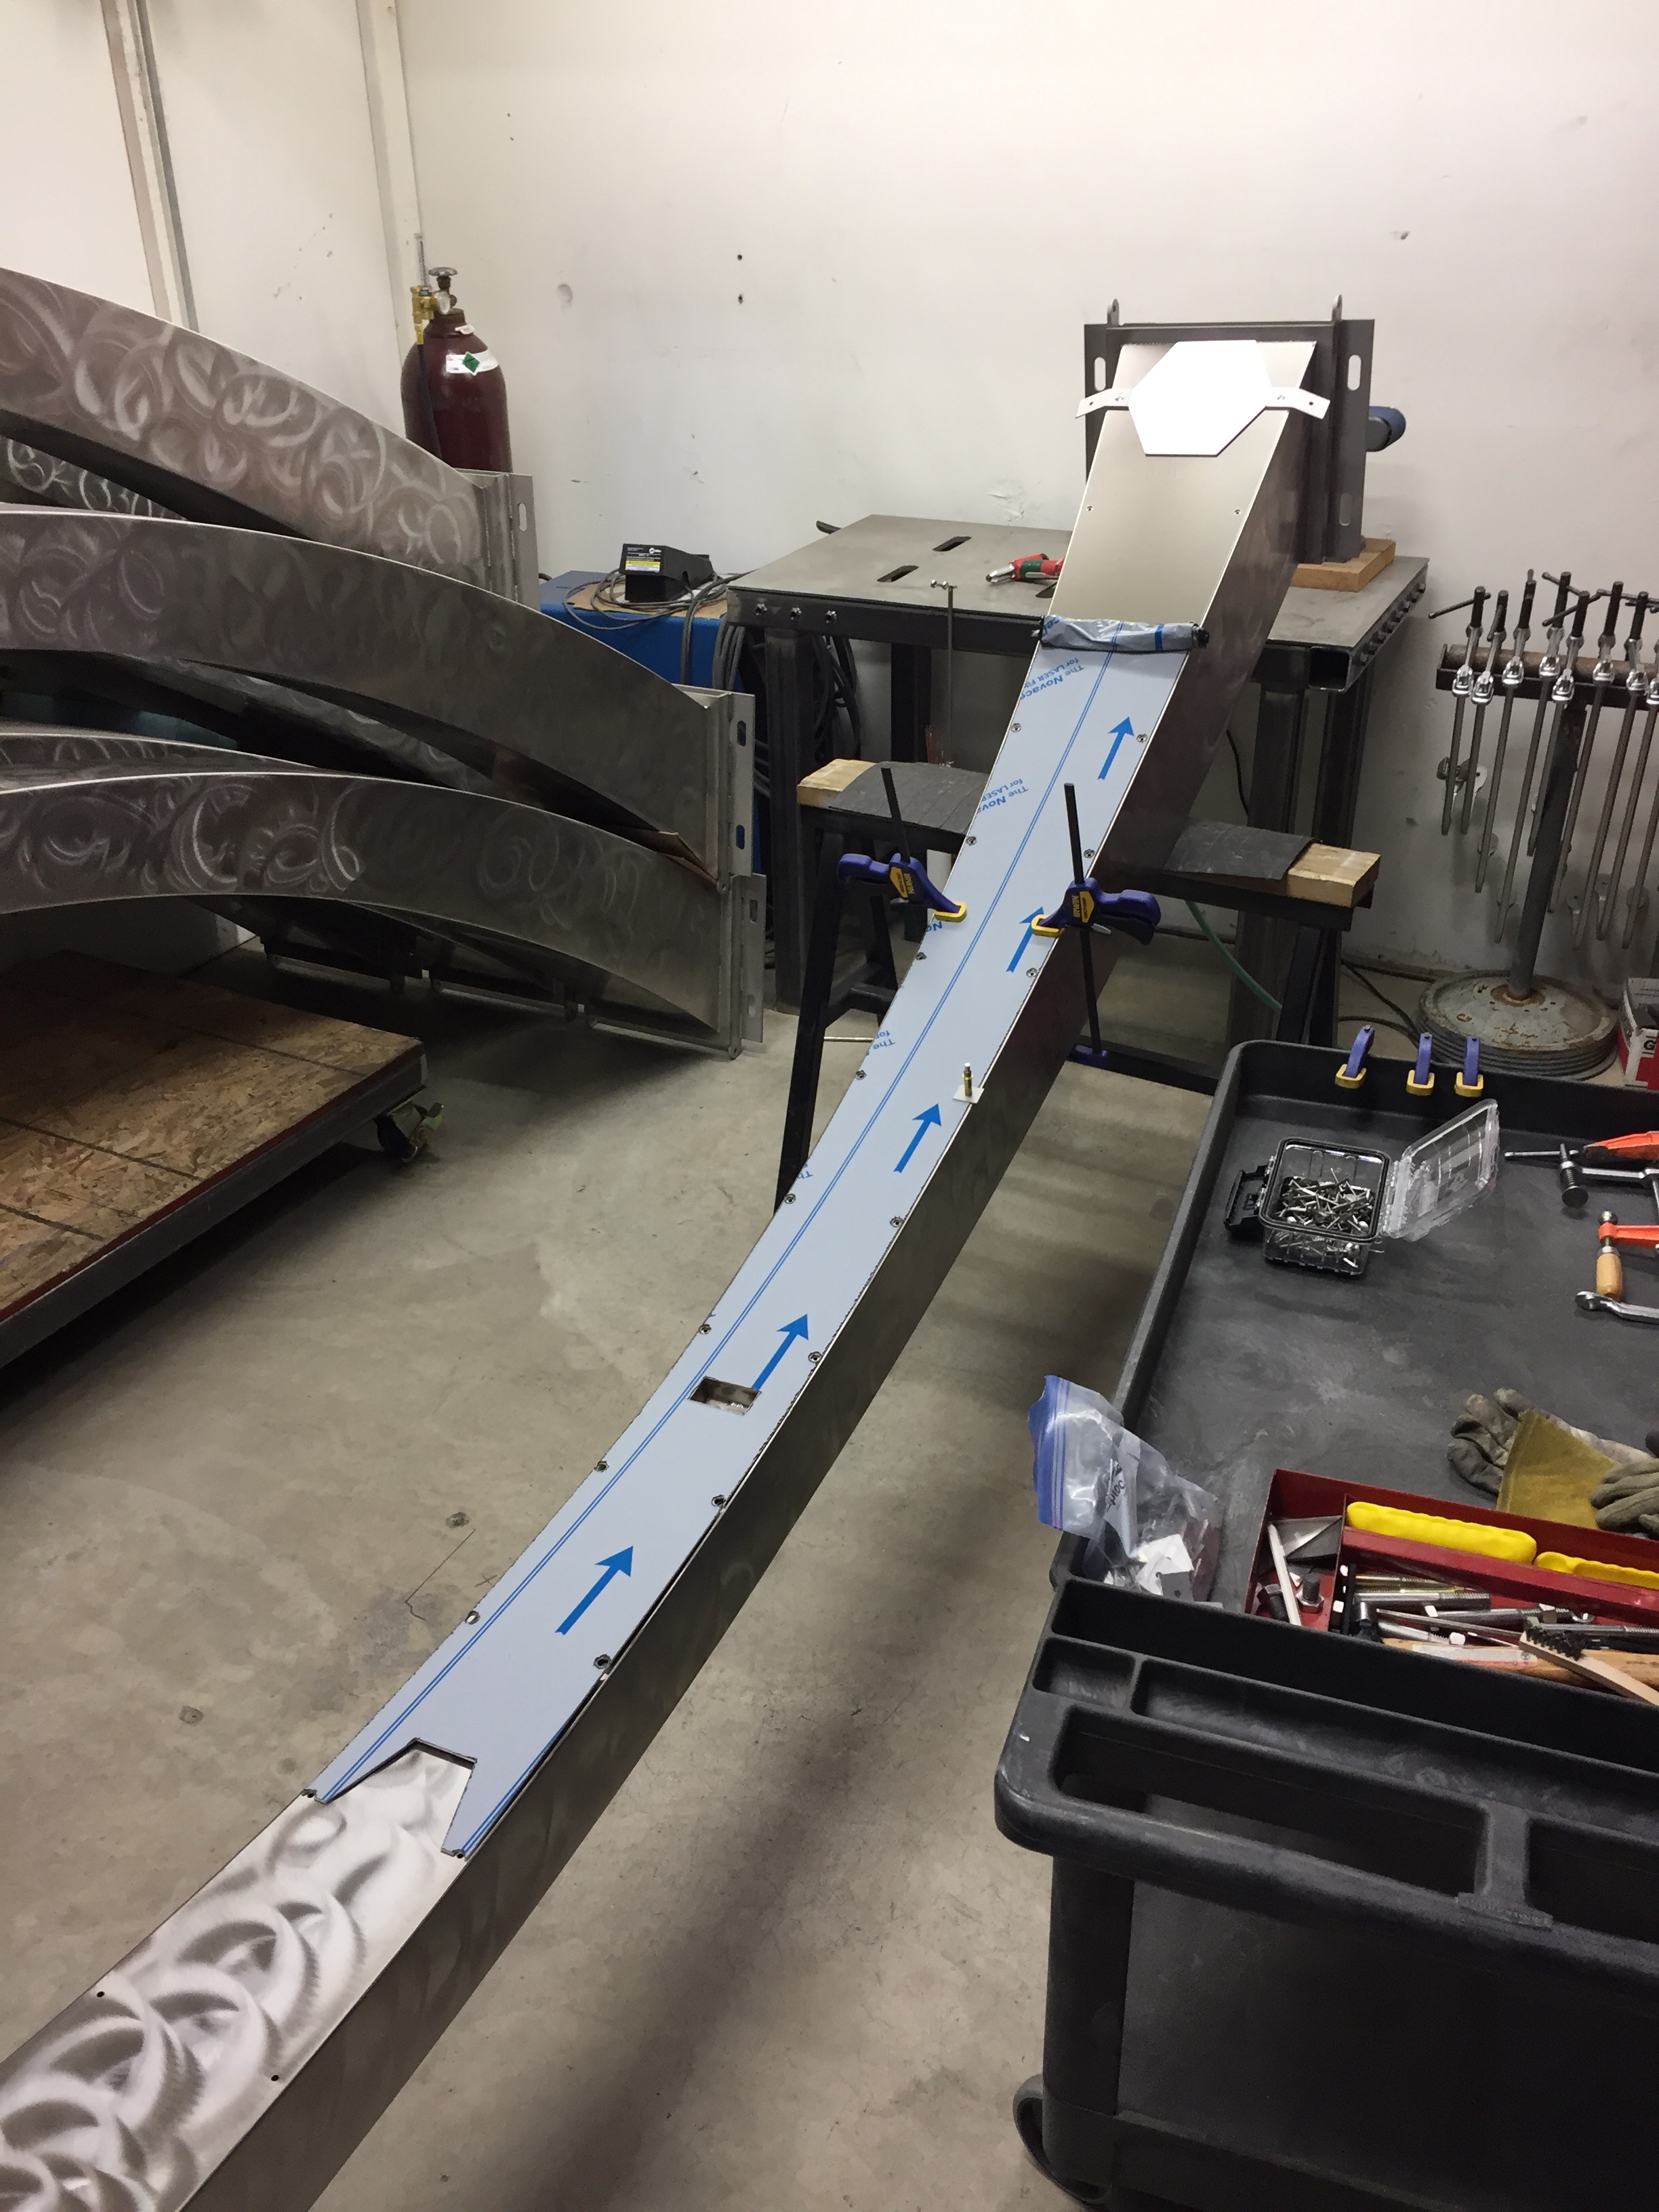
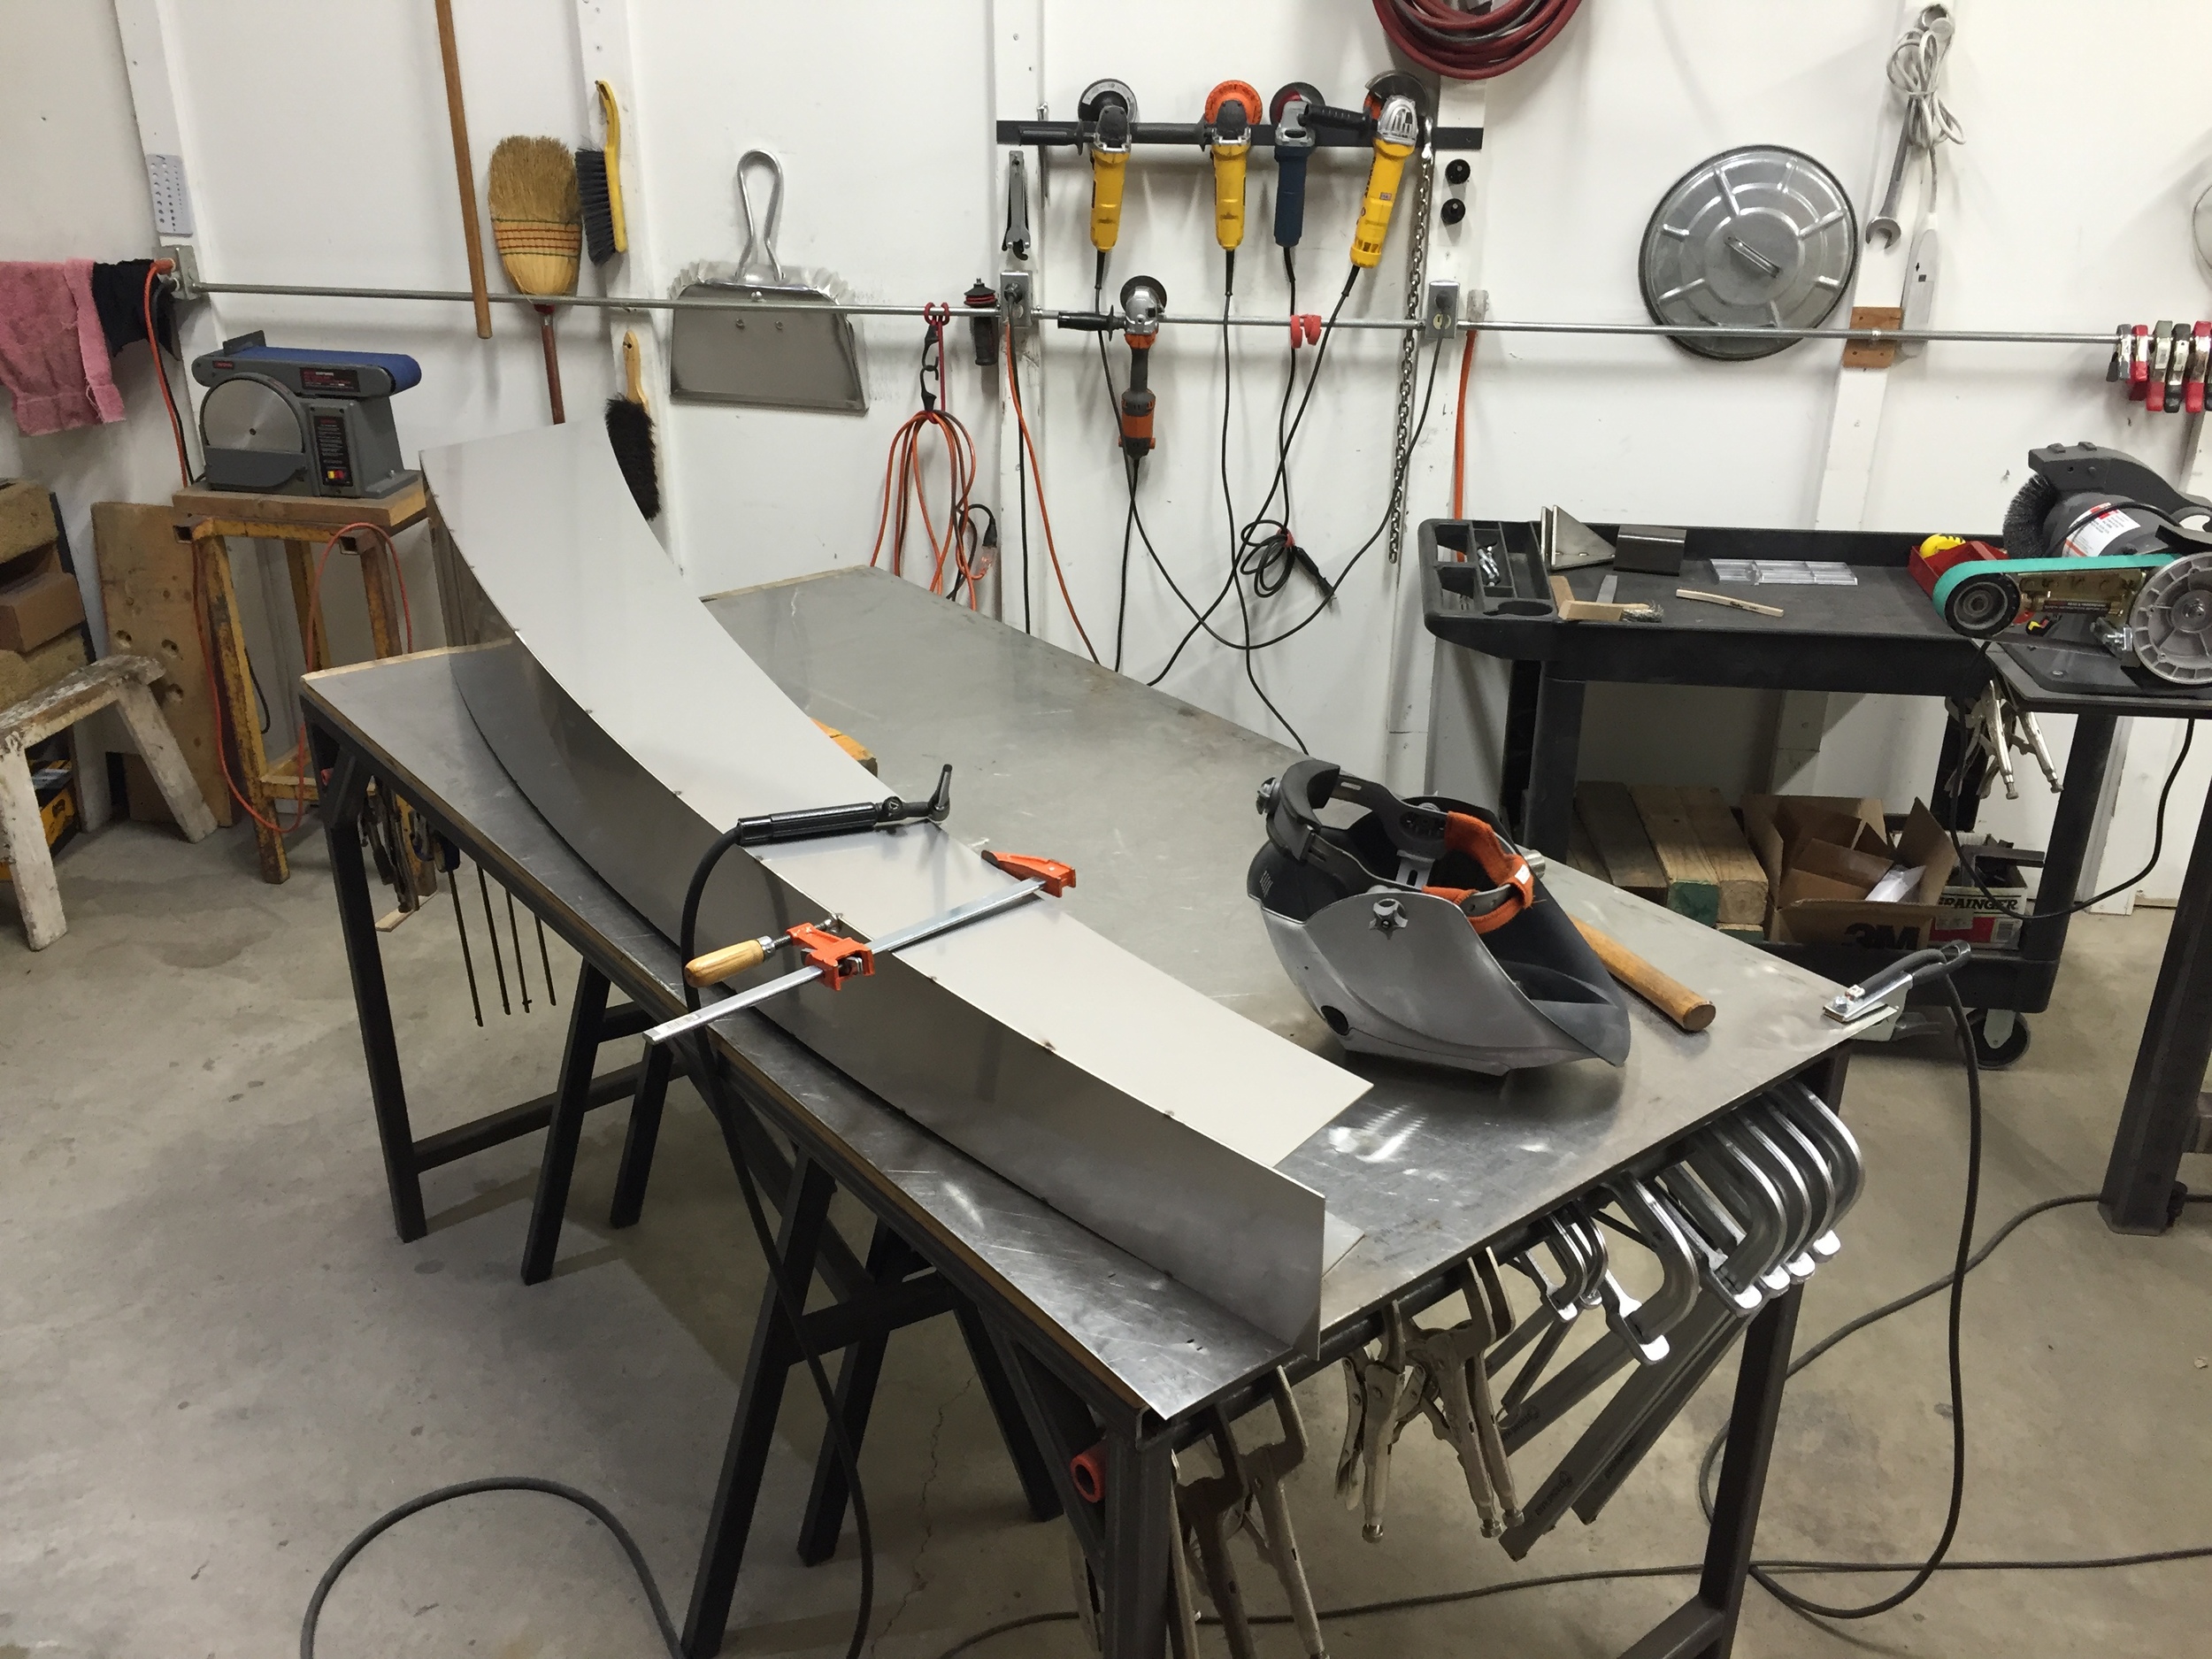
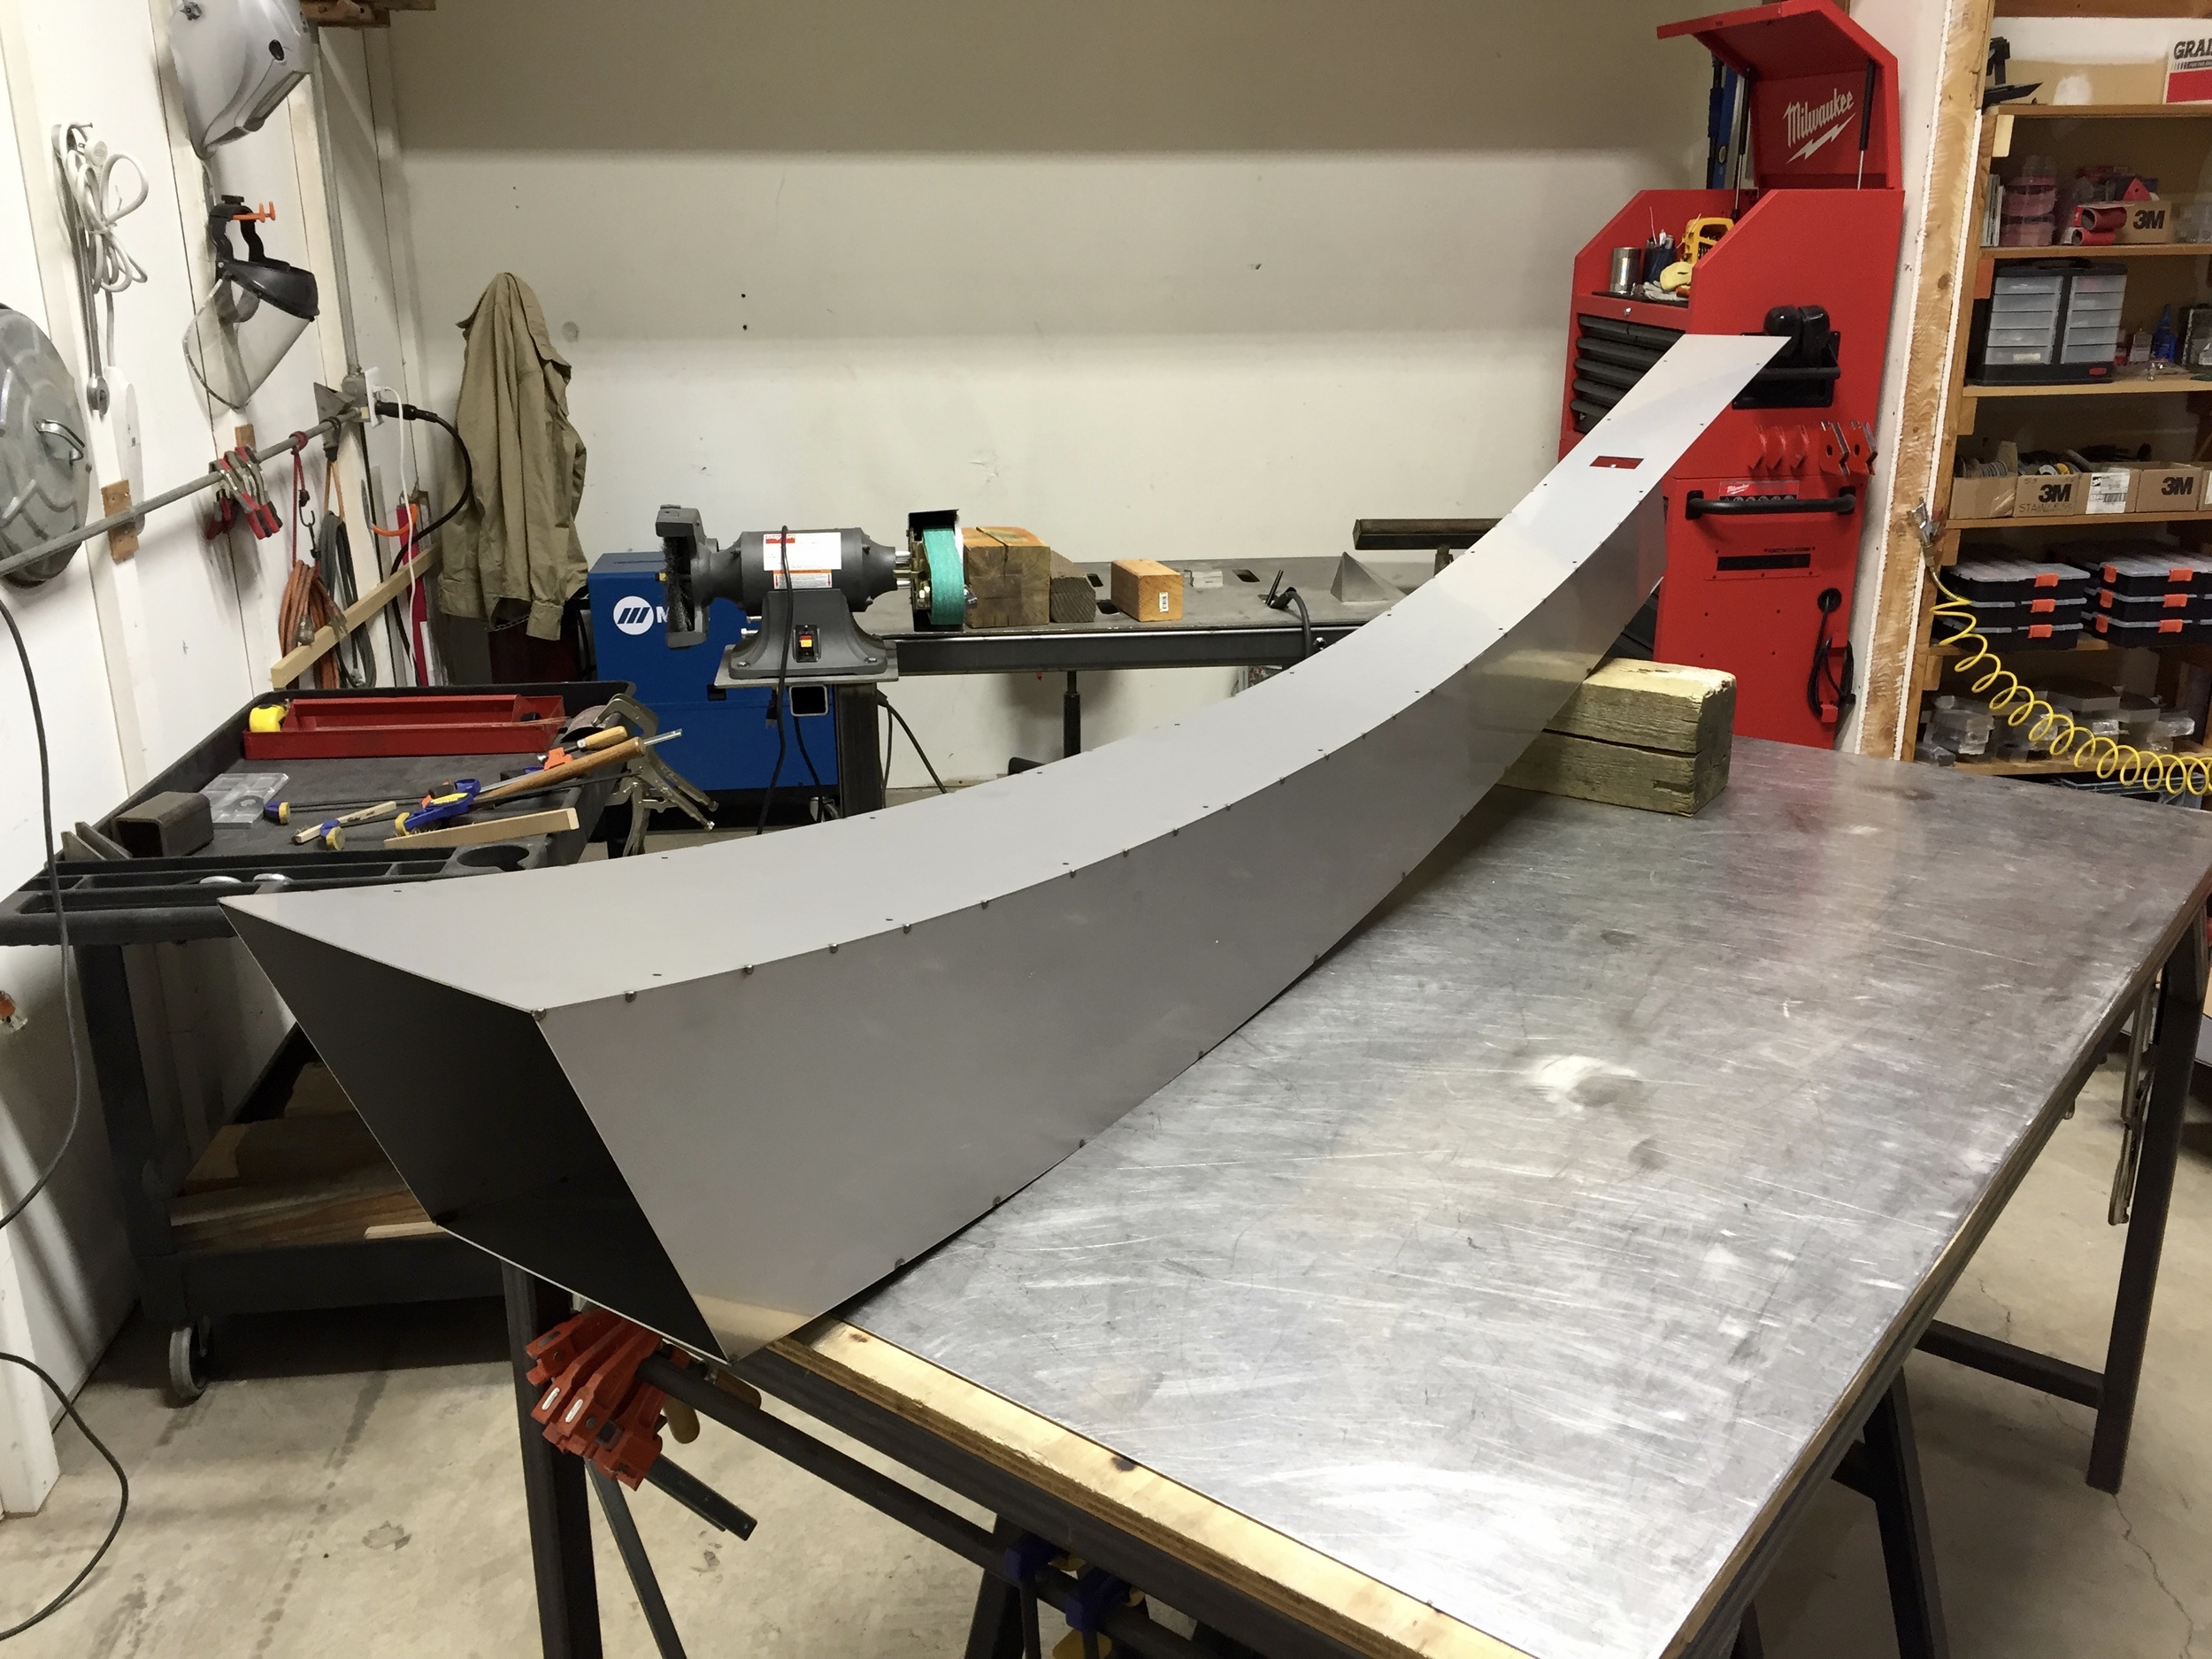
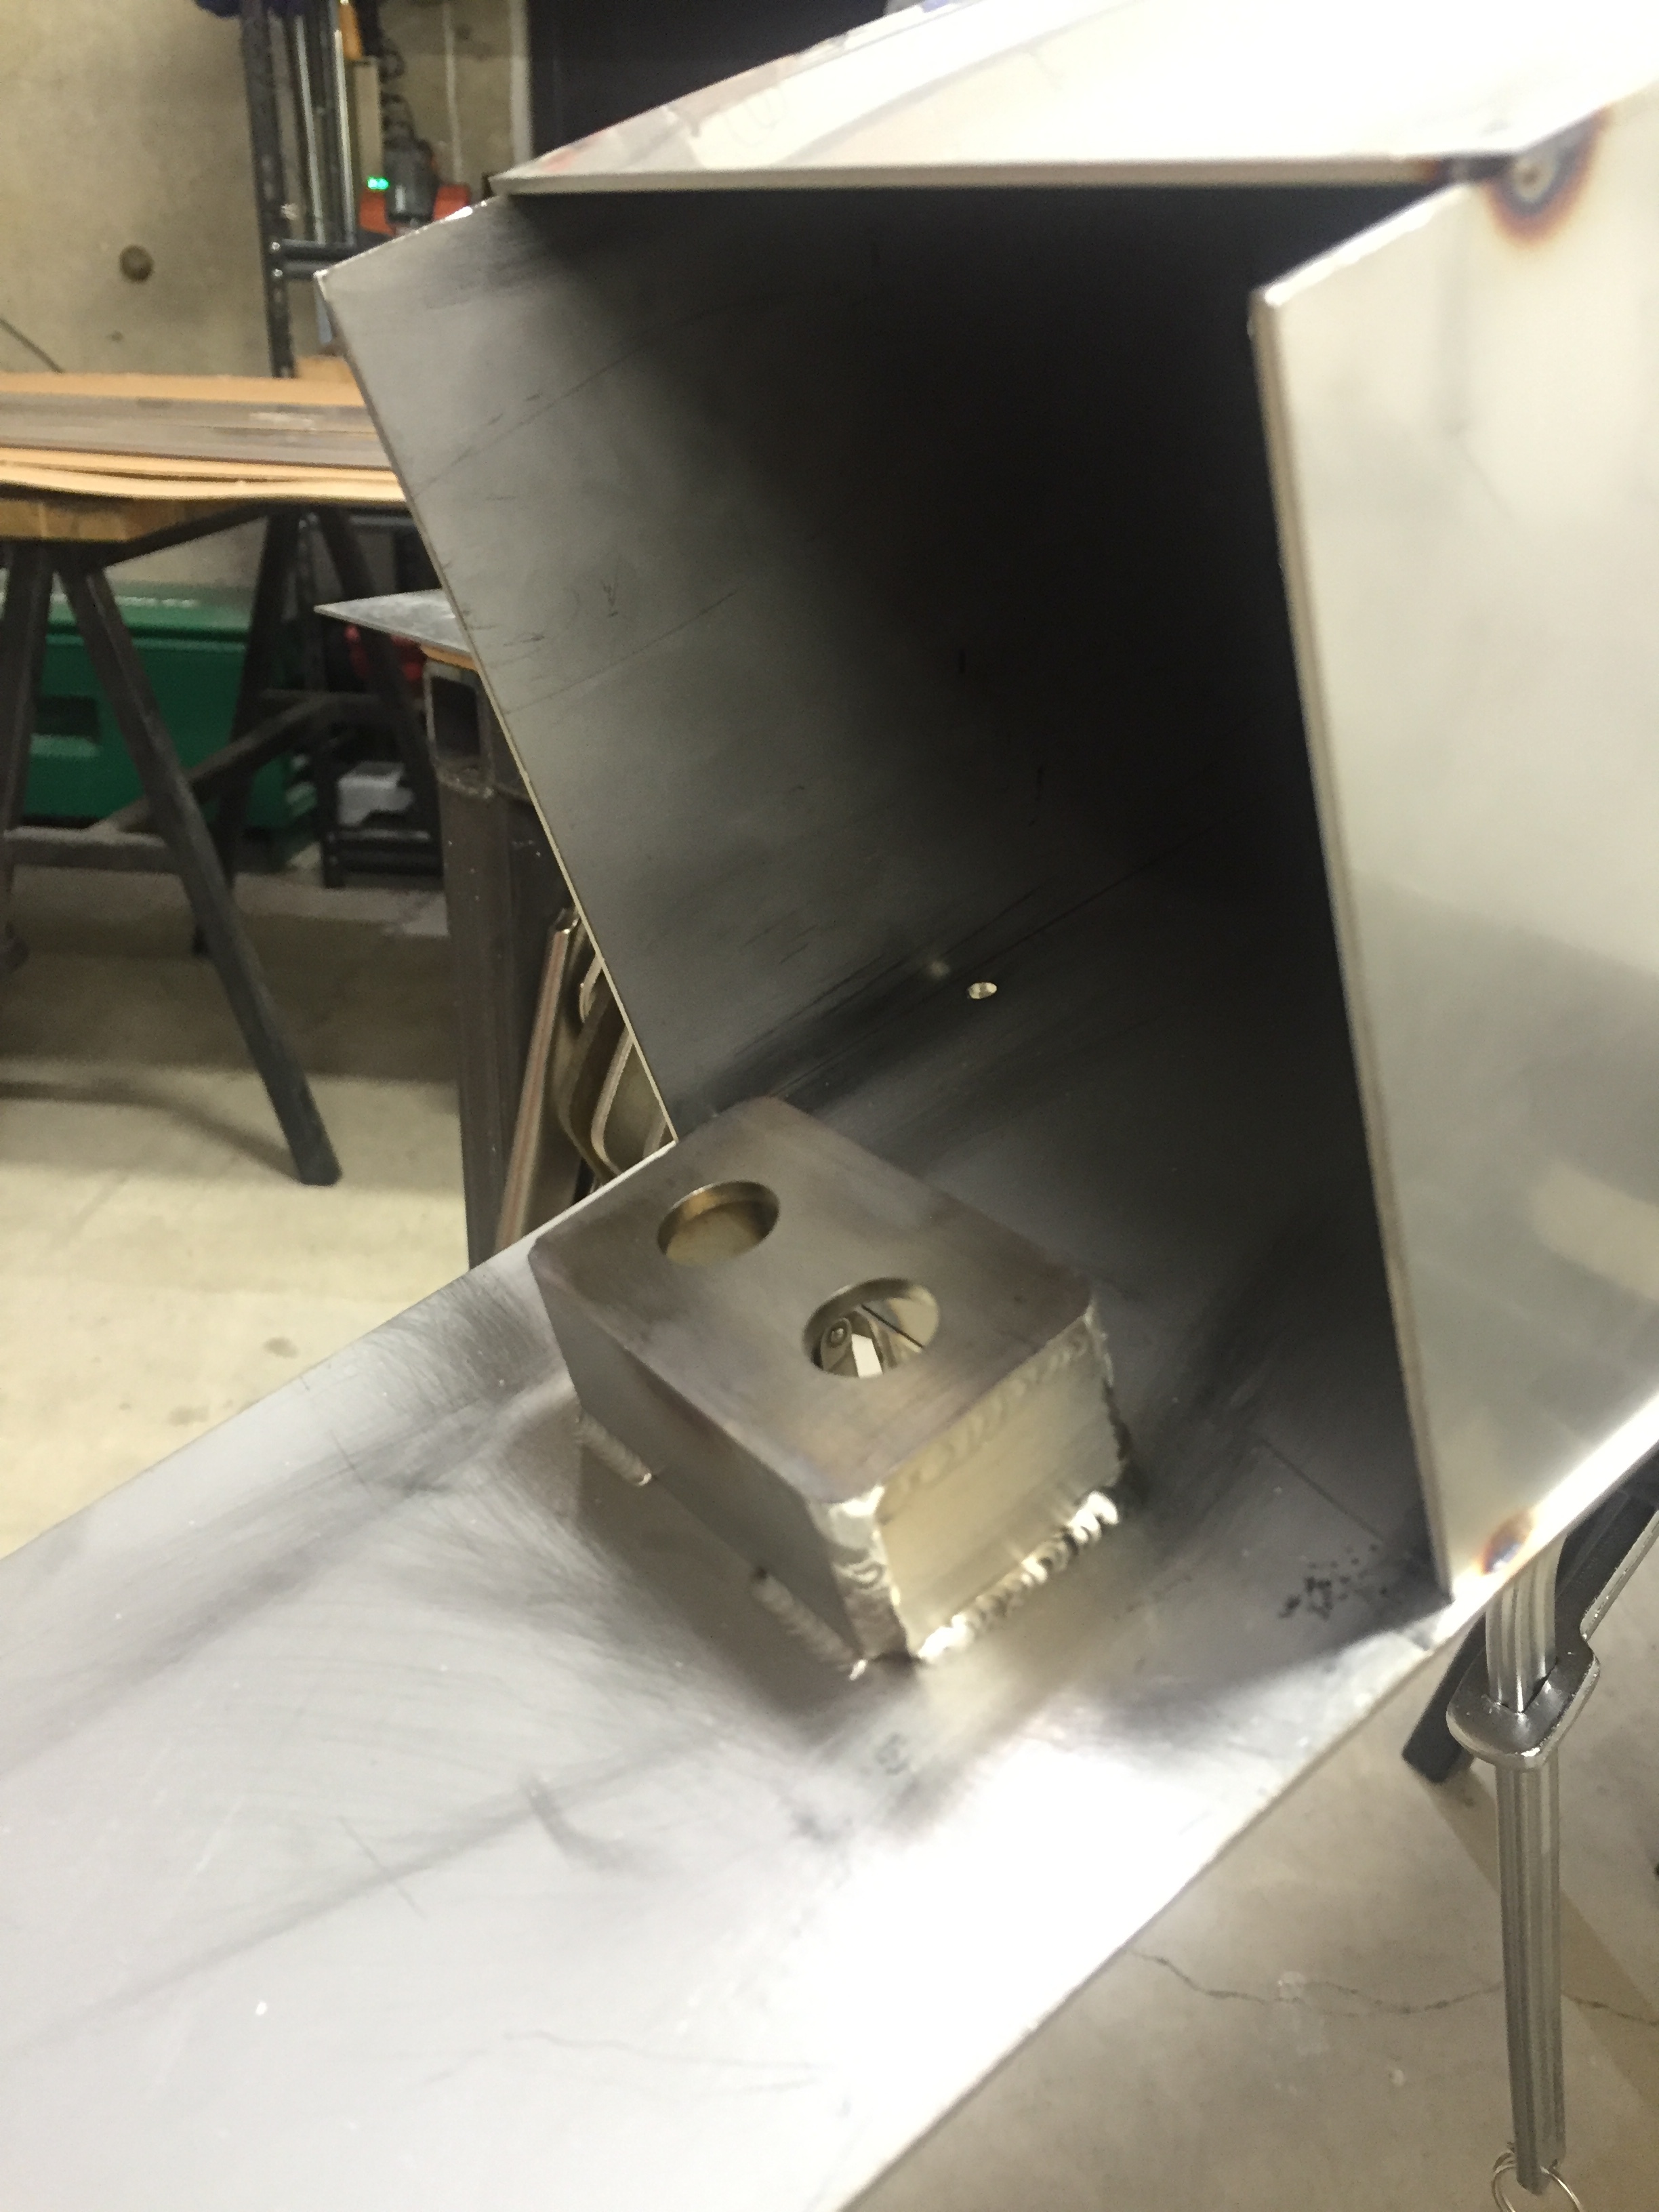
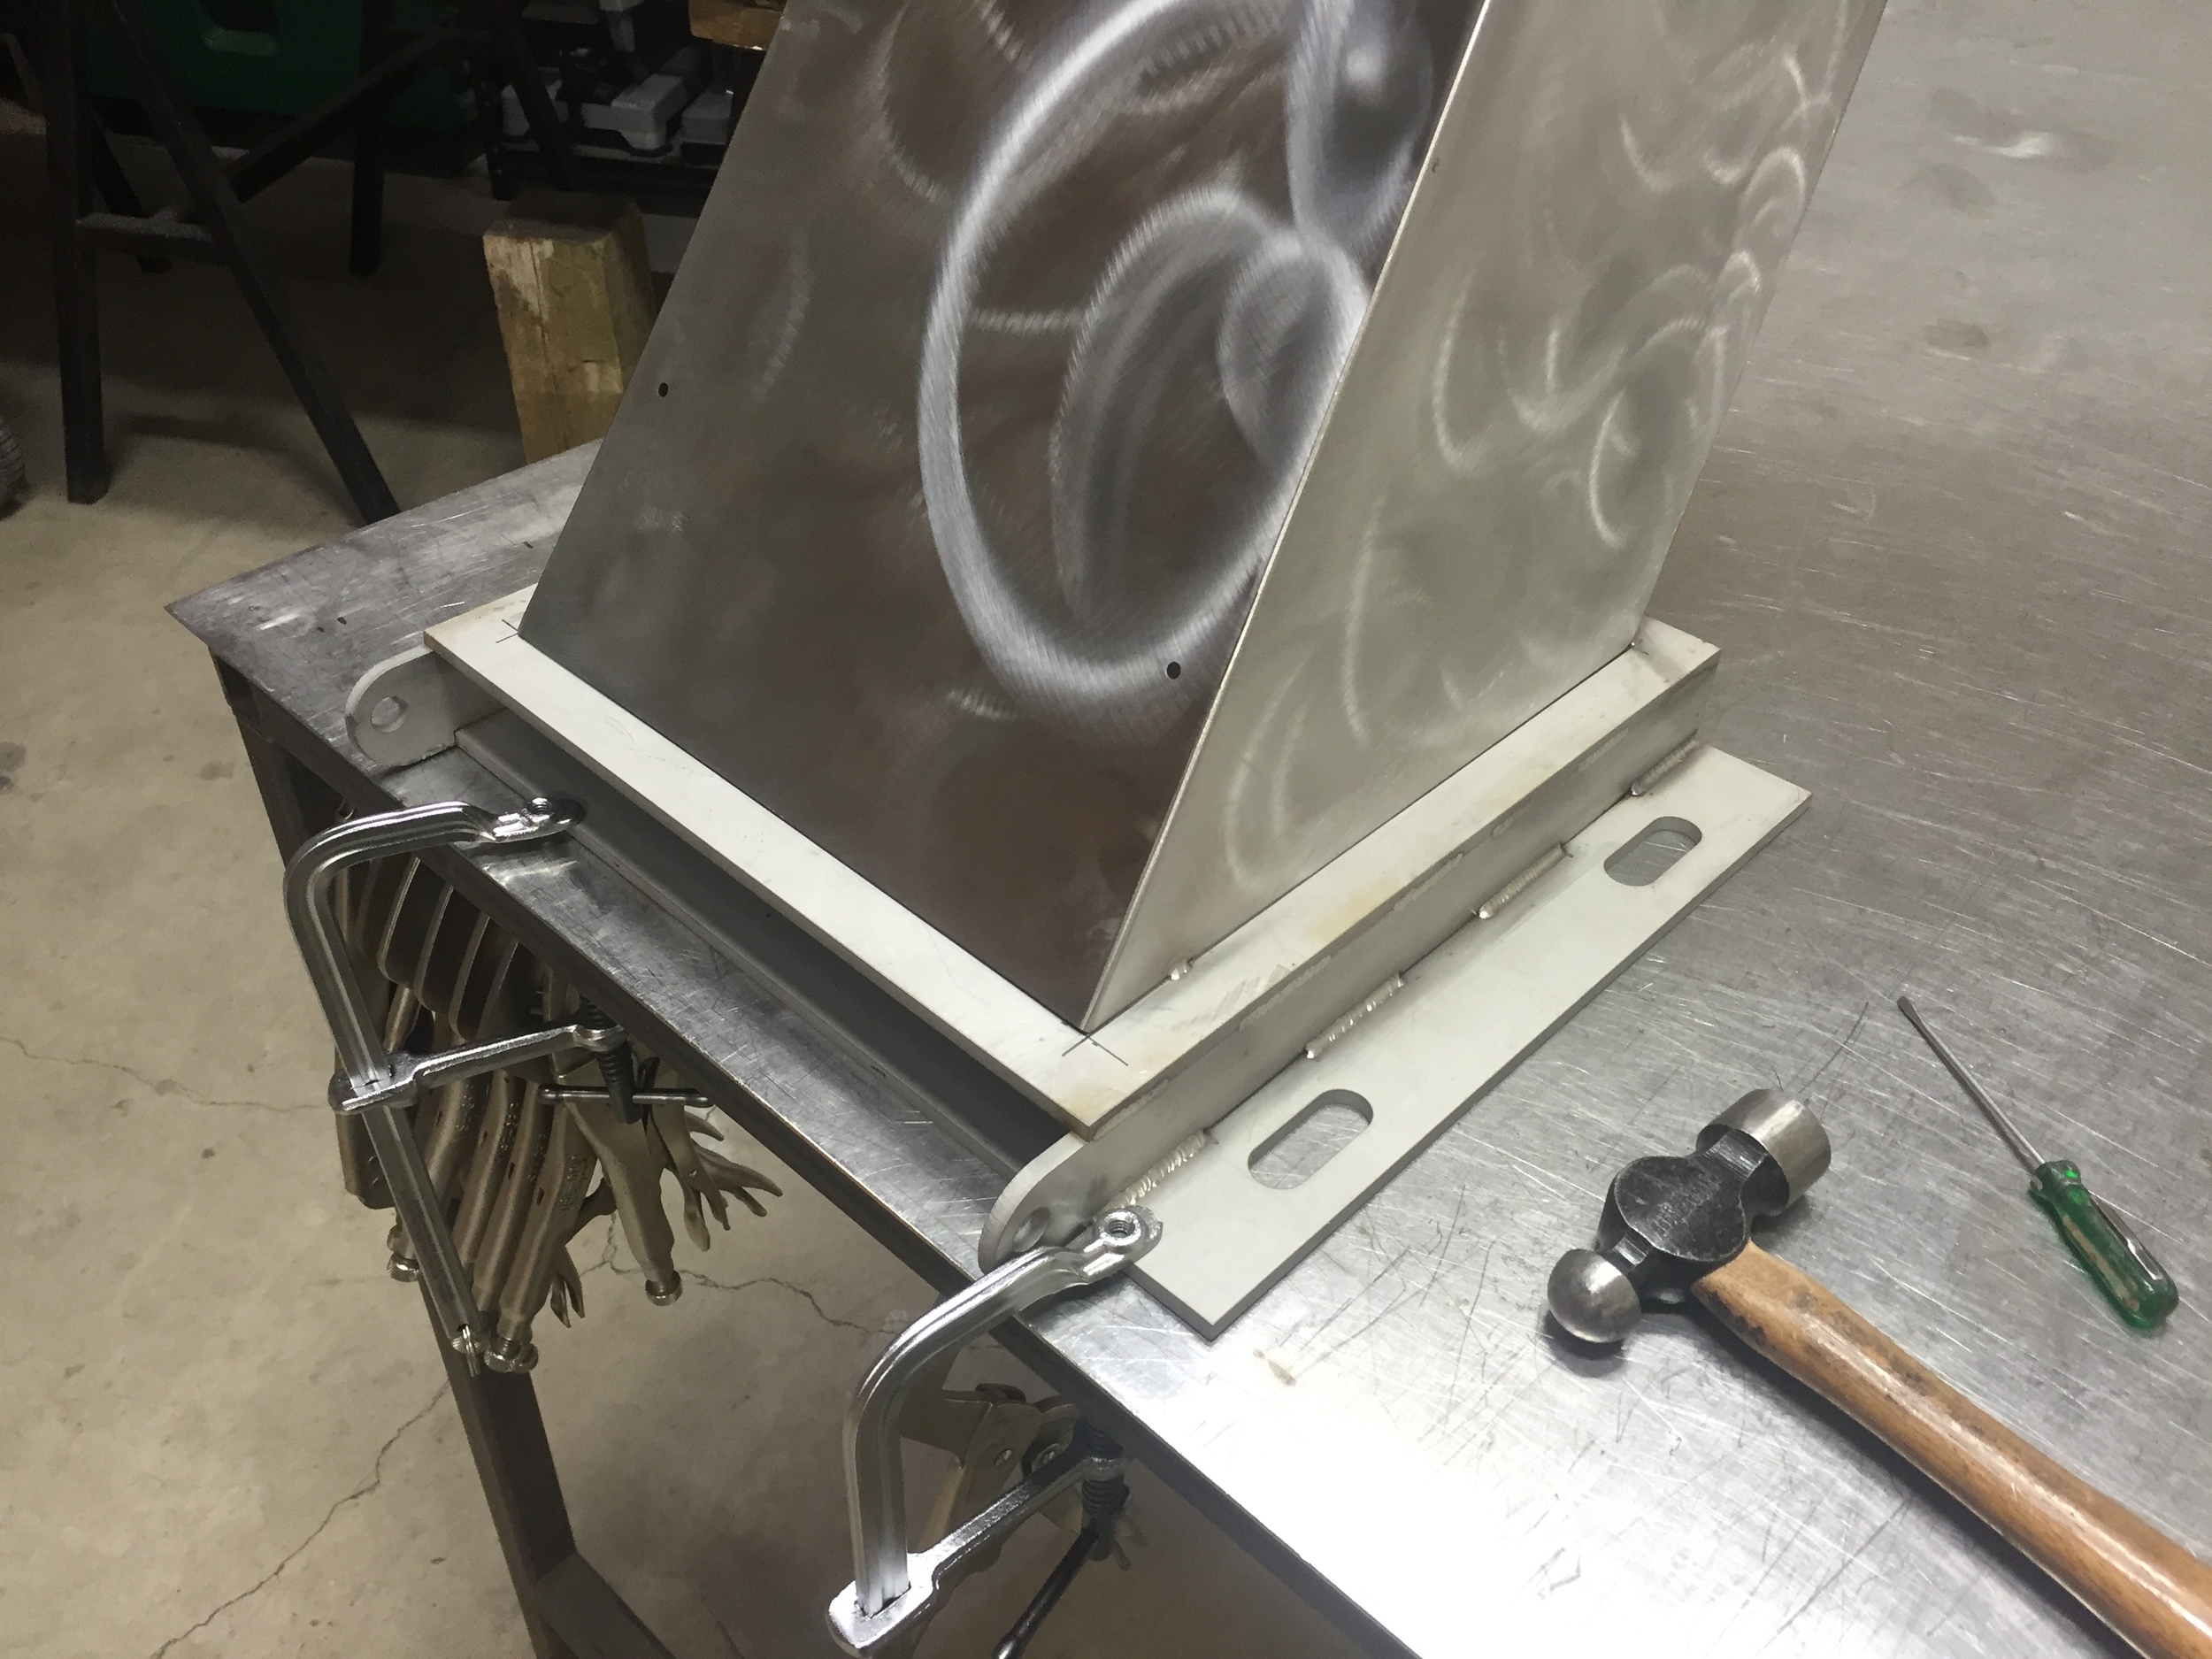
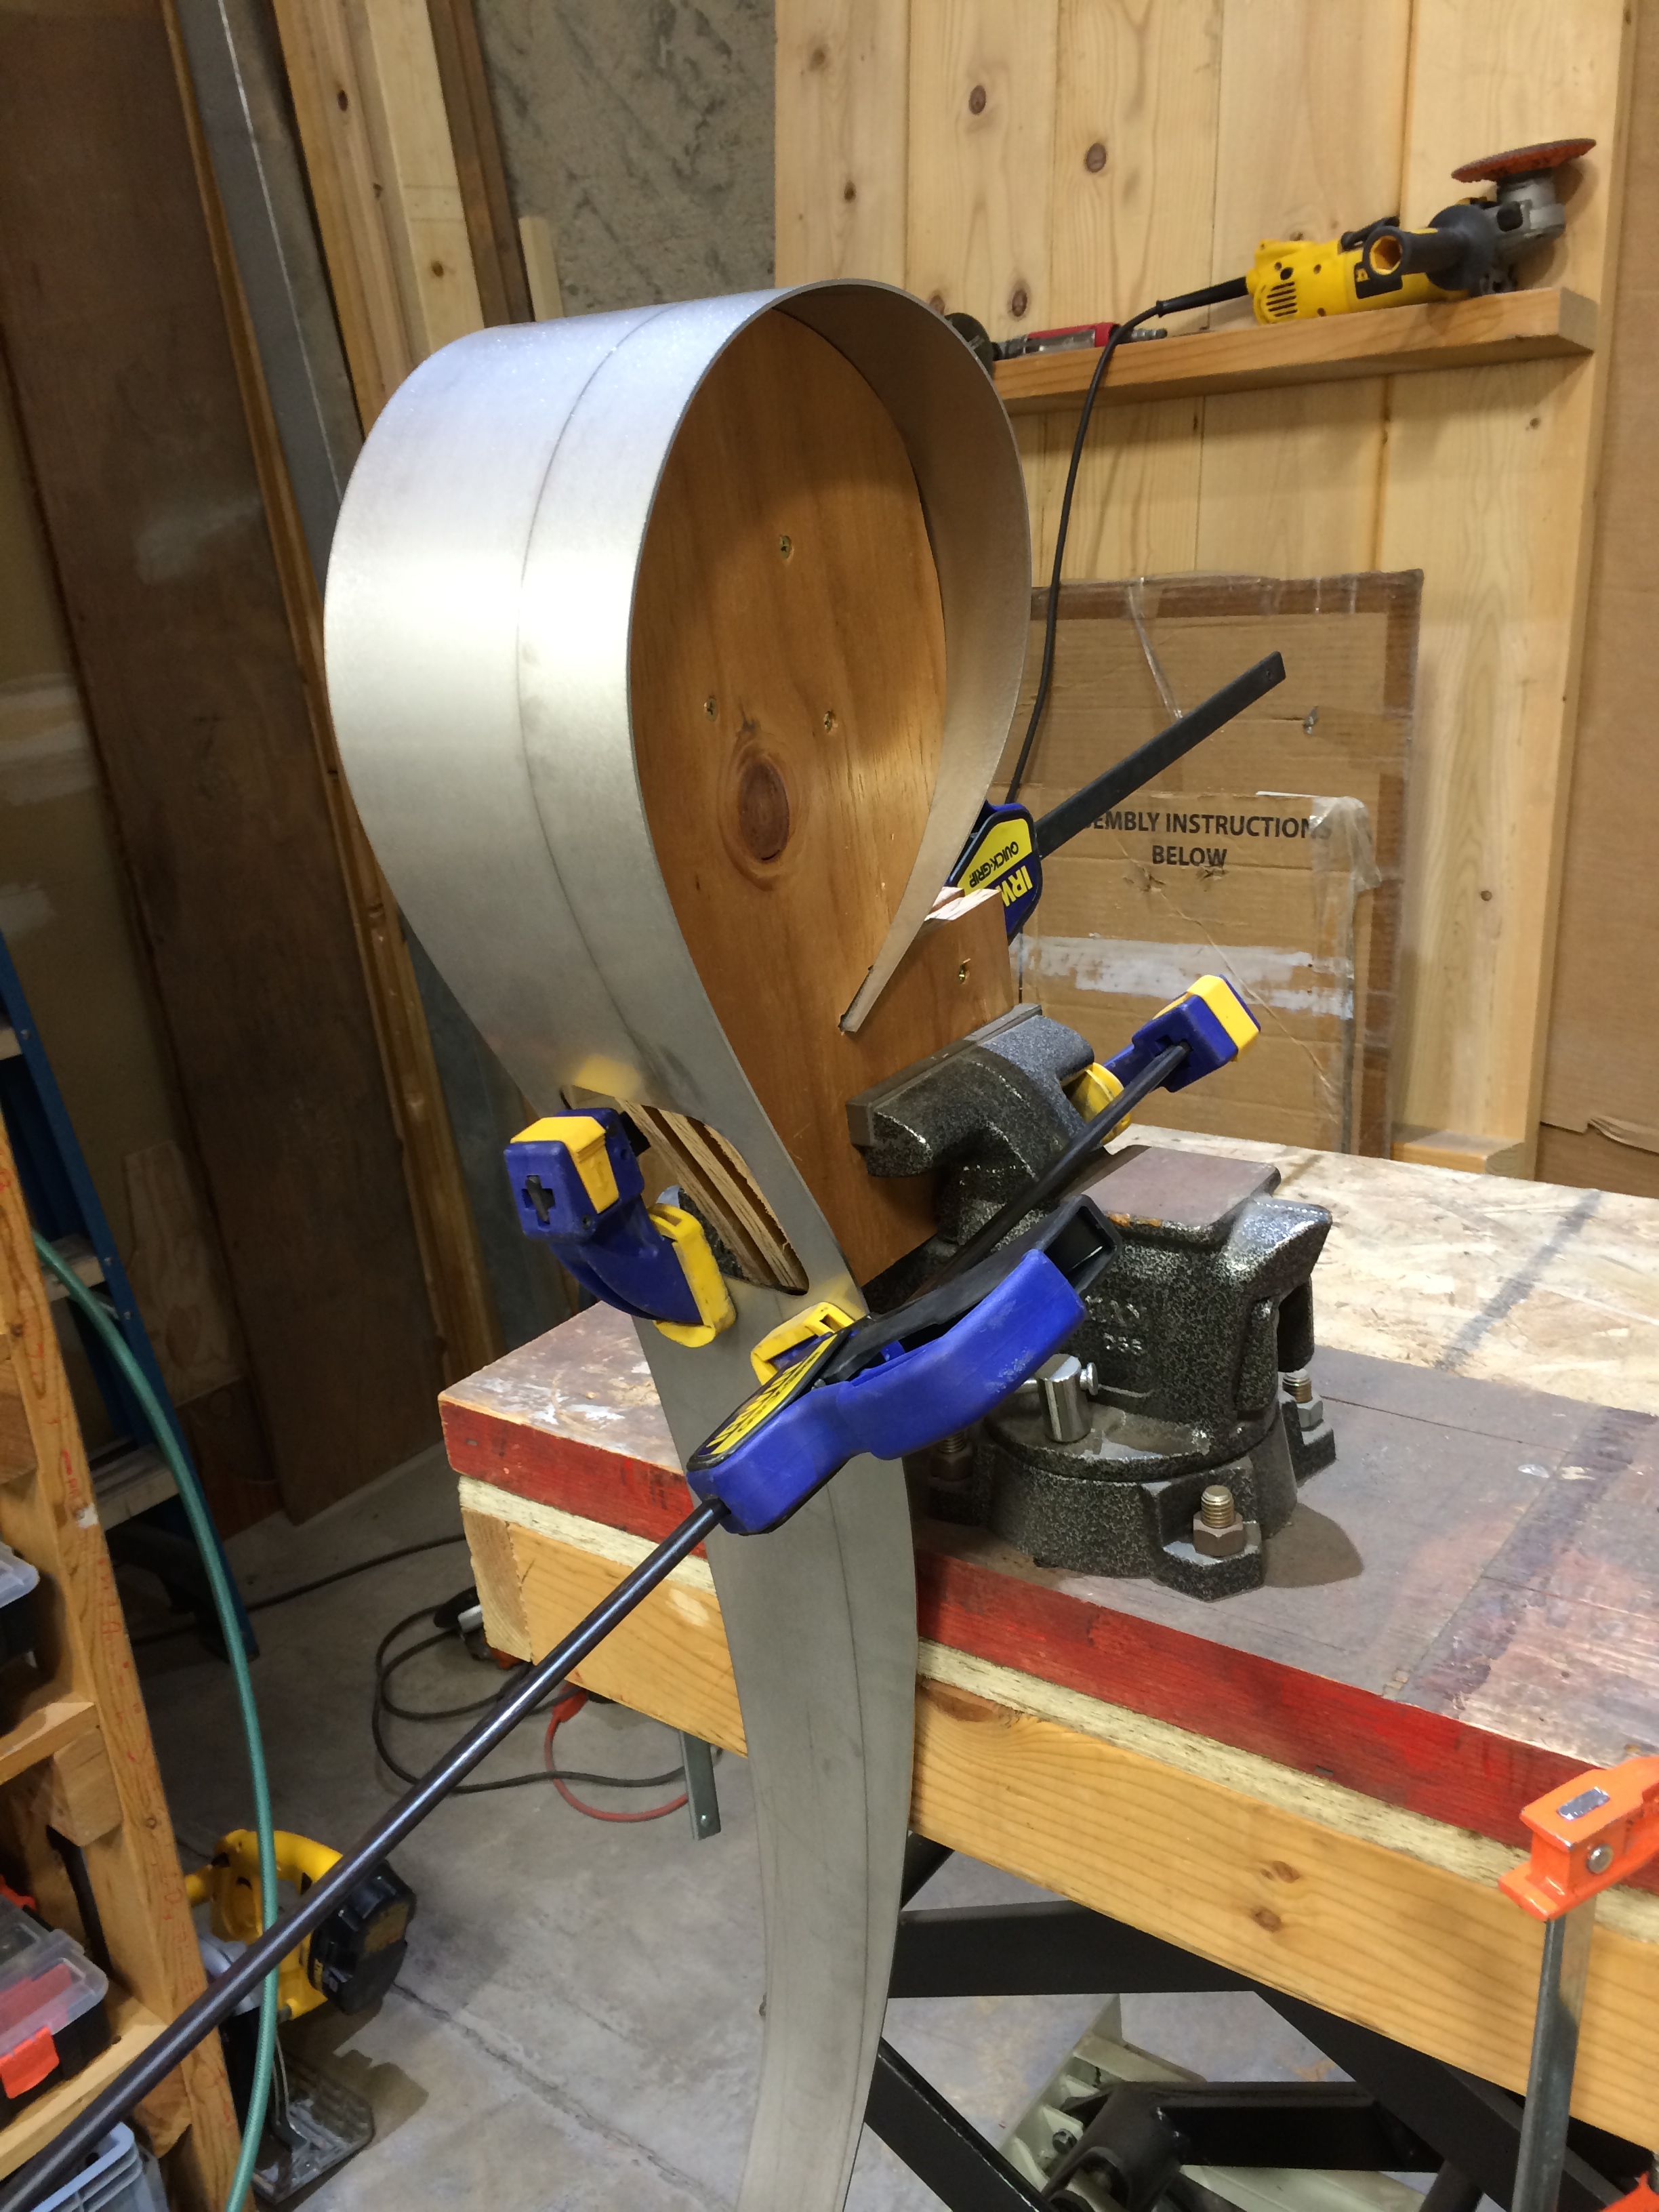
Evident on these strips are the bend lines, with mountain and valley folds color coded cyan and magenta. Keeping that sorted in my head was a source of continual stress. I ended up modifying a drill press vice to simplify bending the strips. The basic procedure can be seen below:

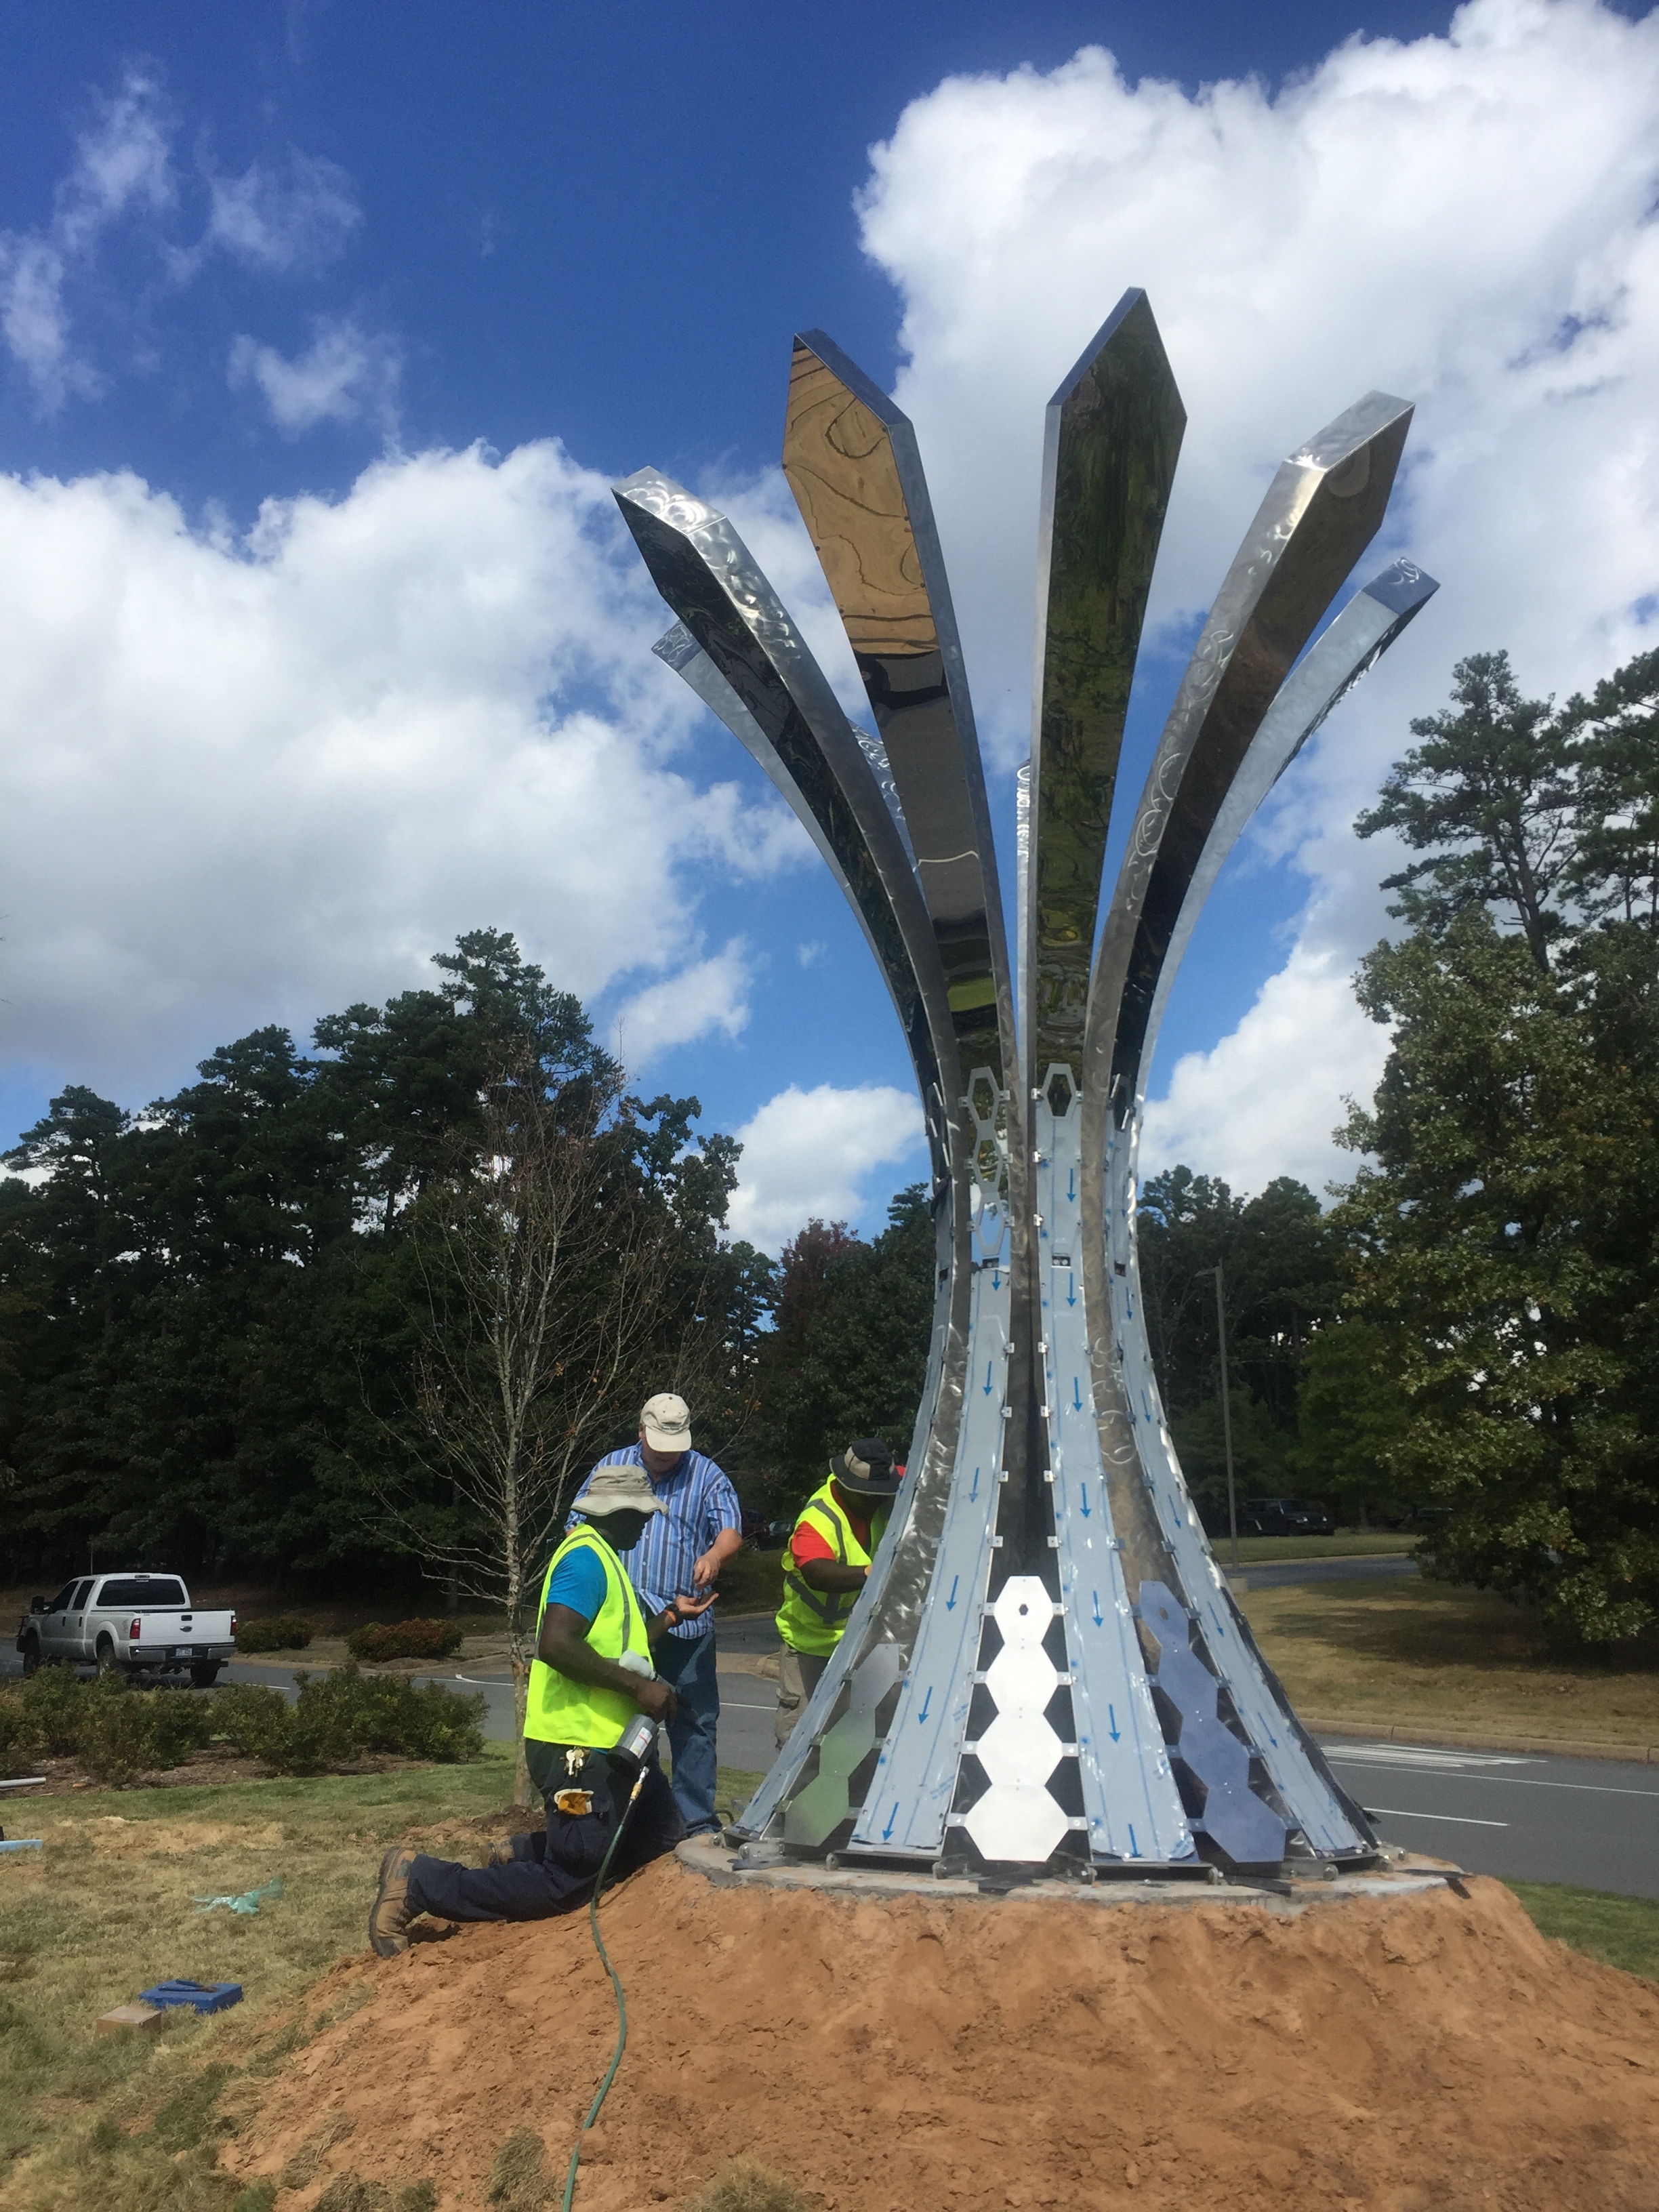
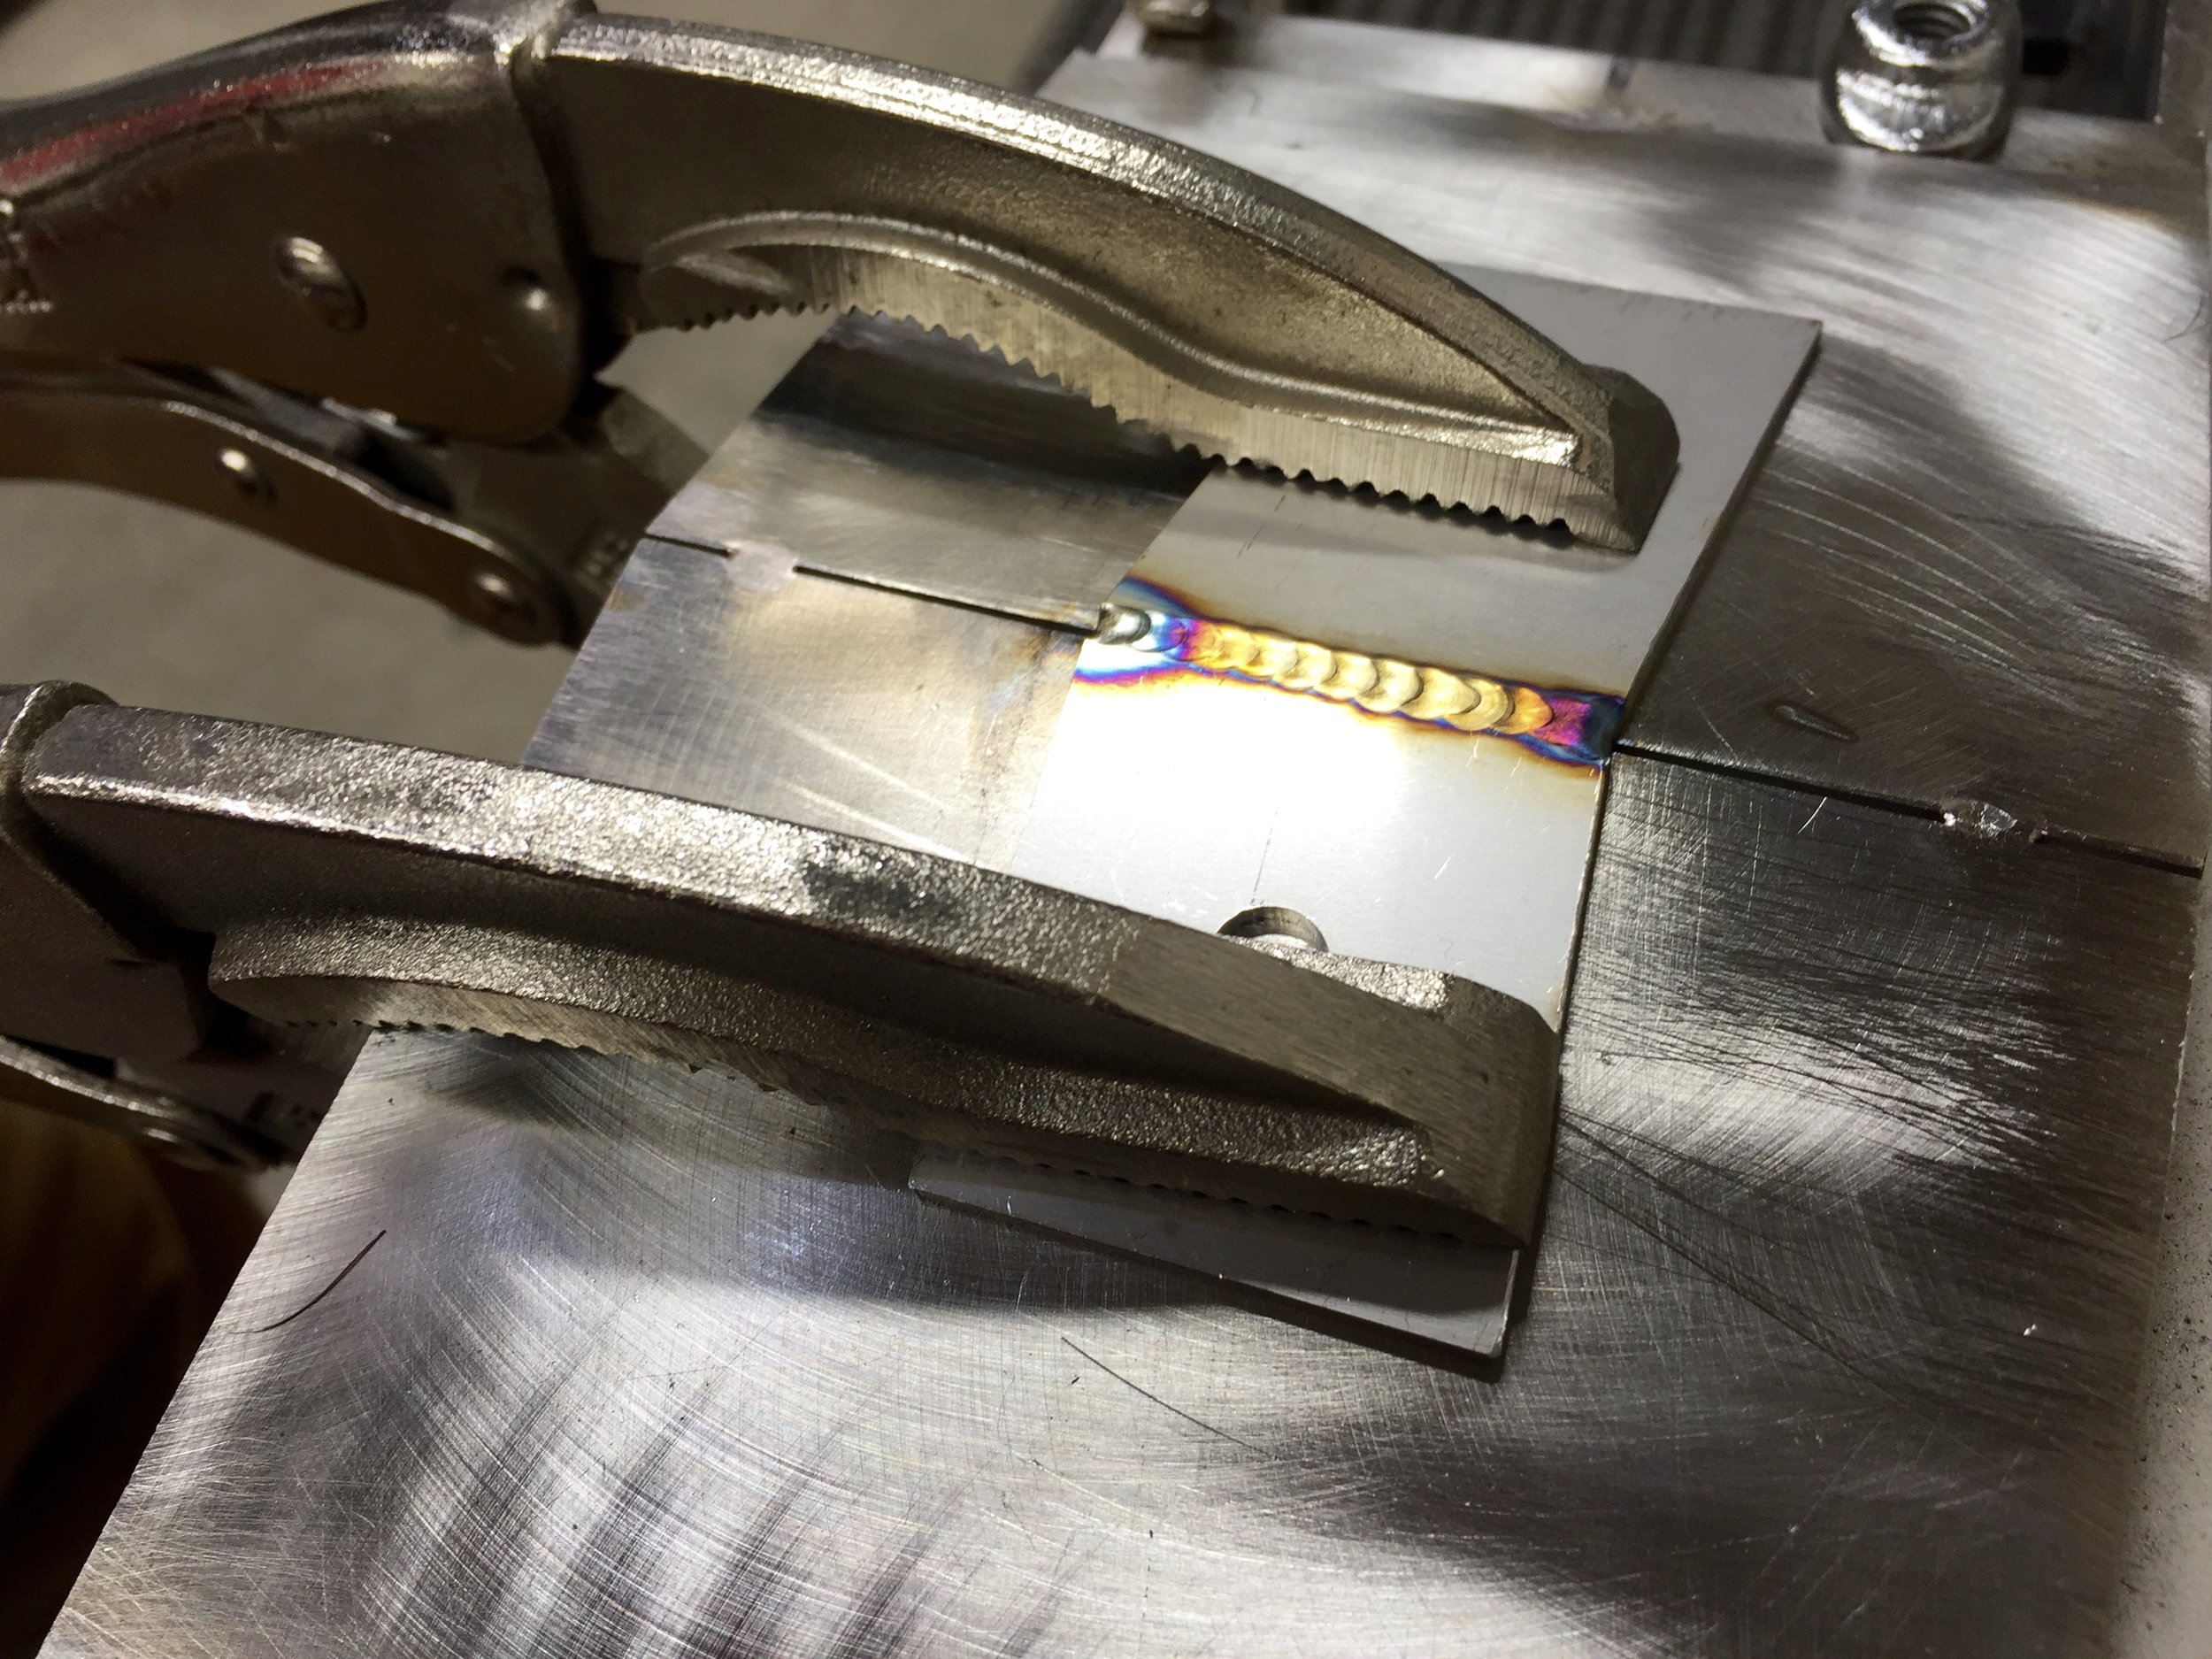
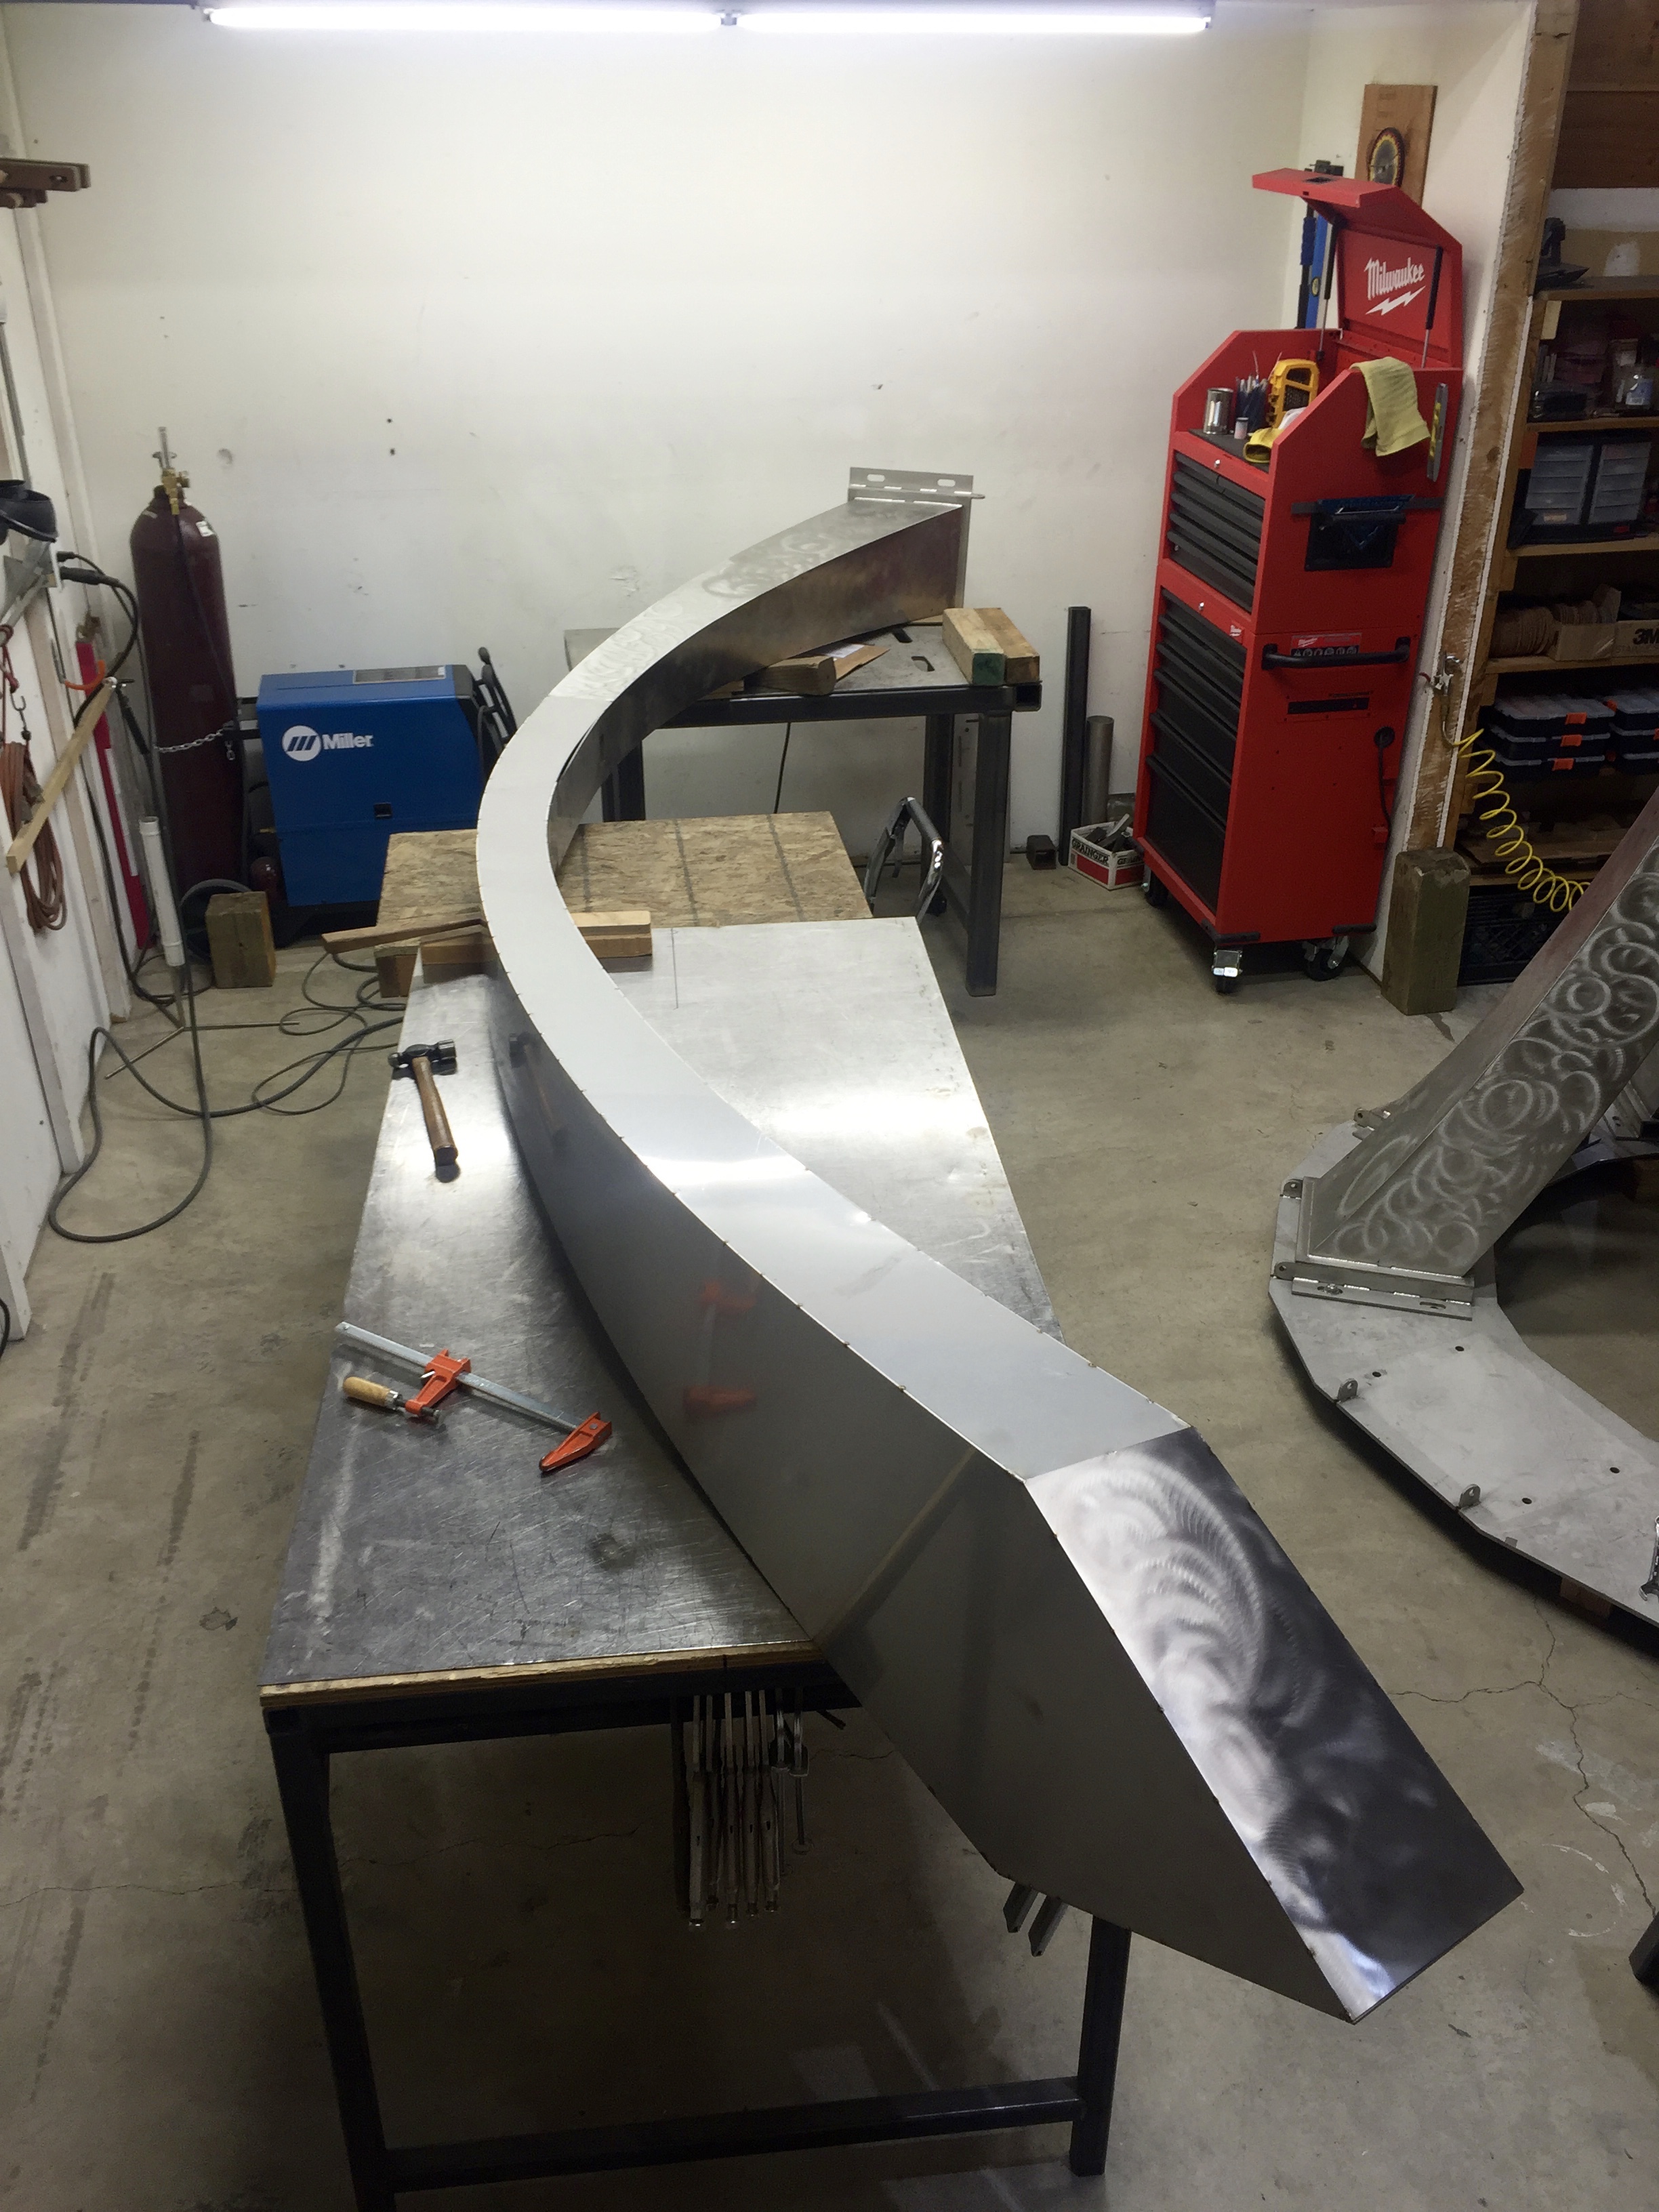
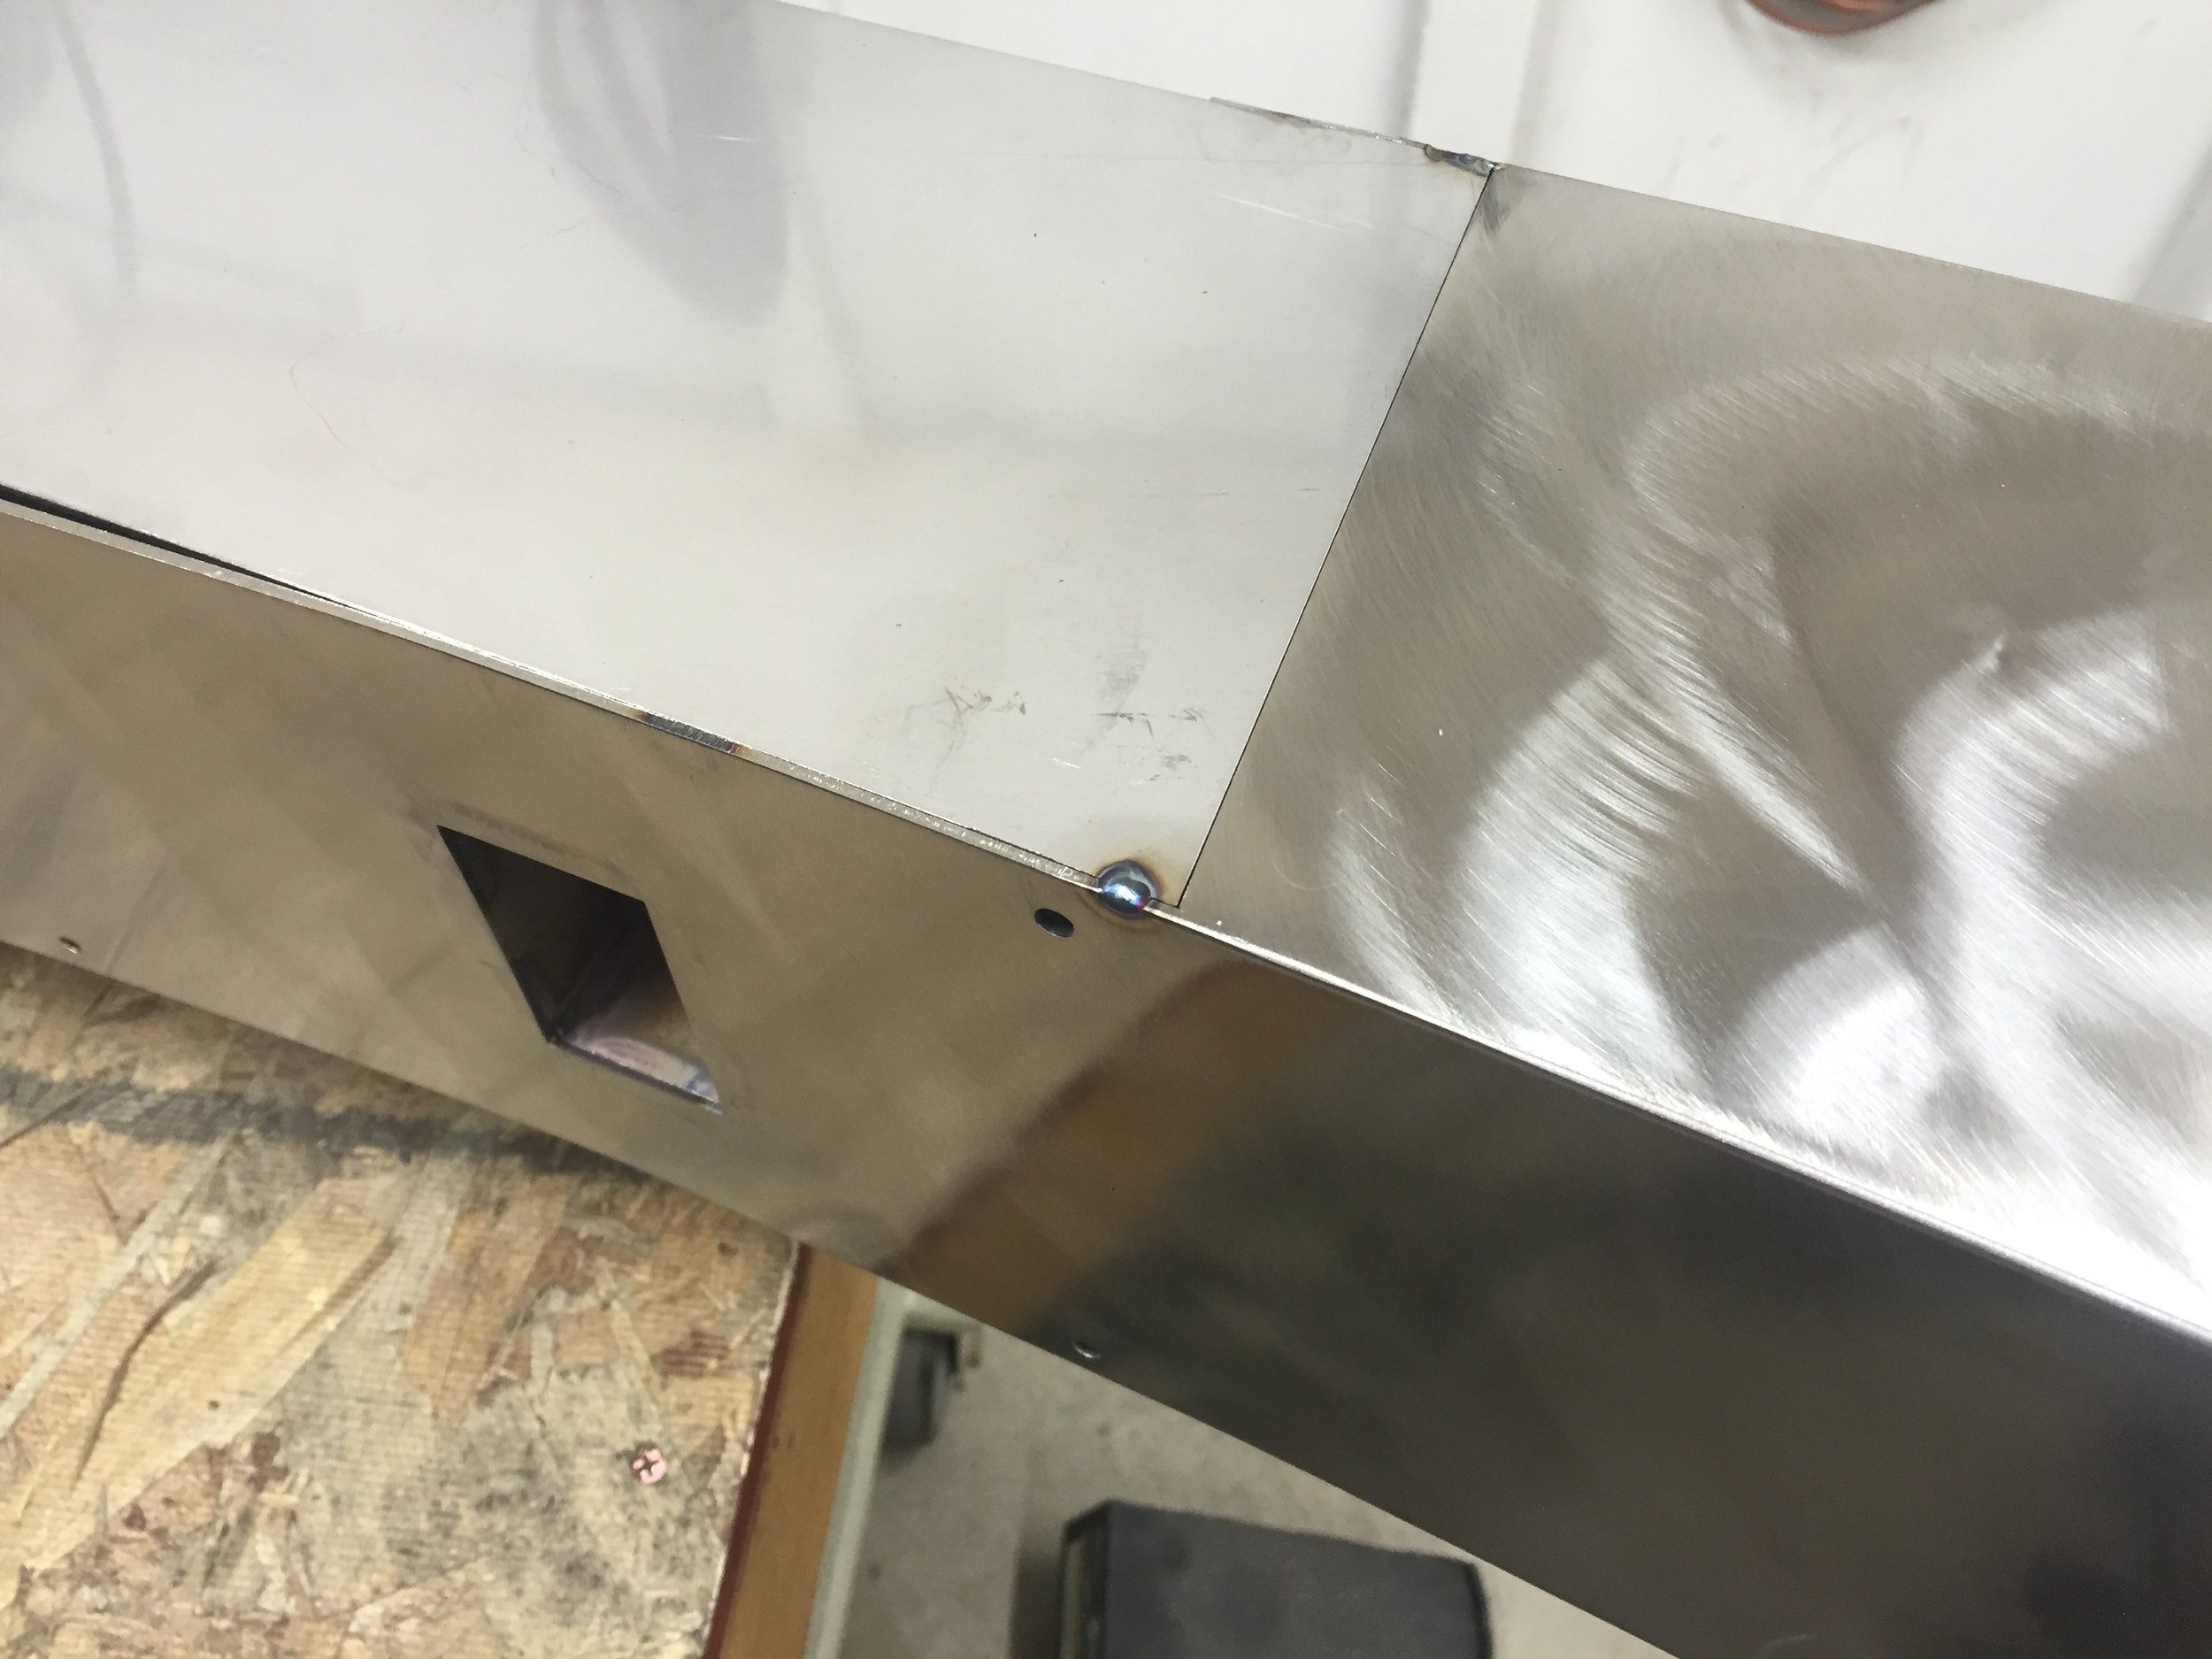
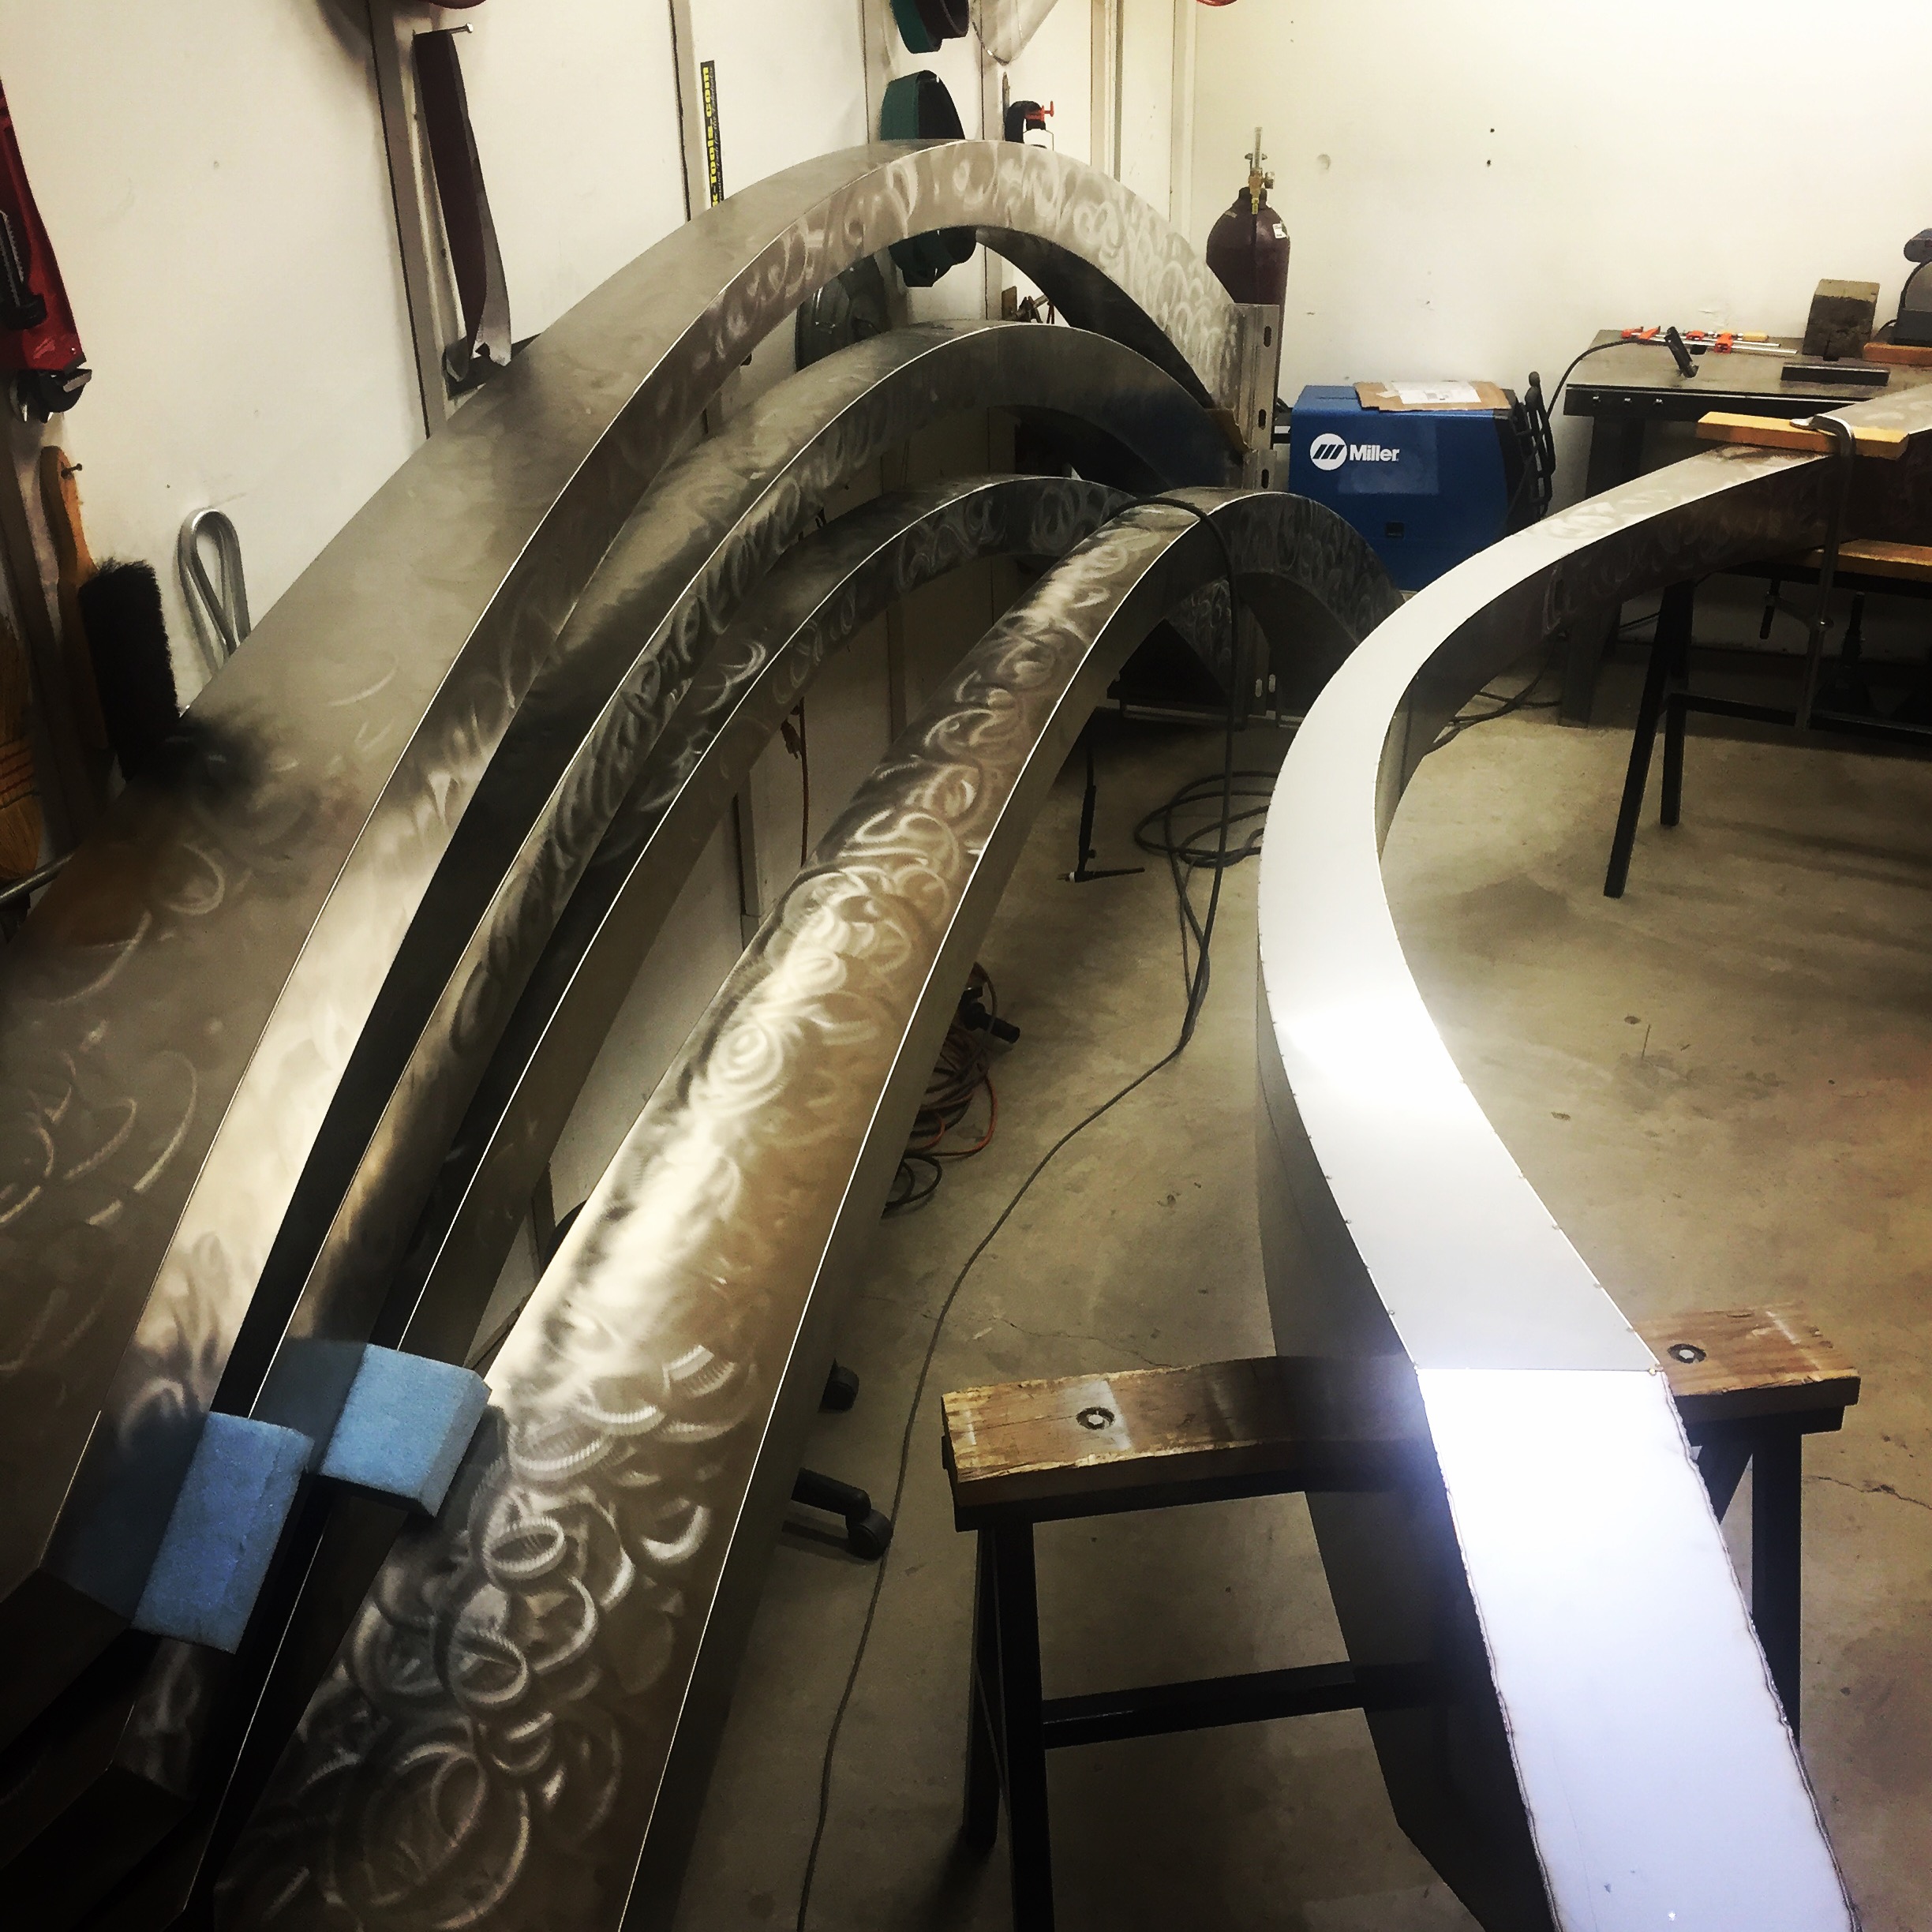
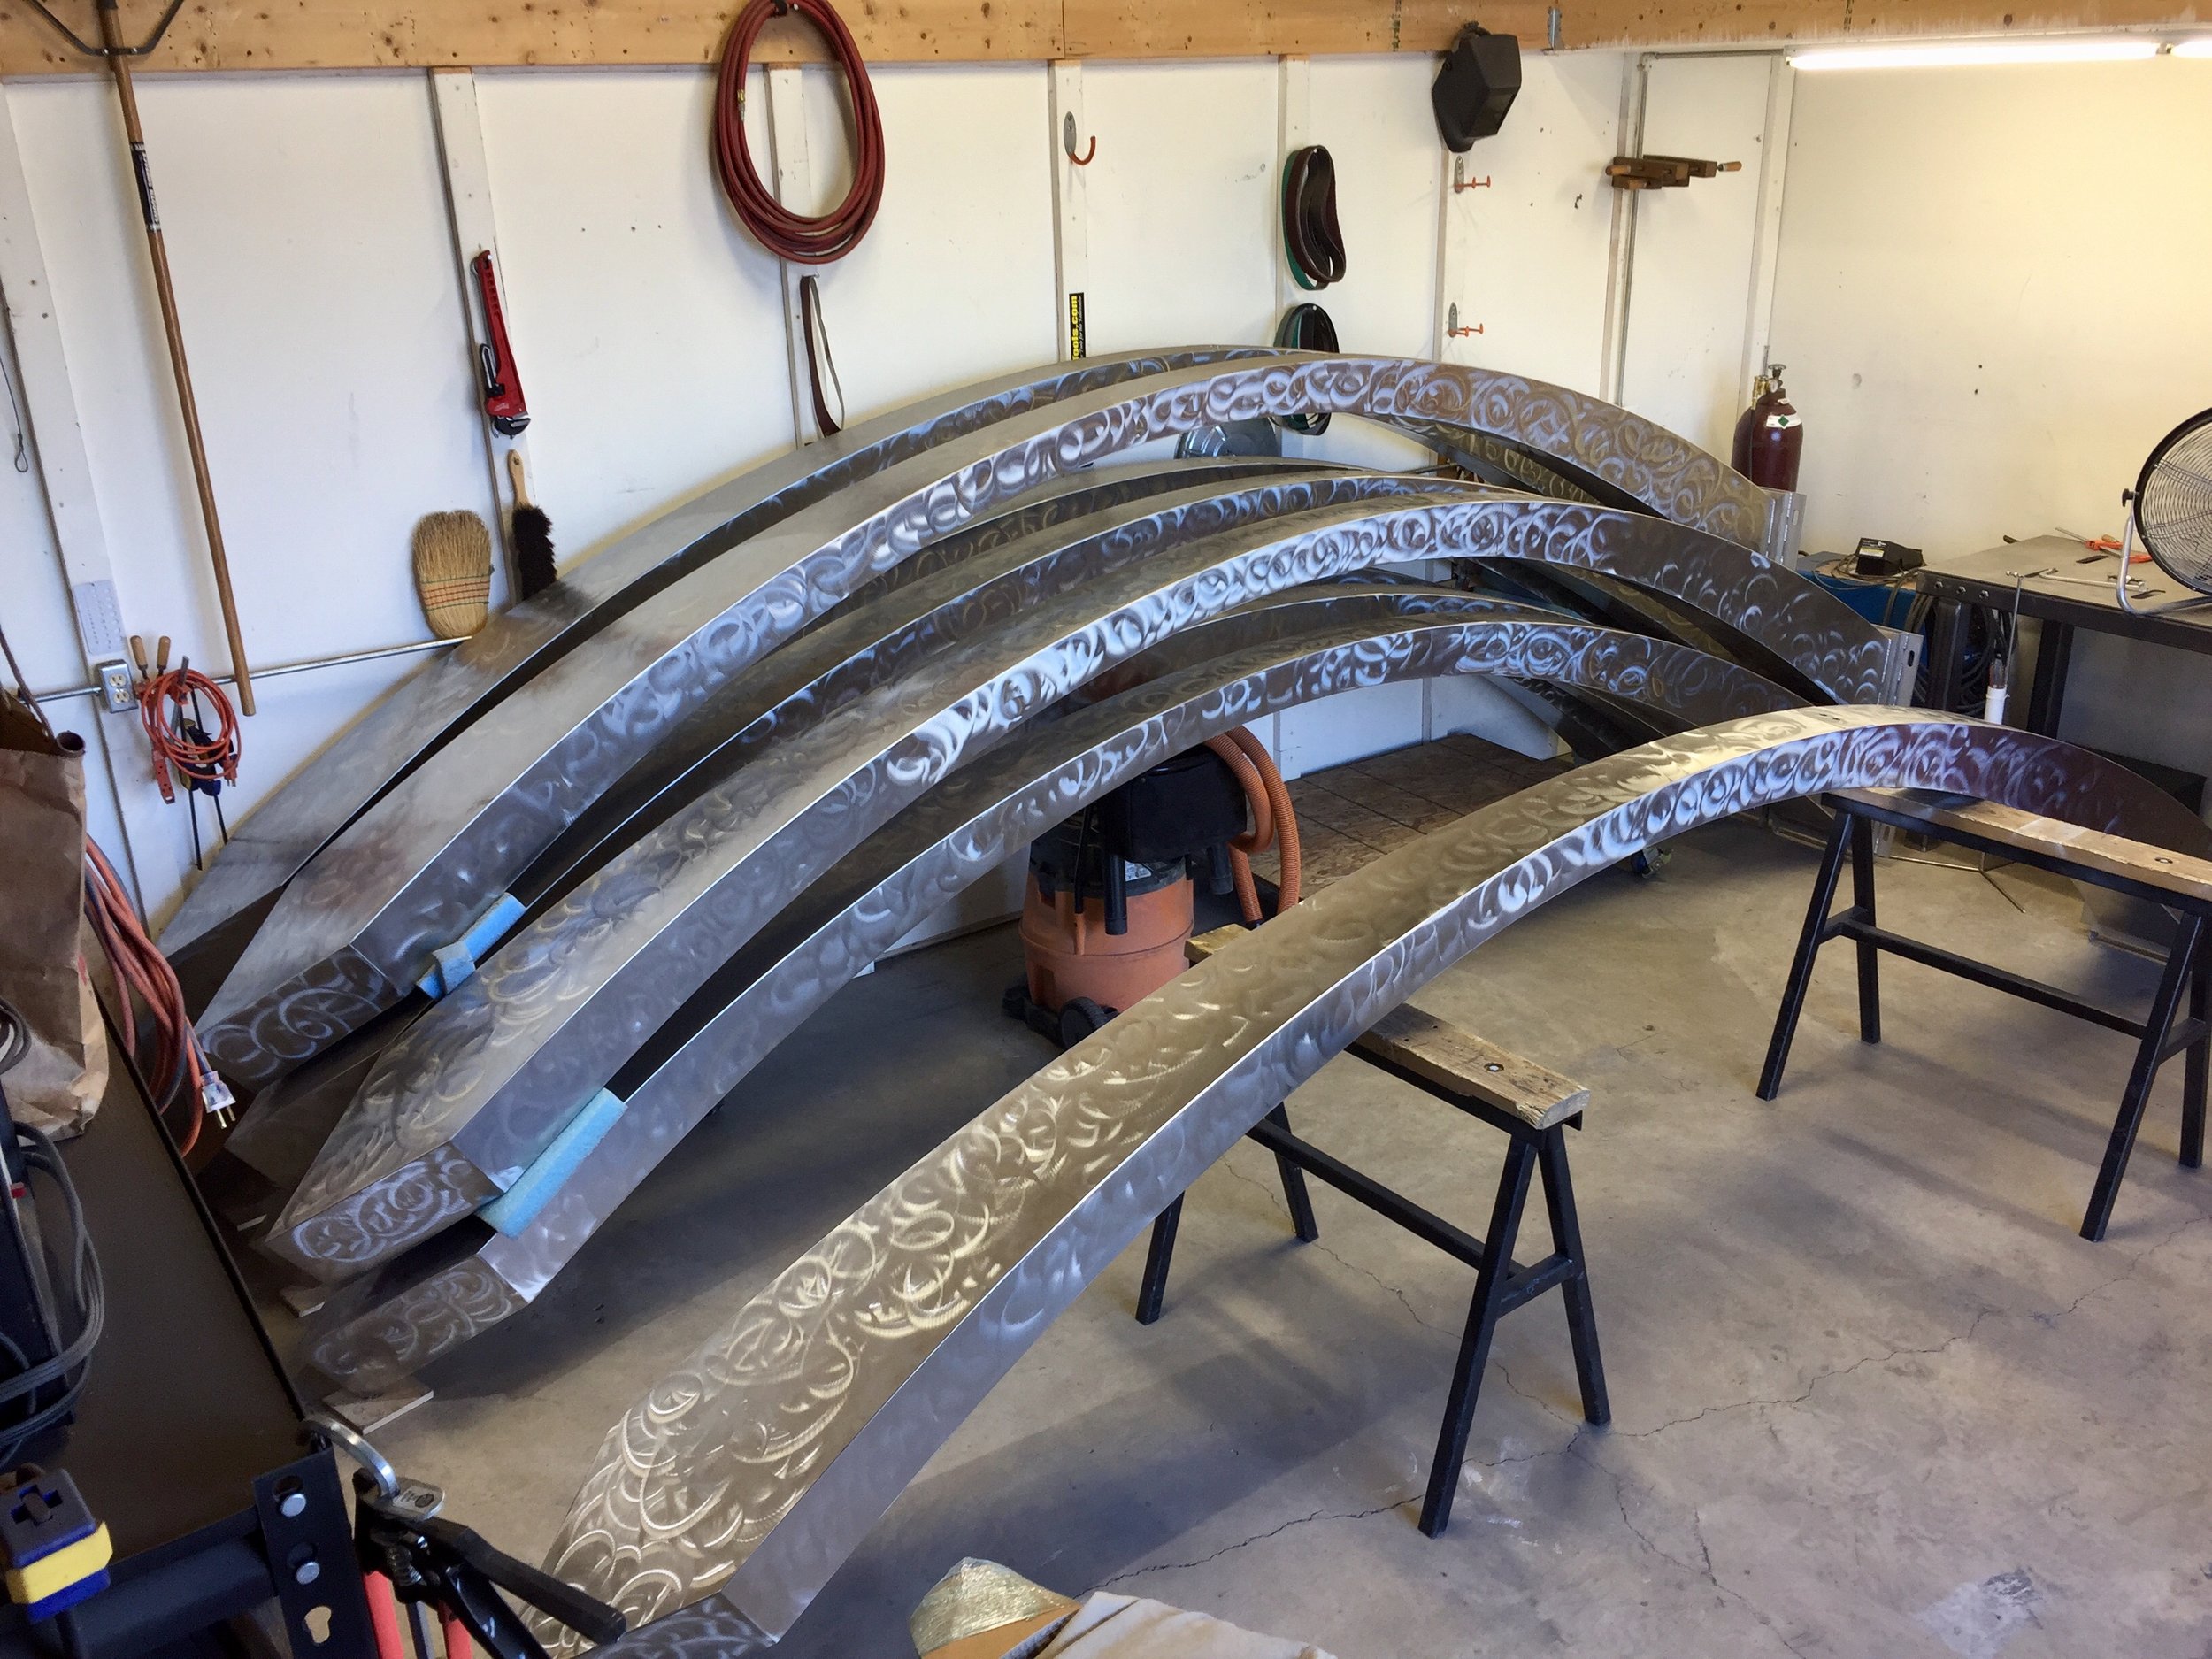
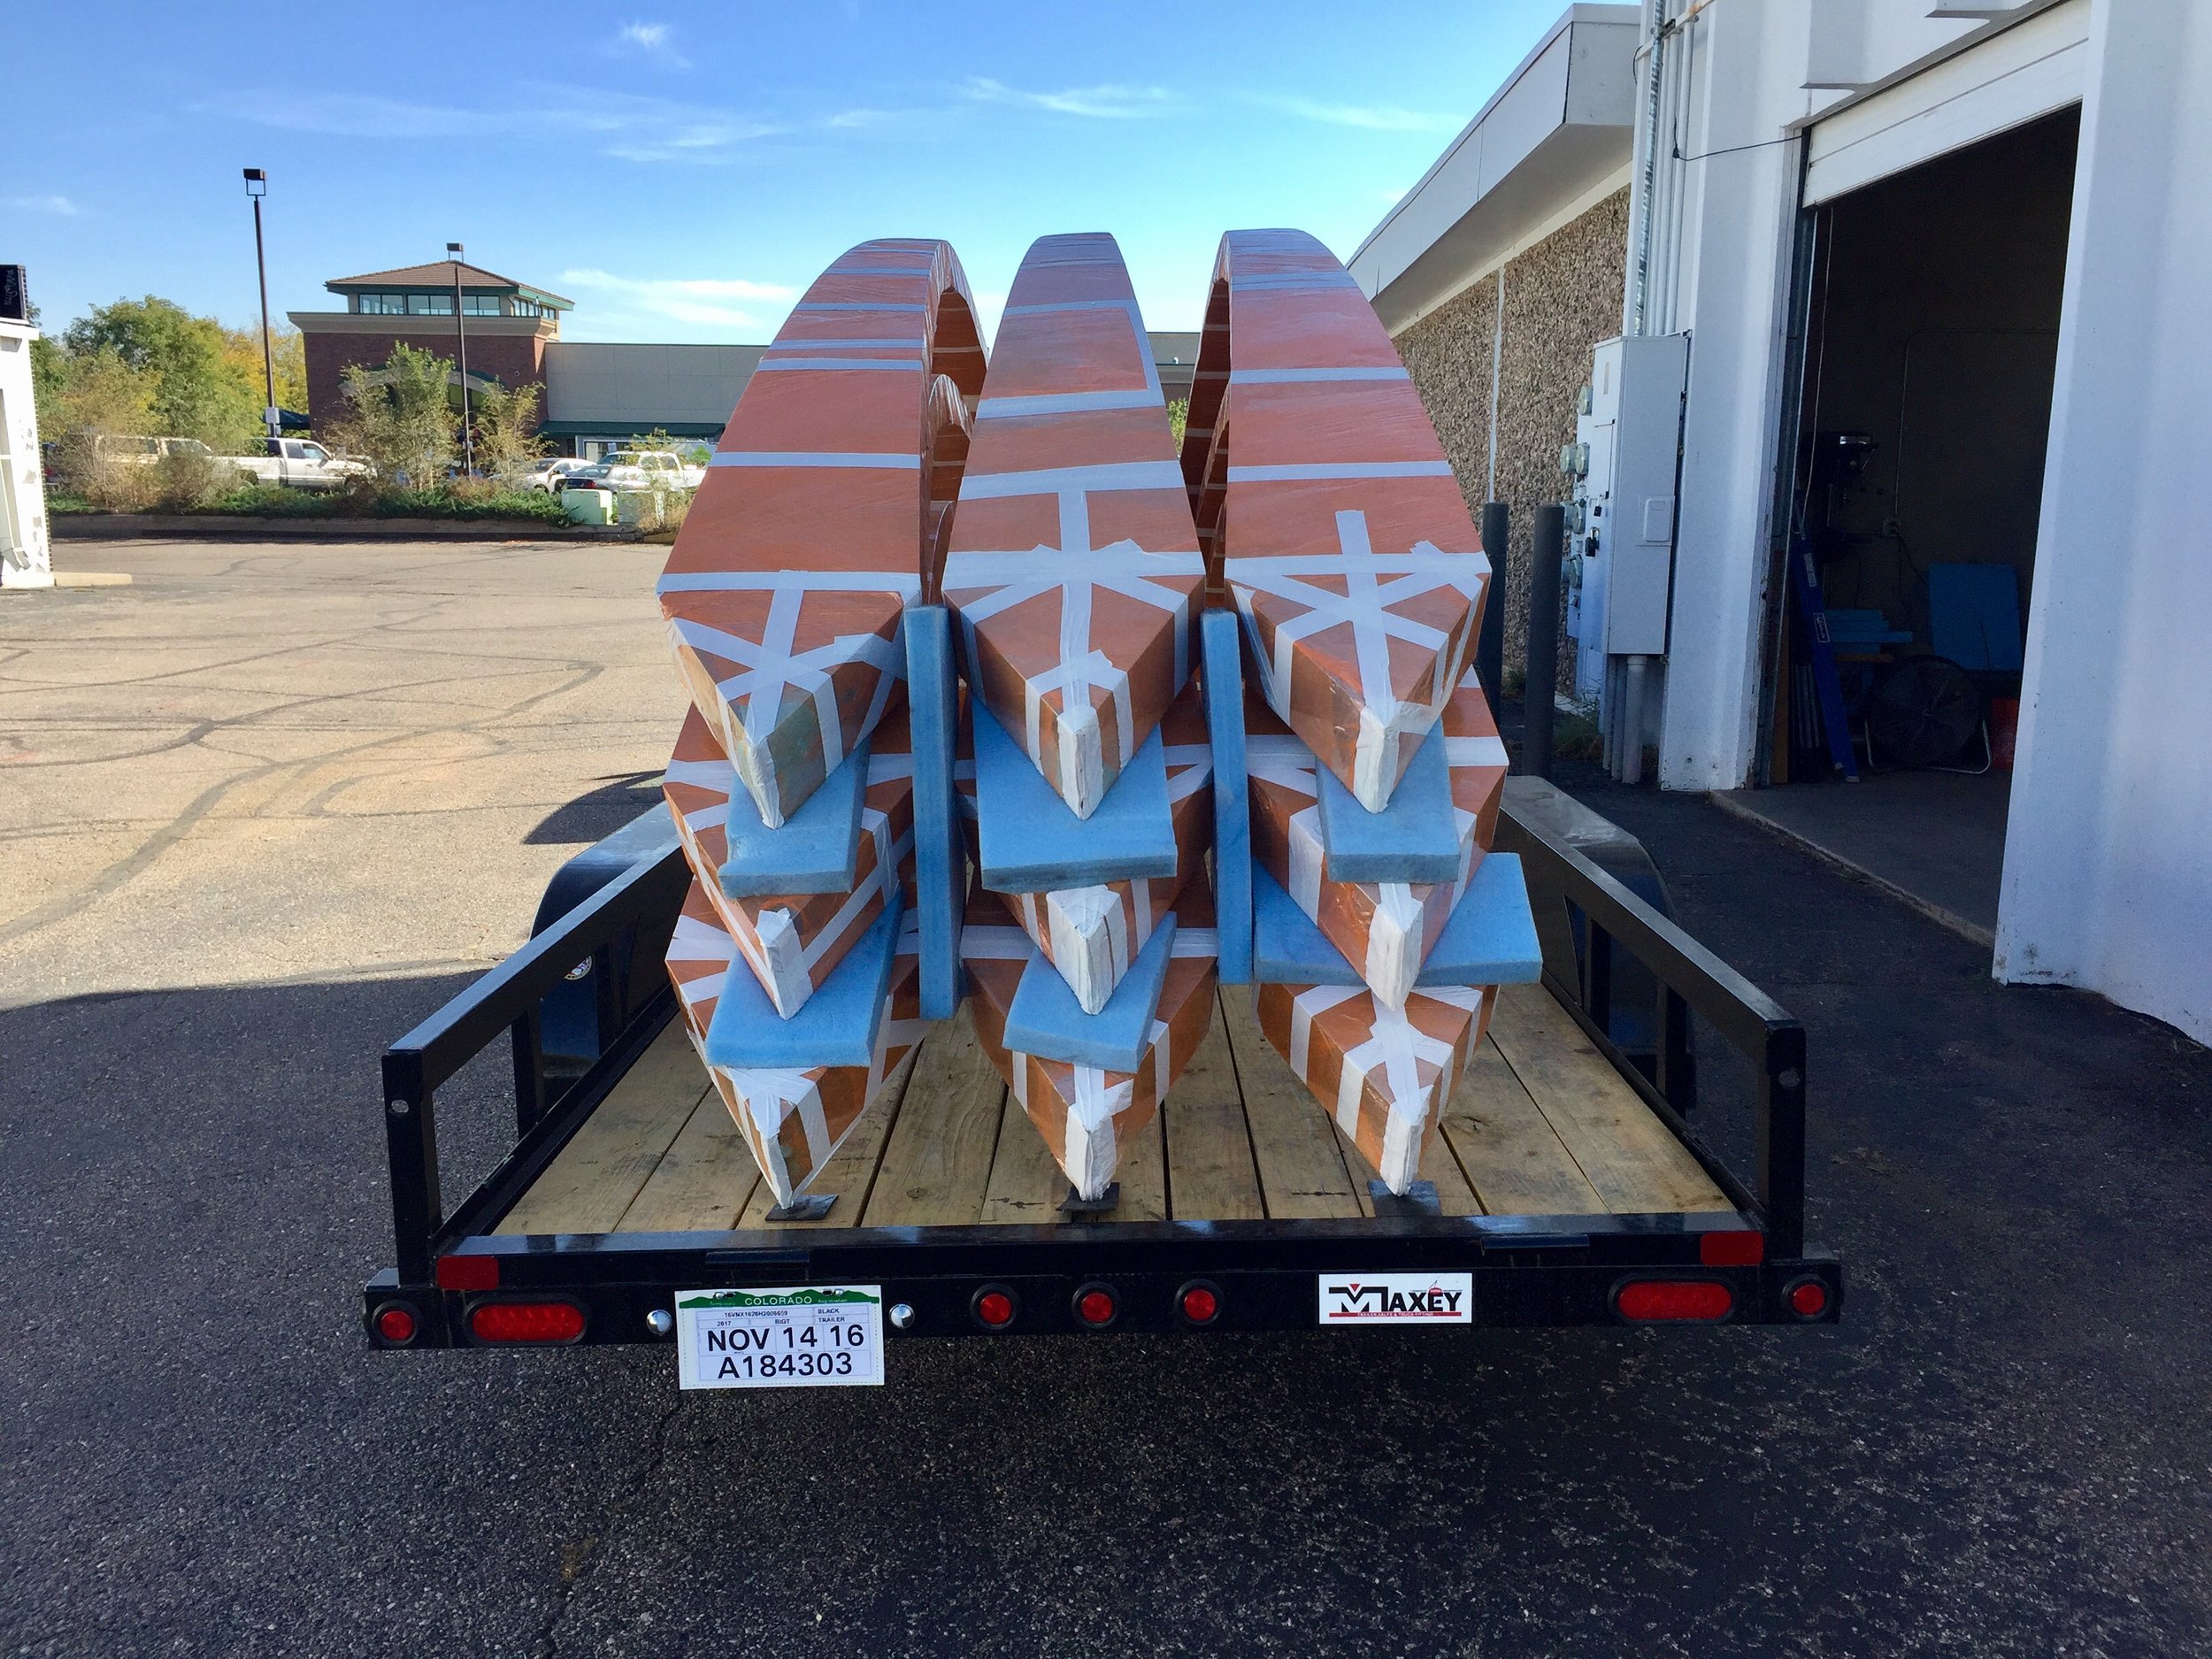
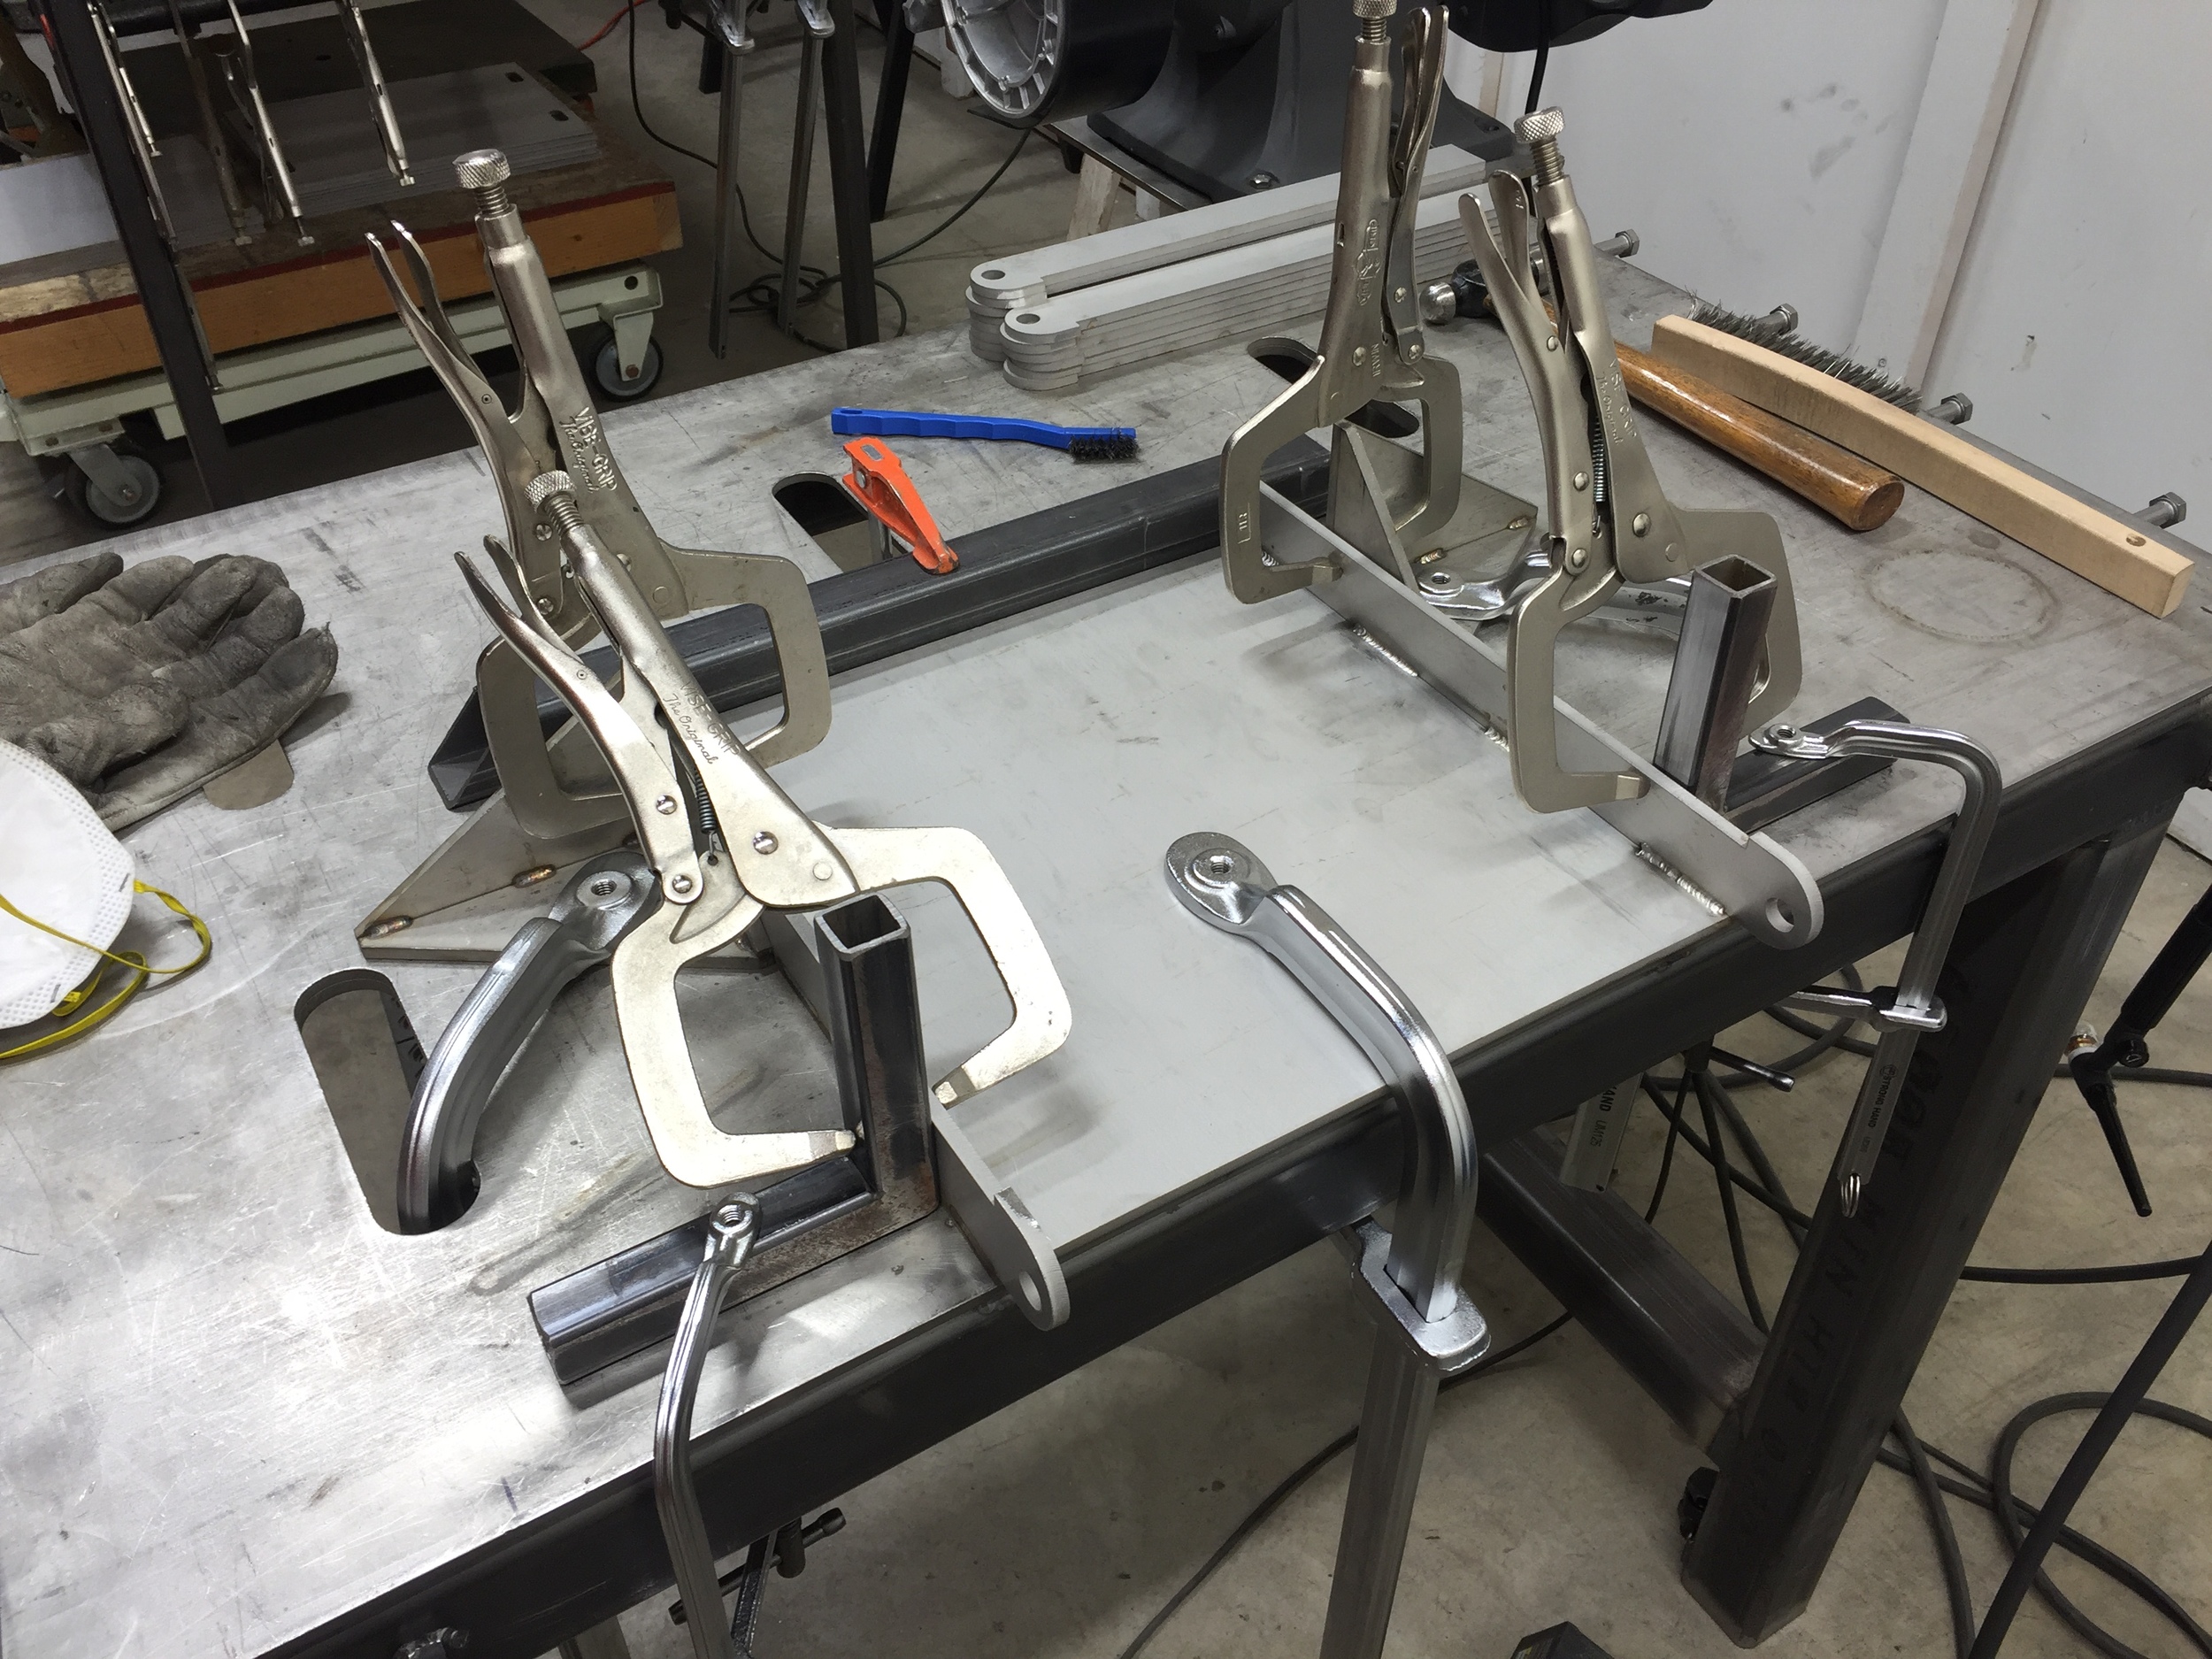
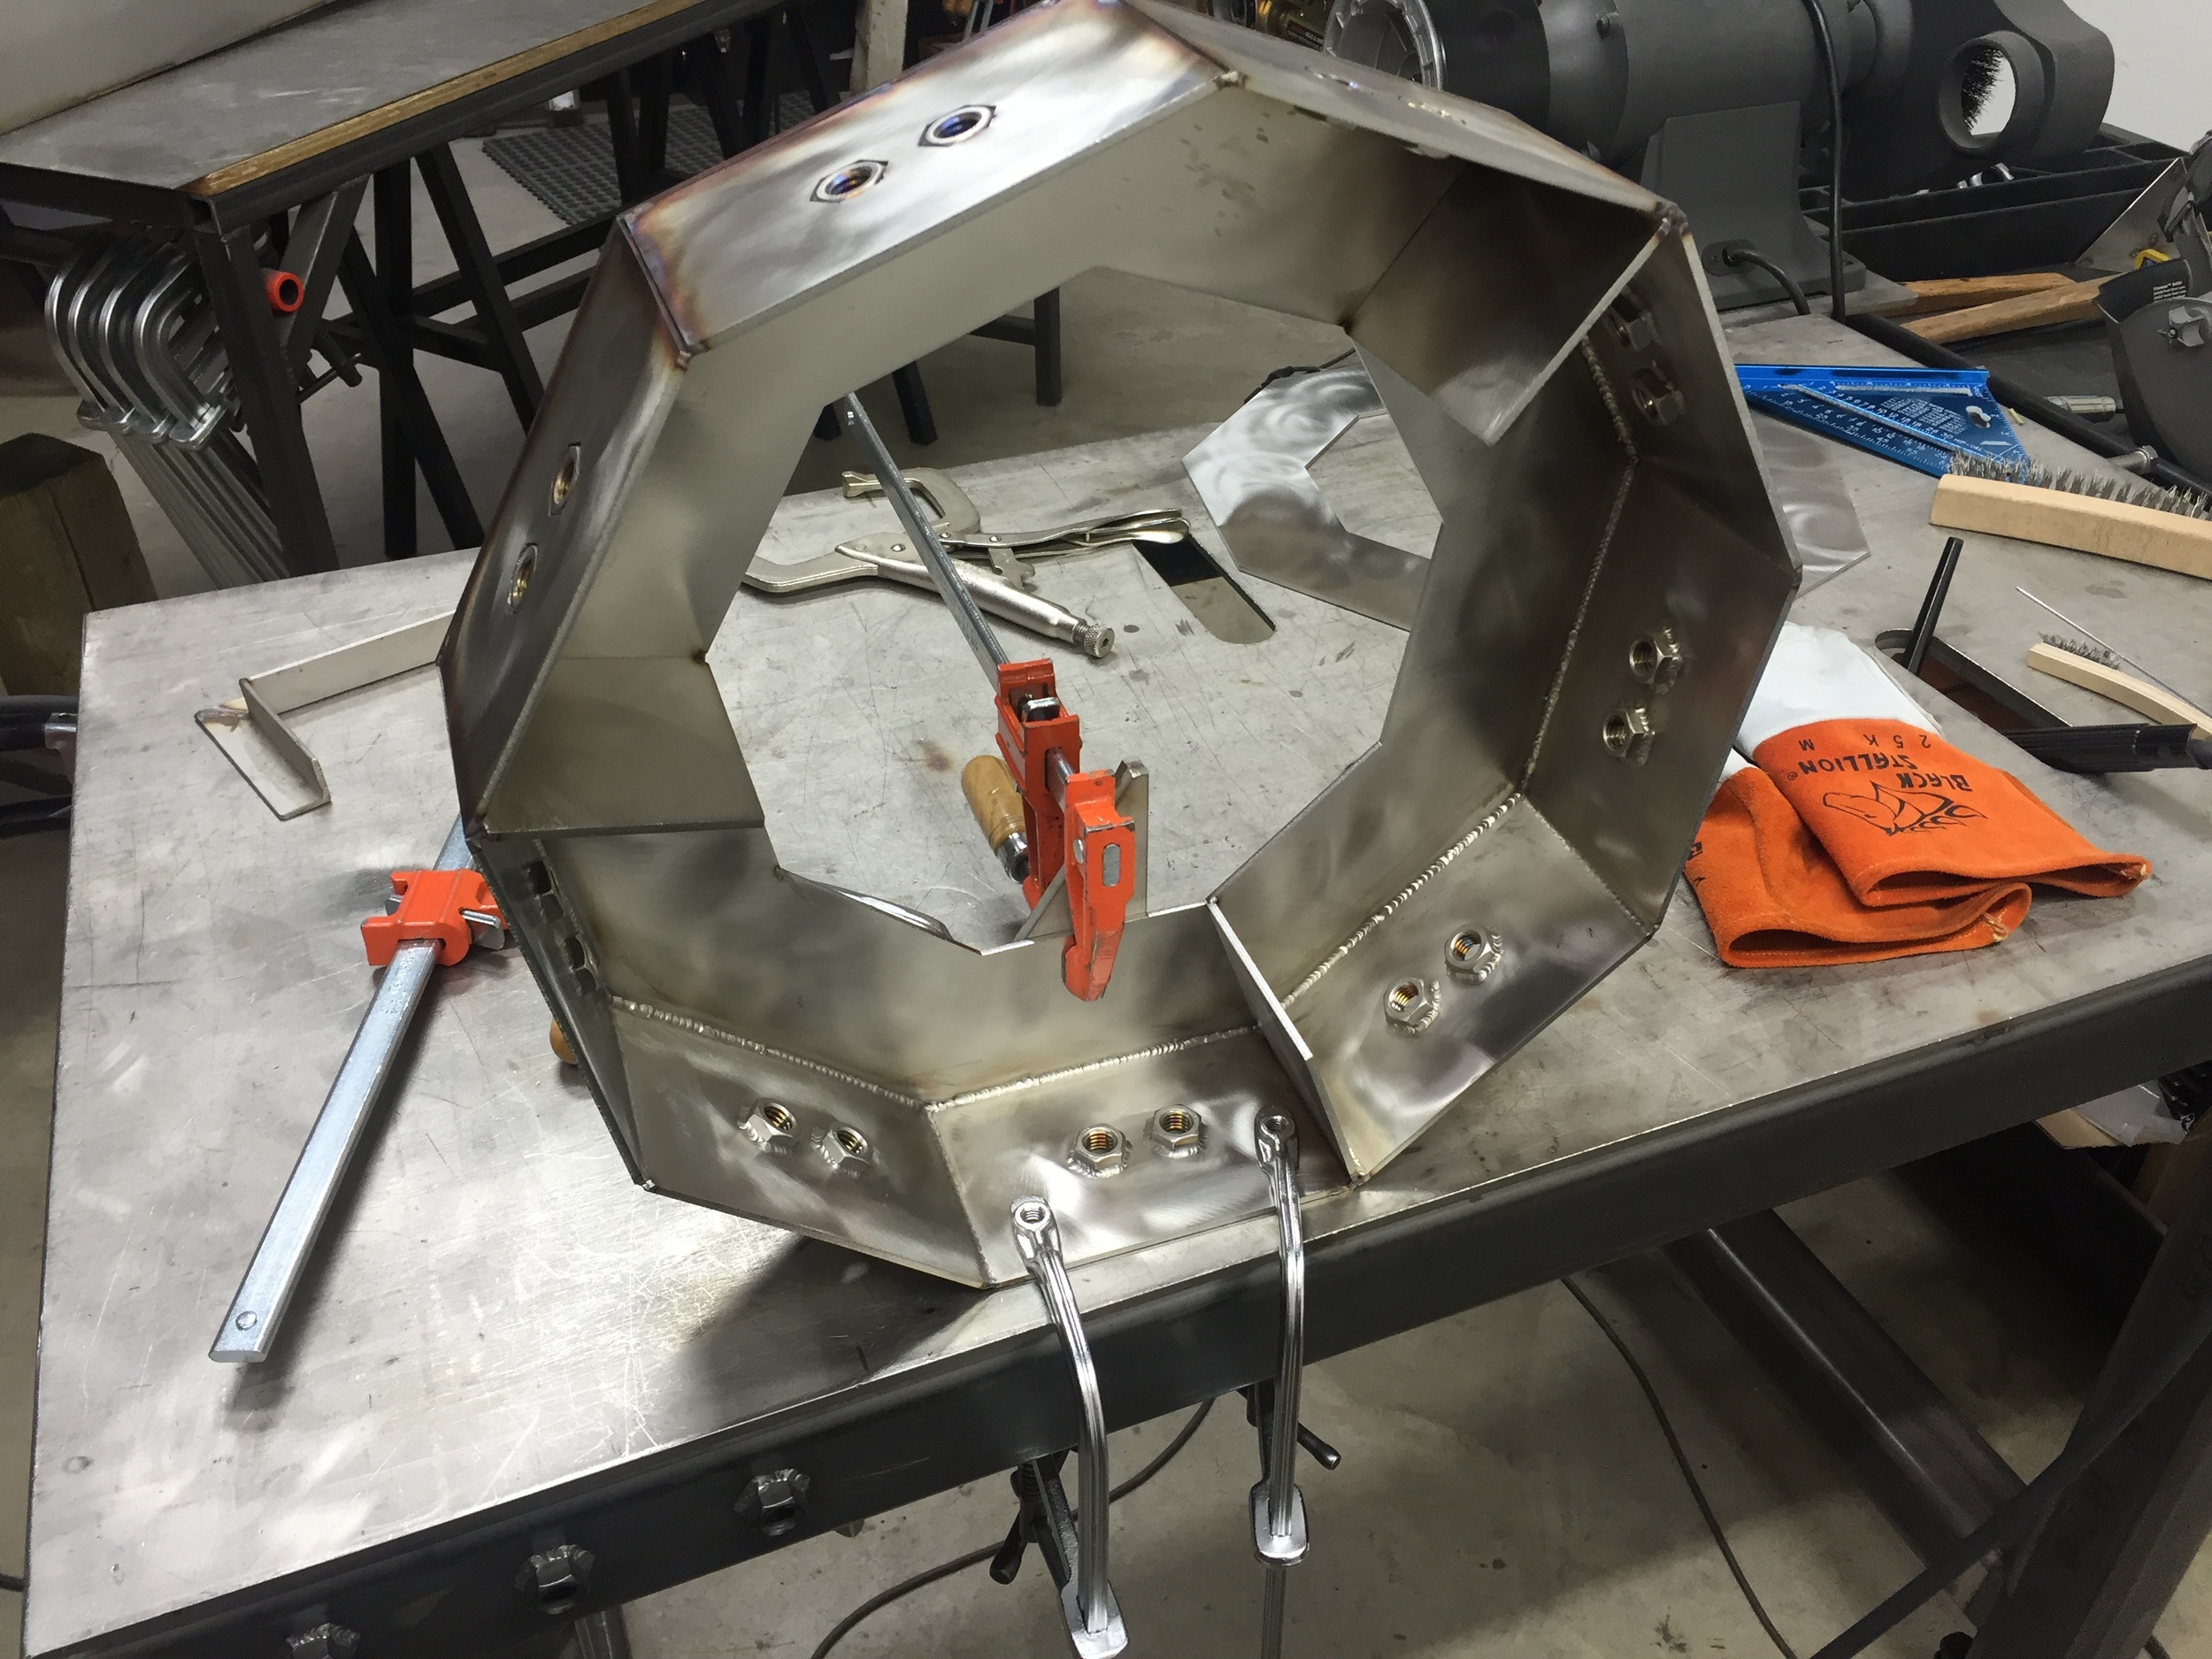
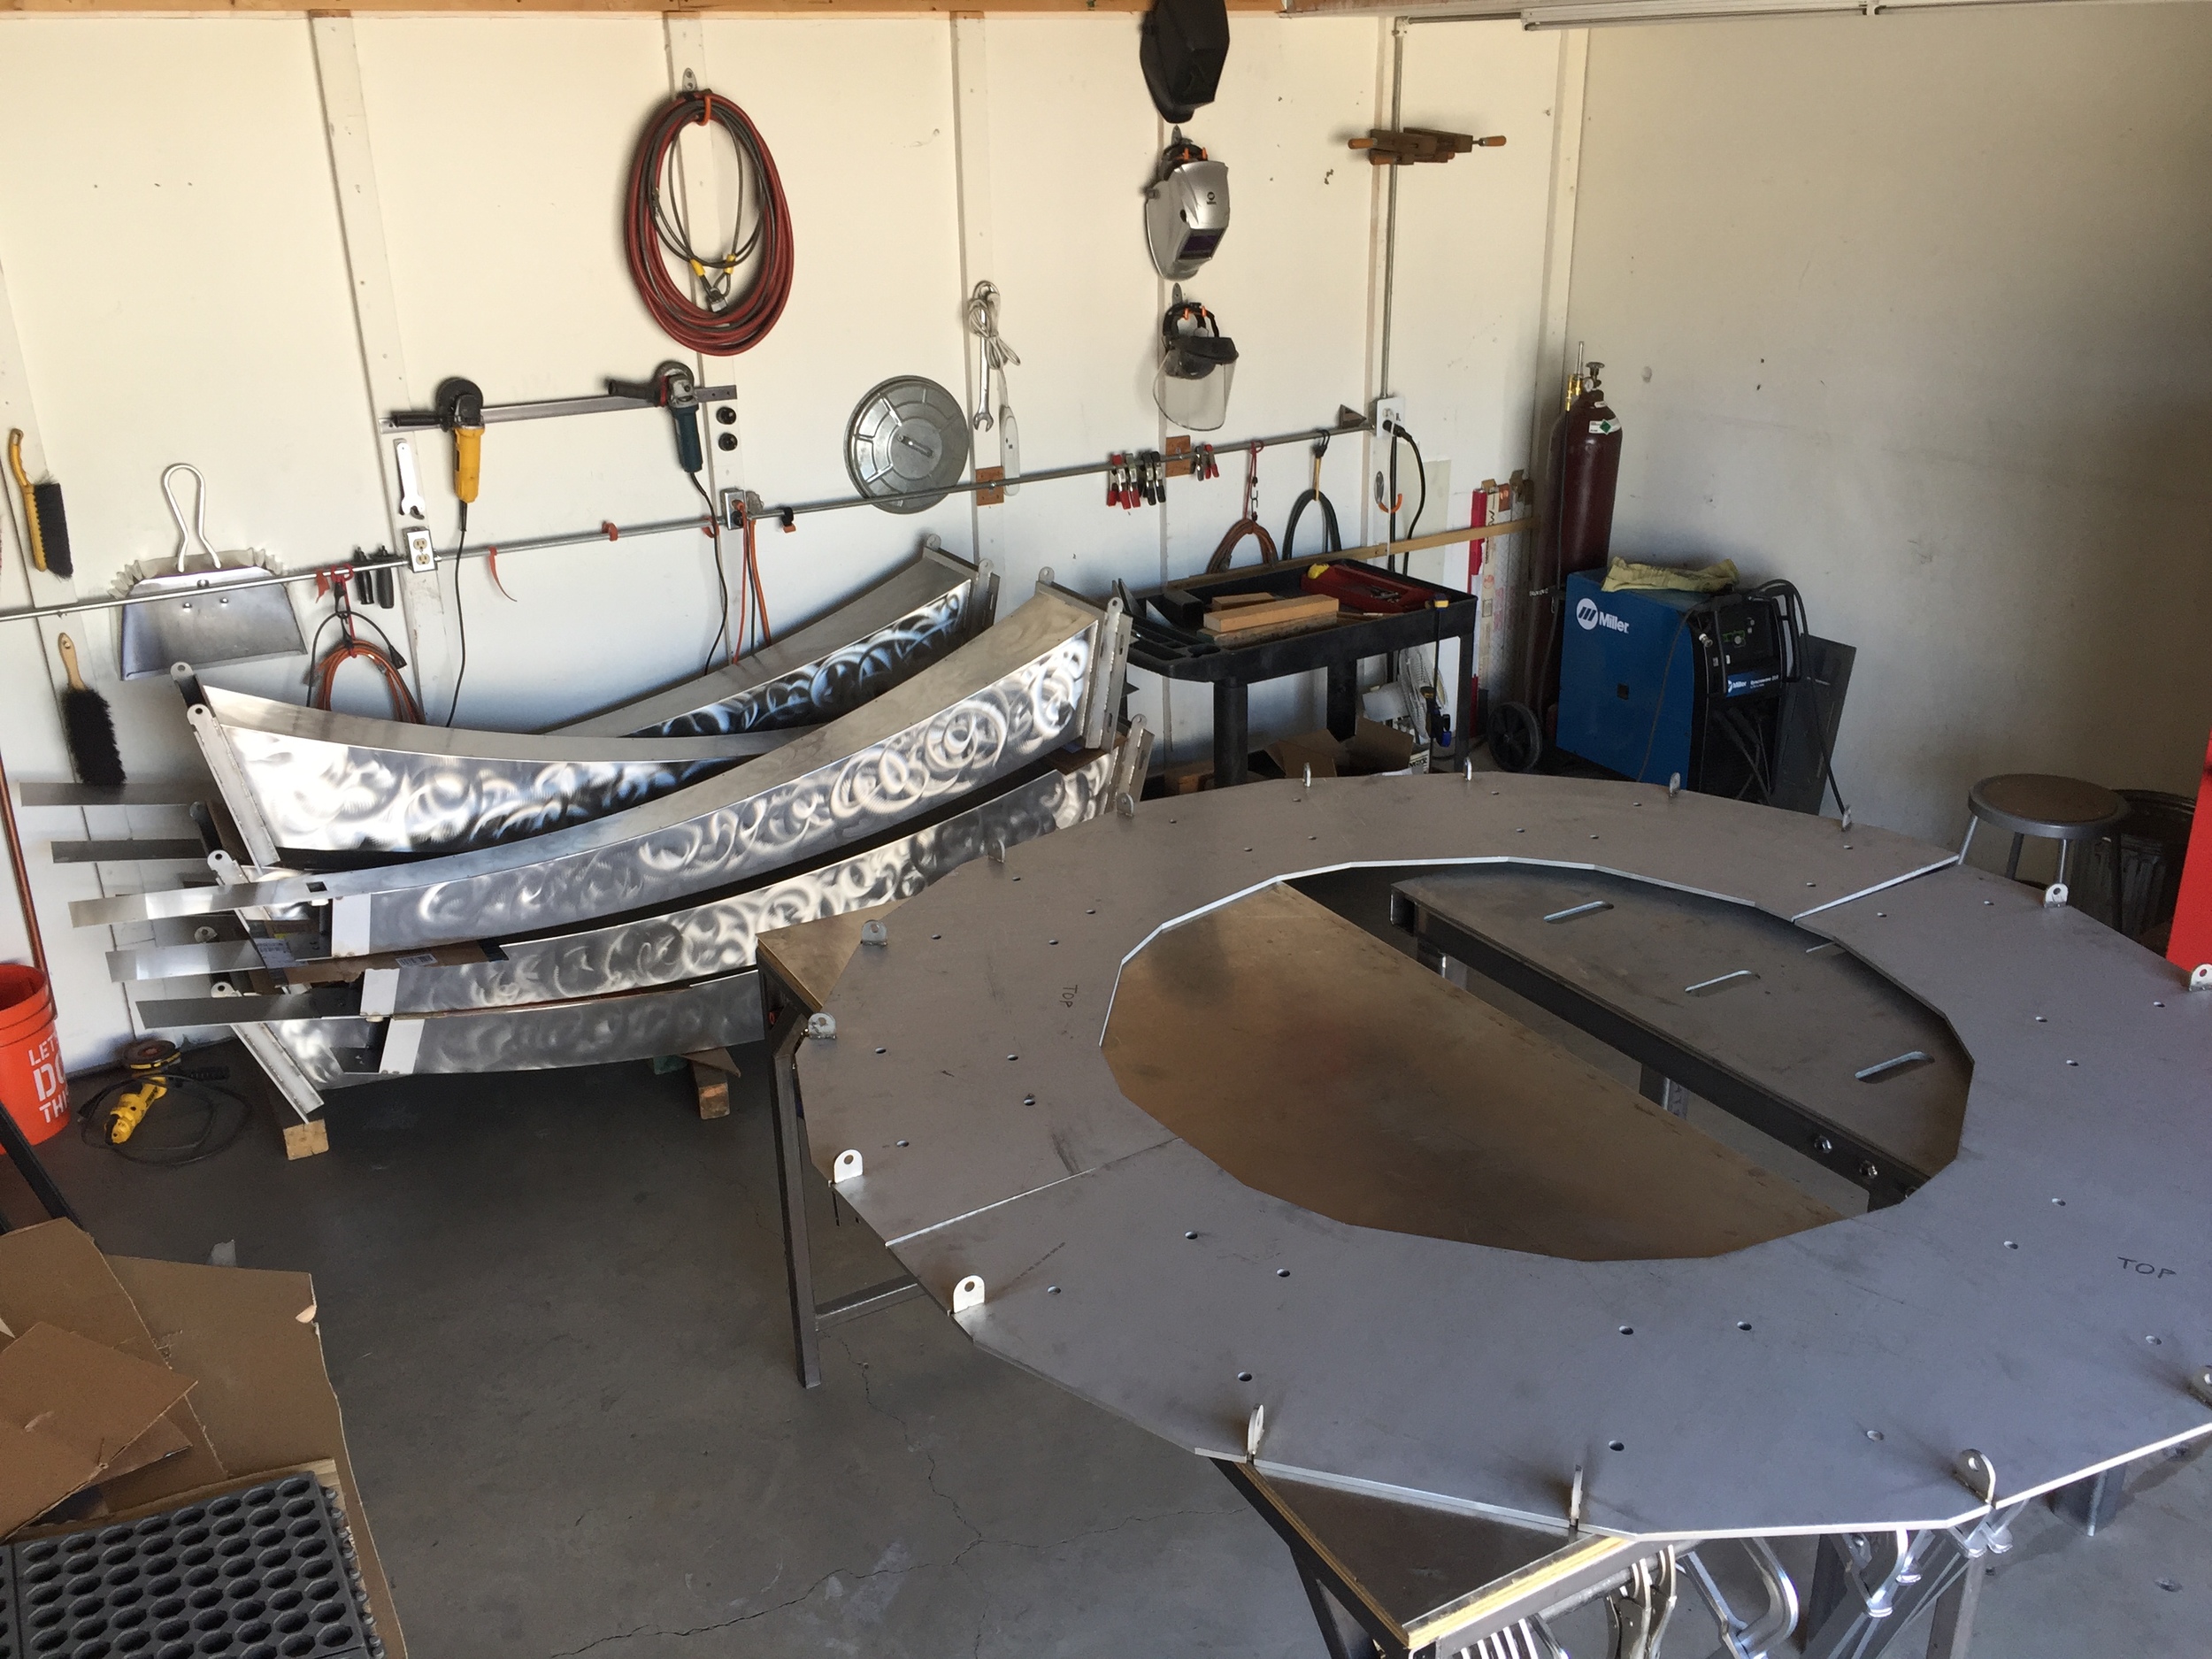
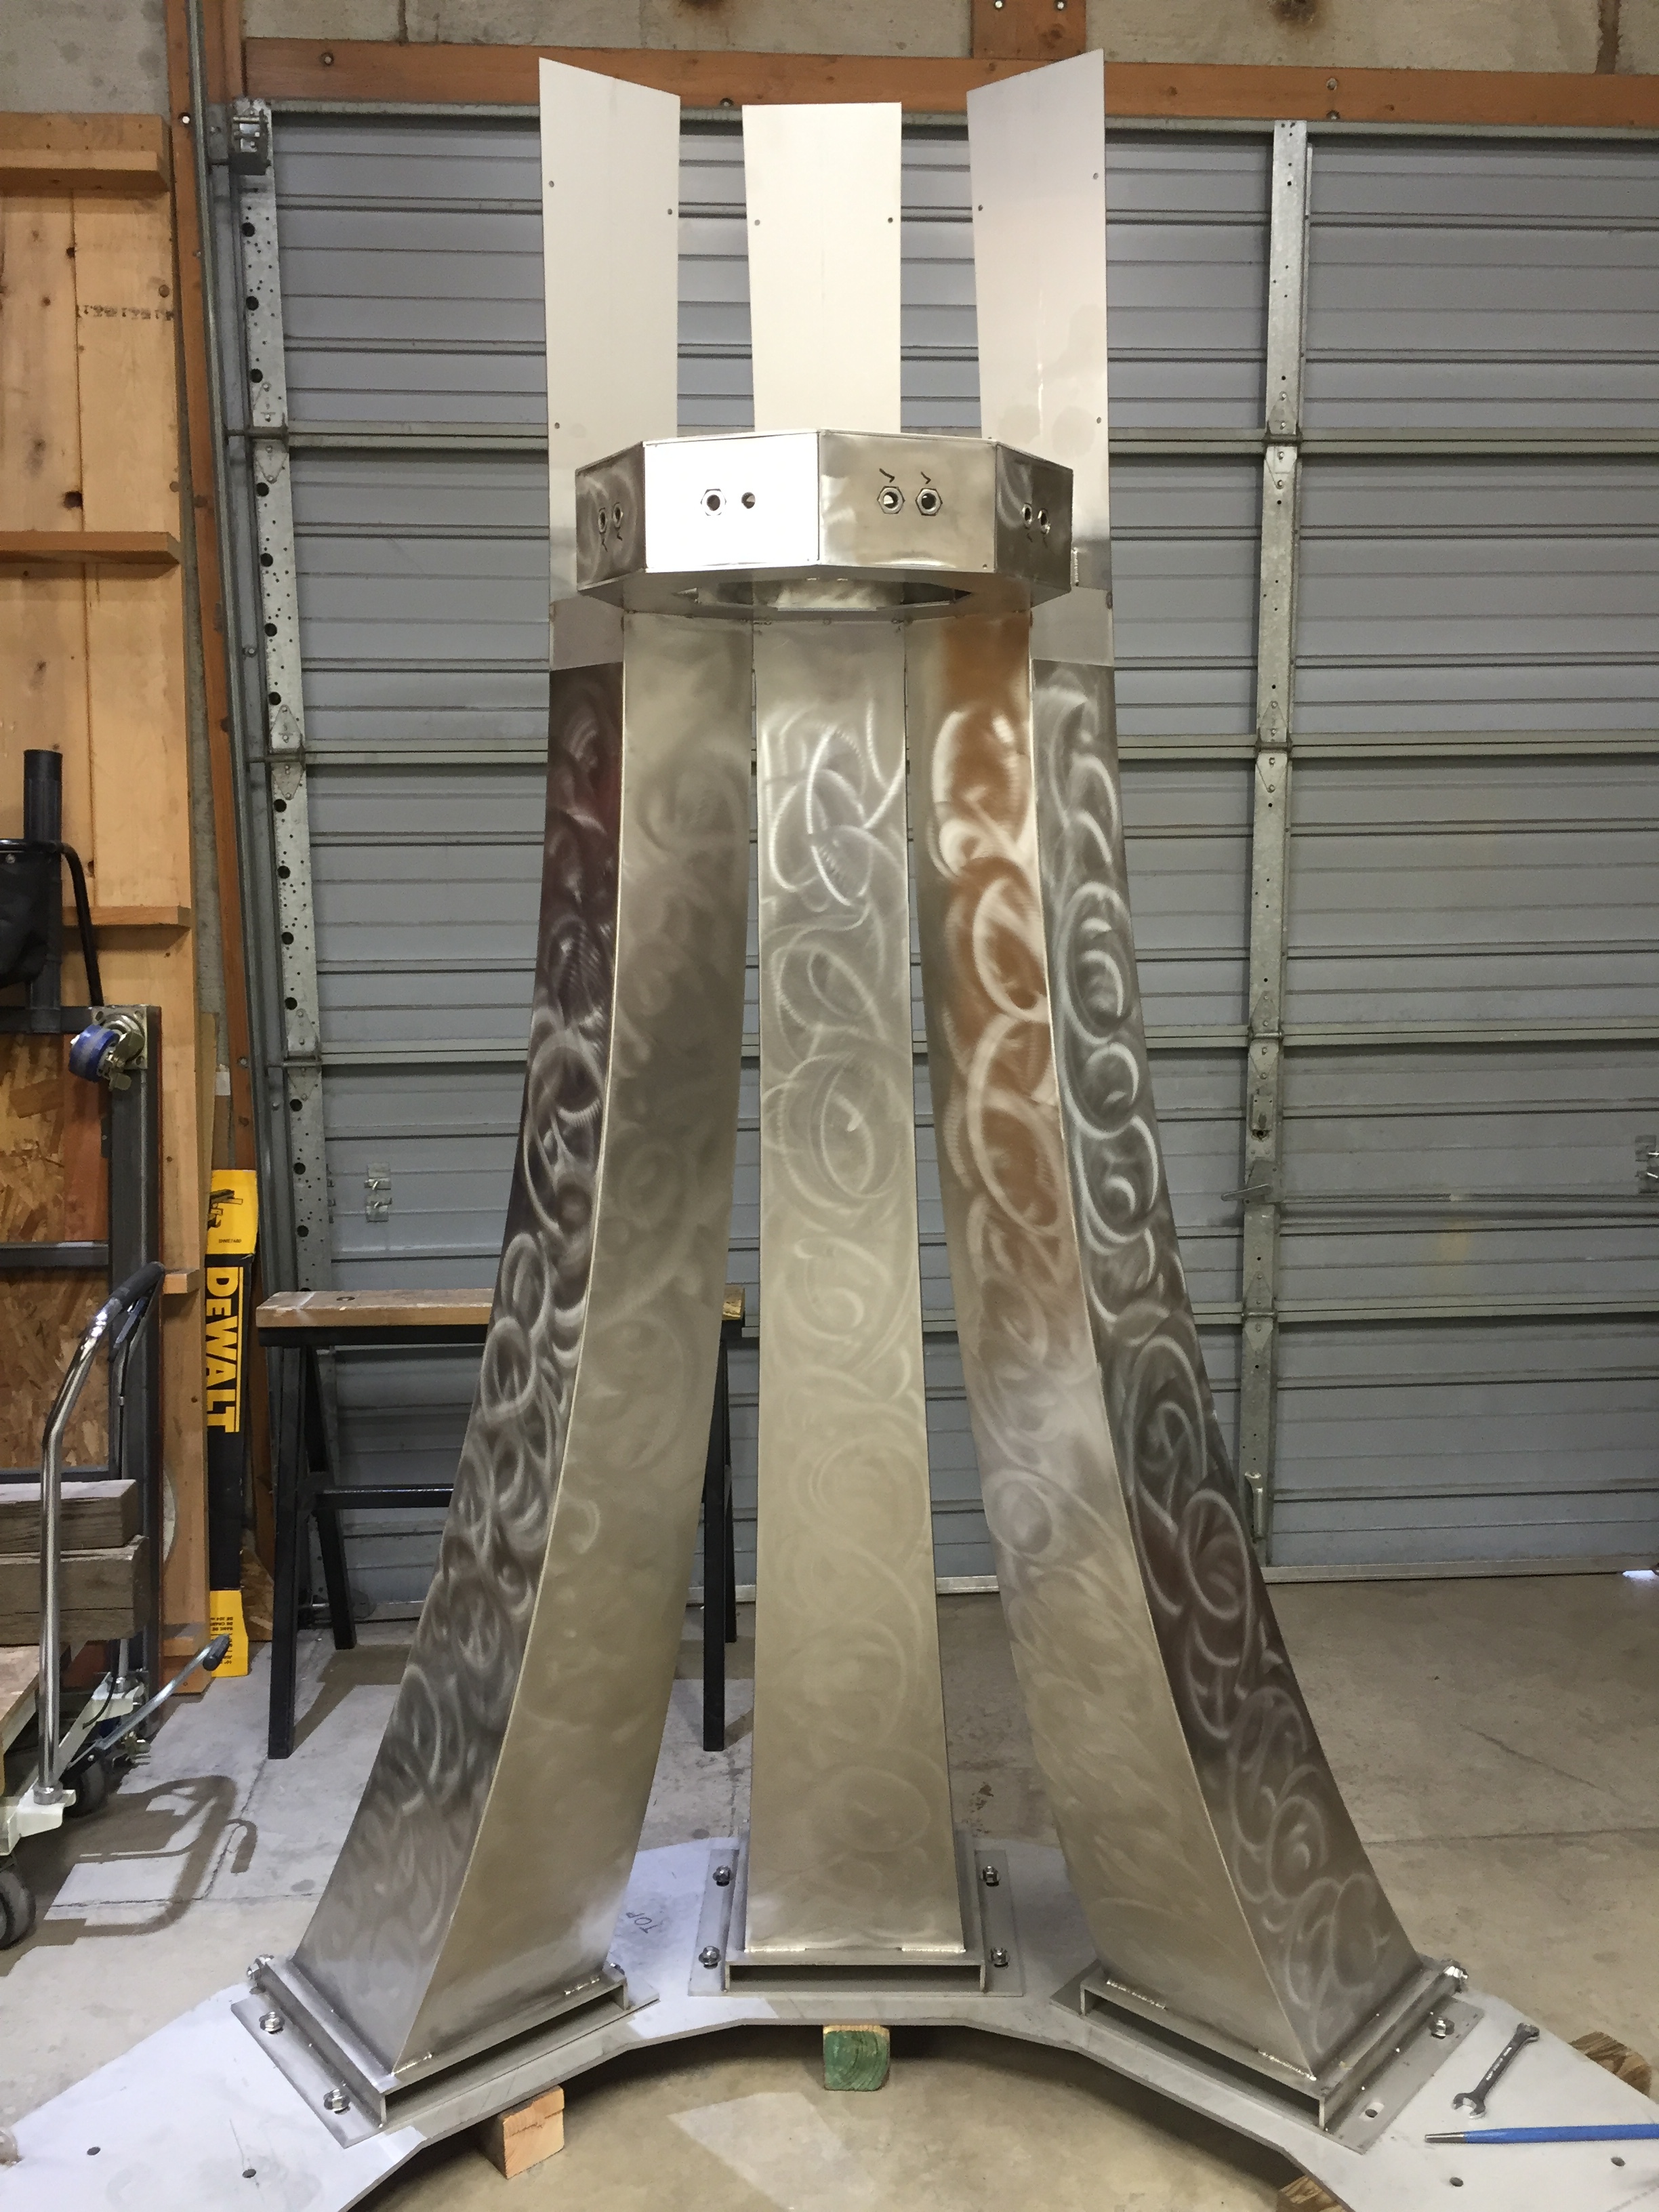
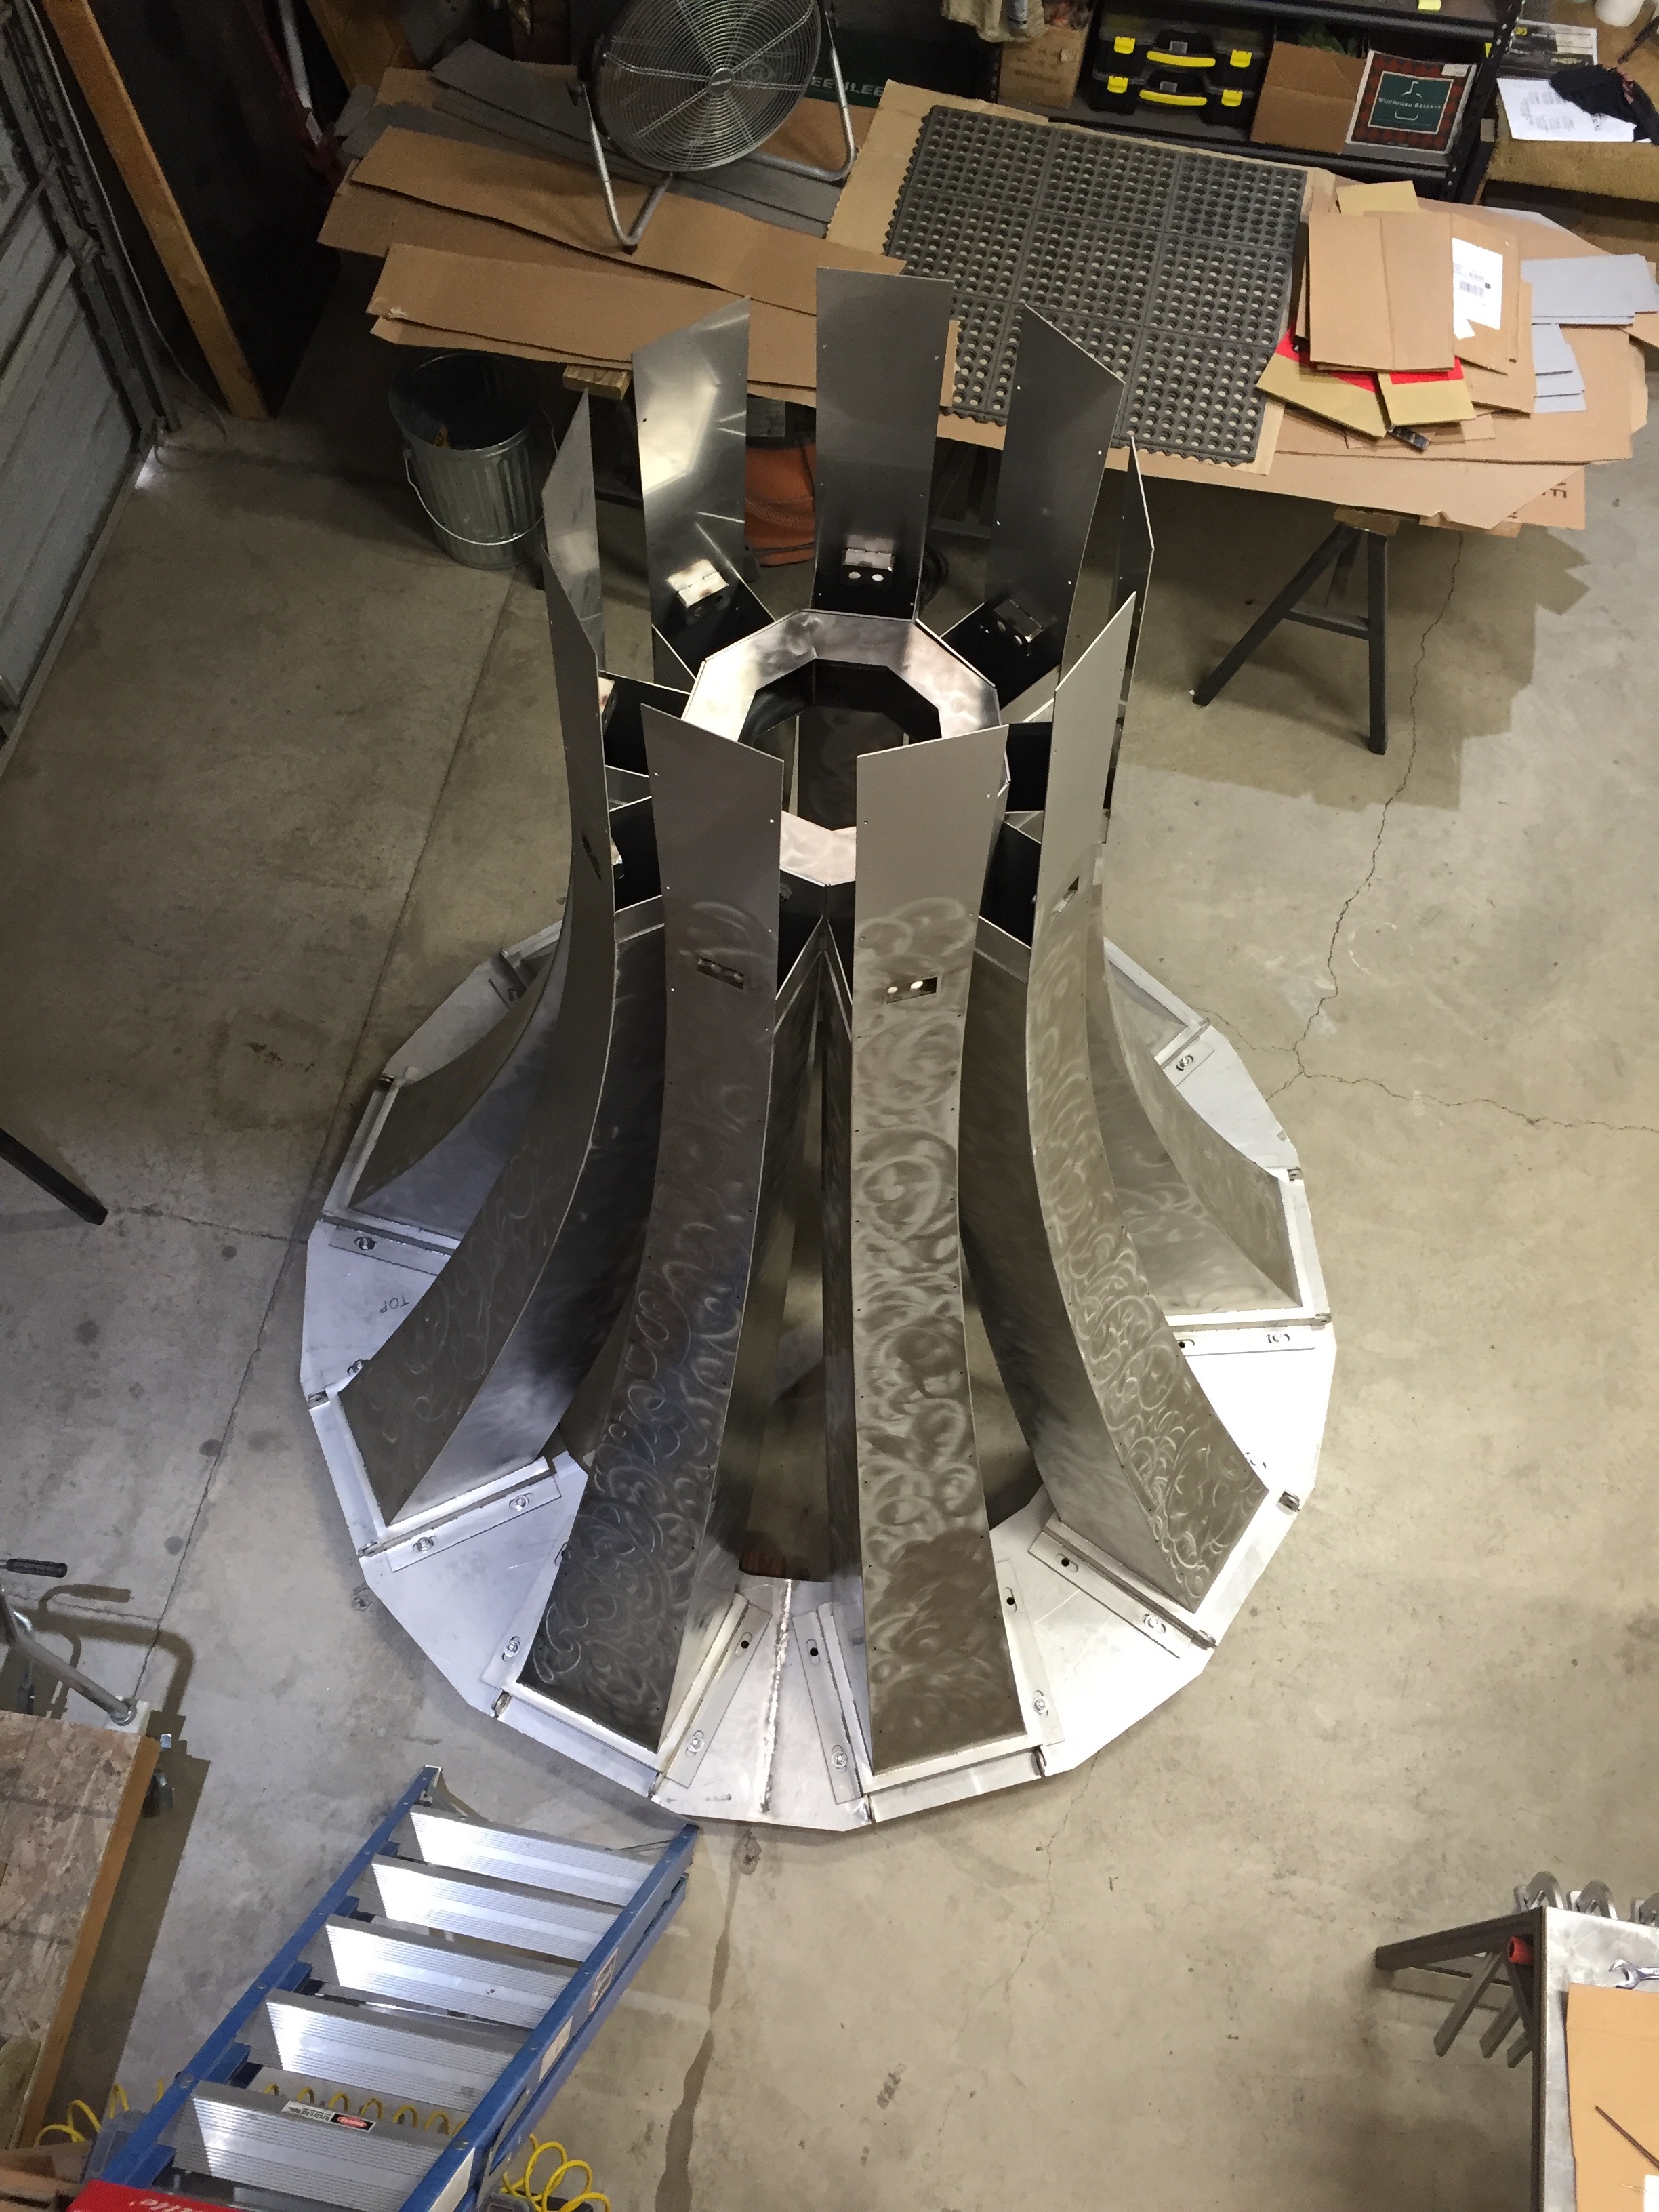
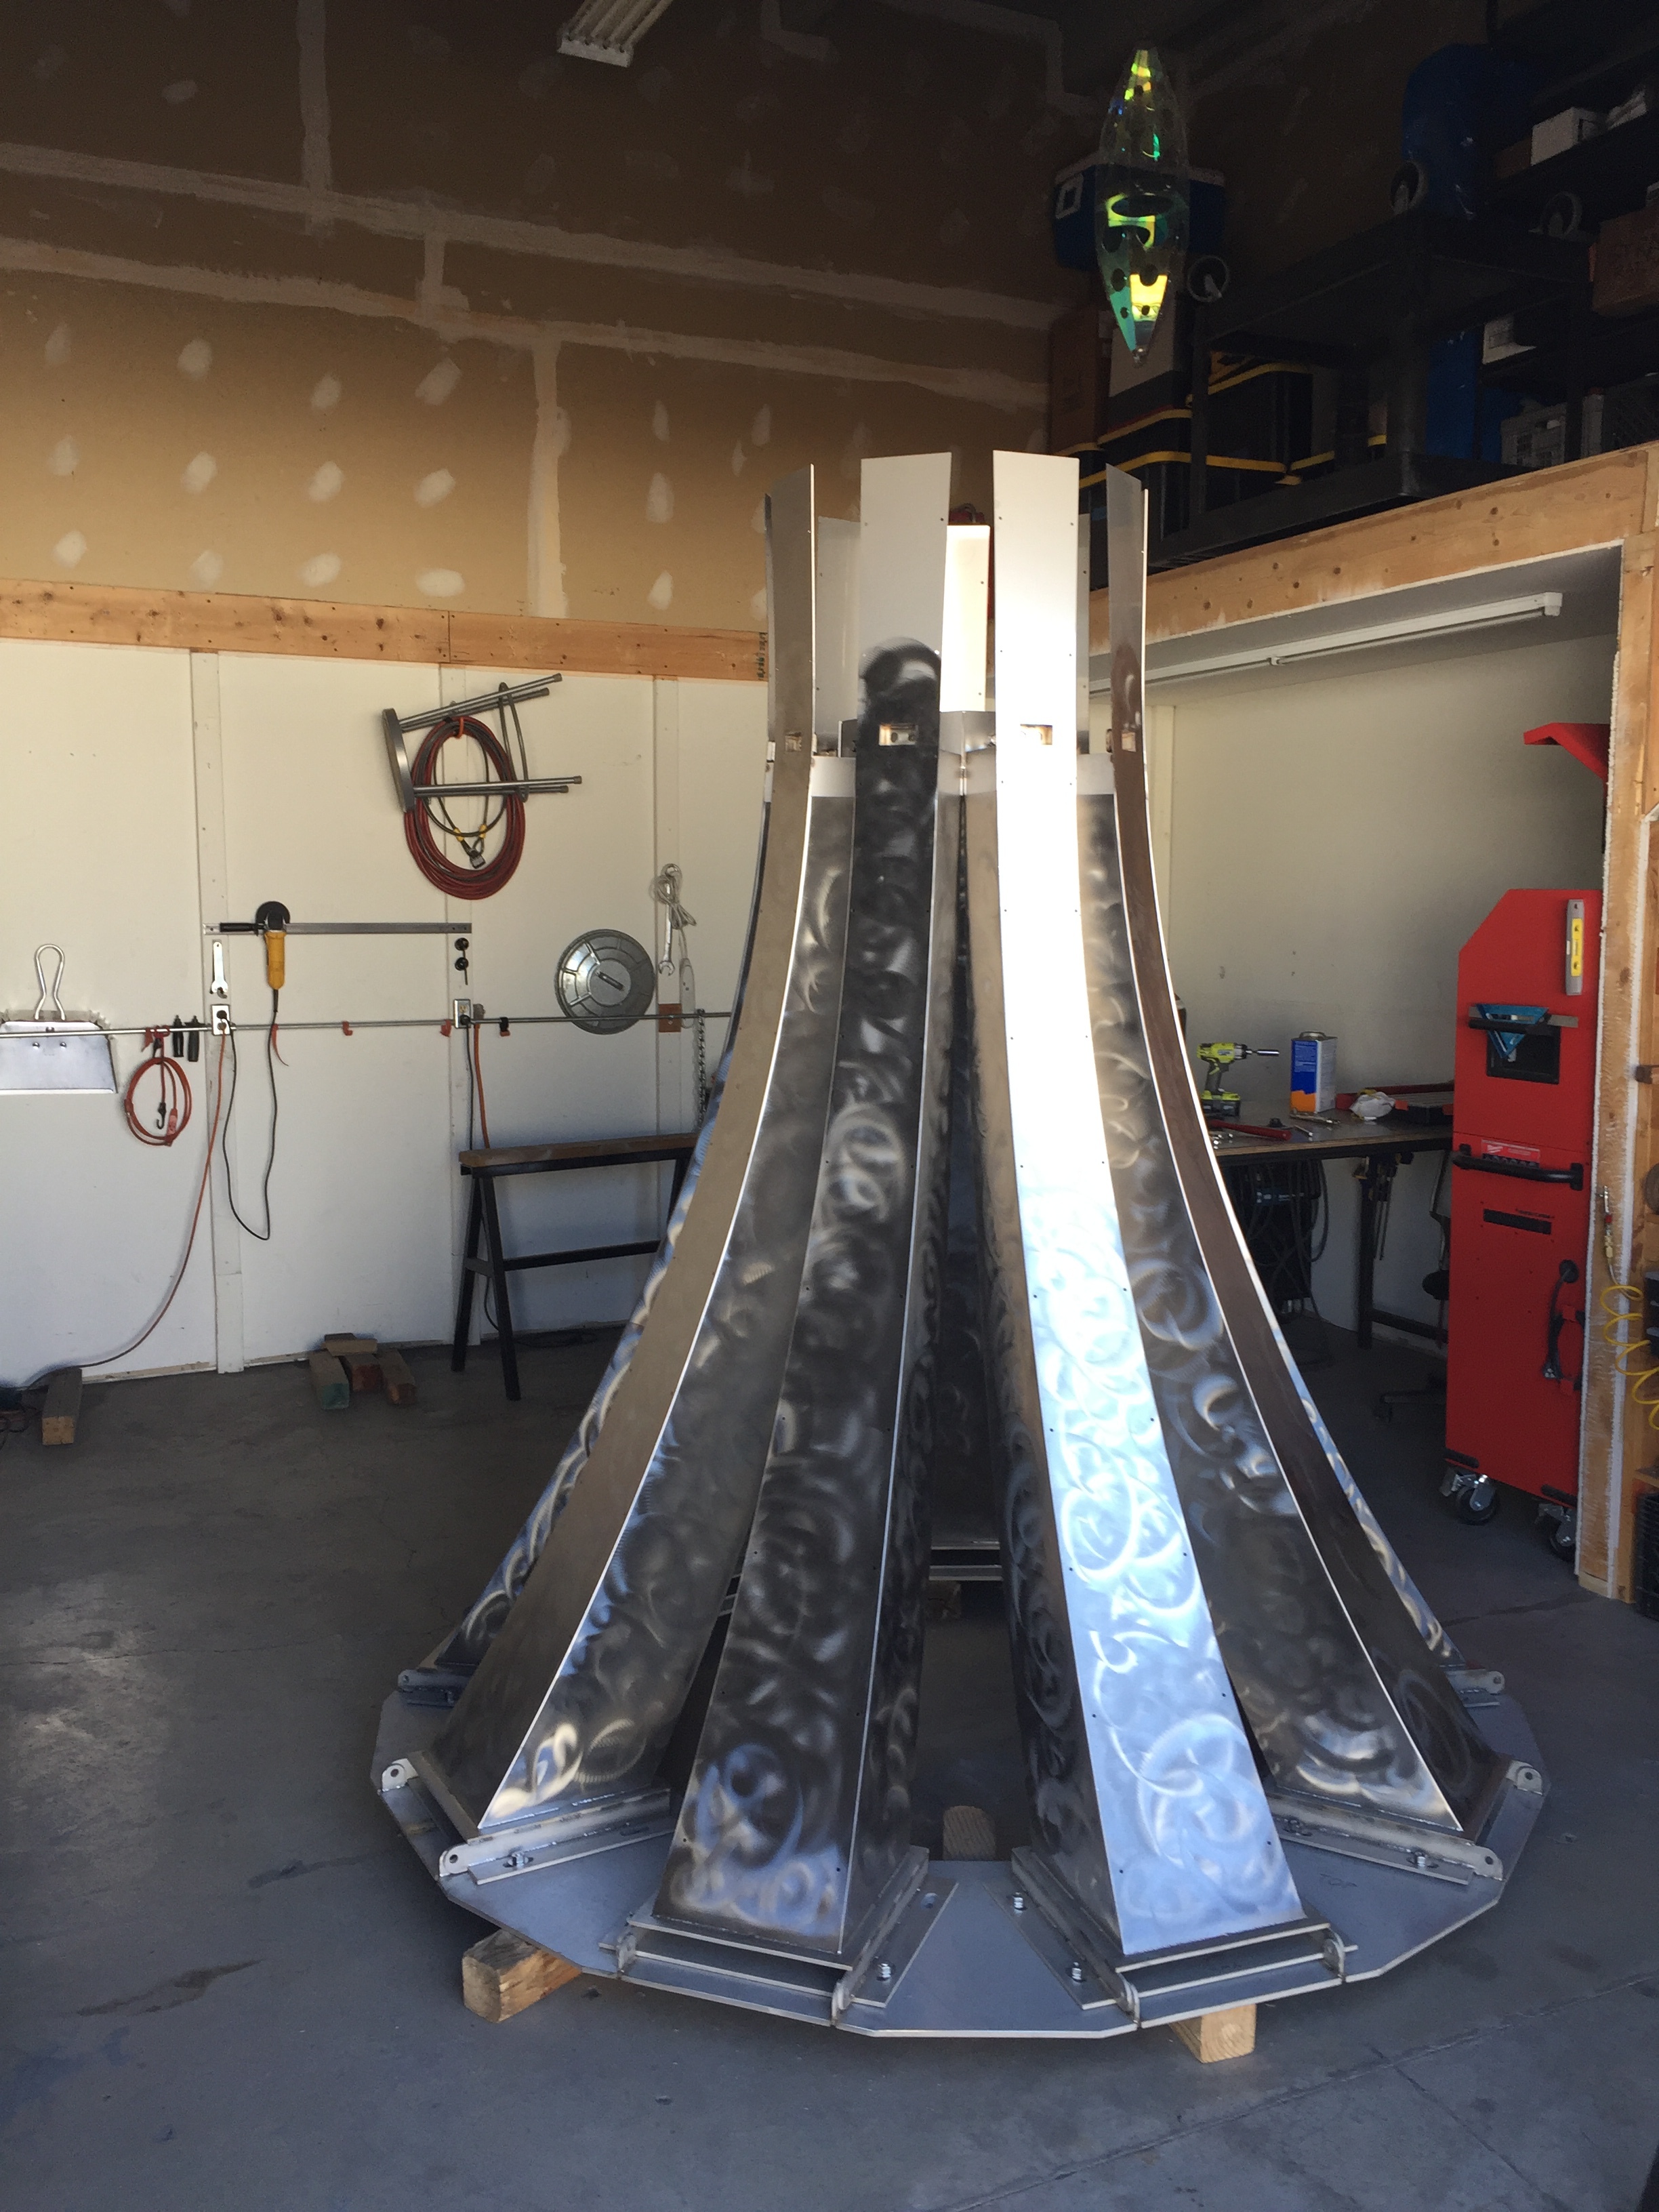
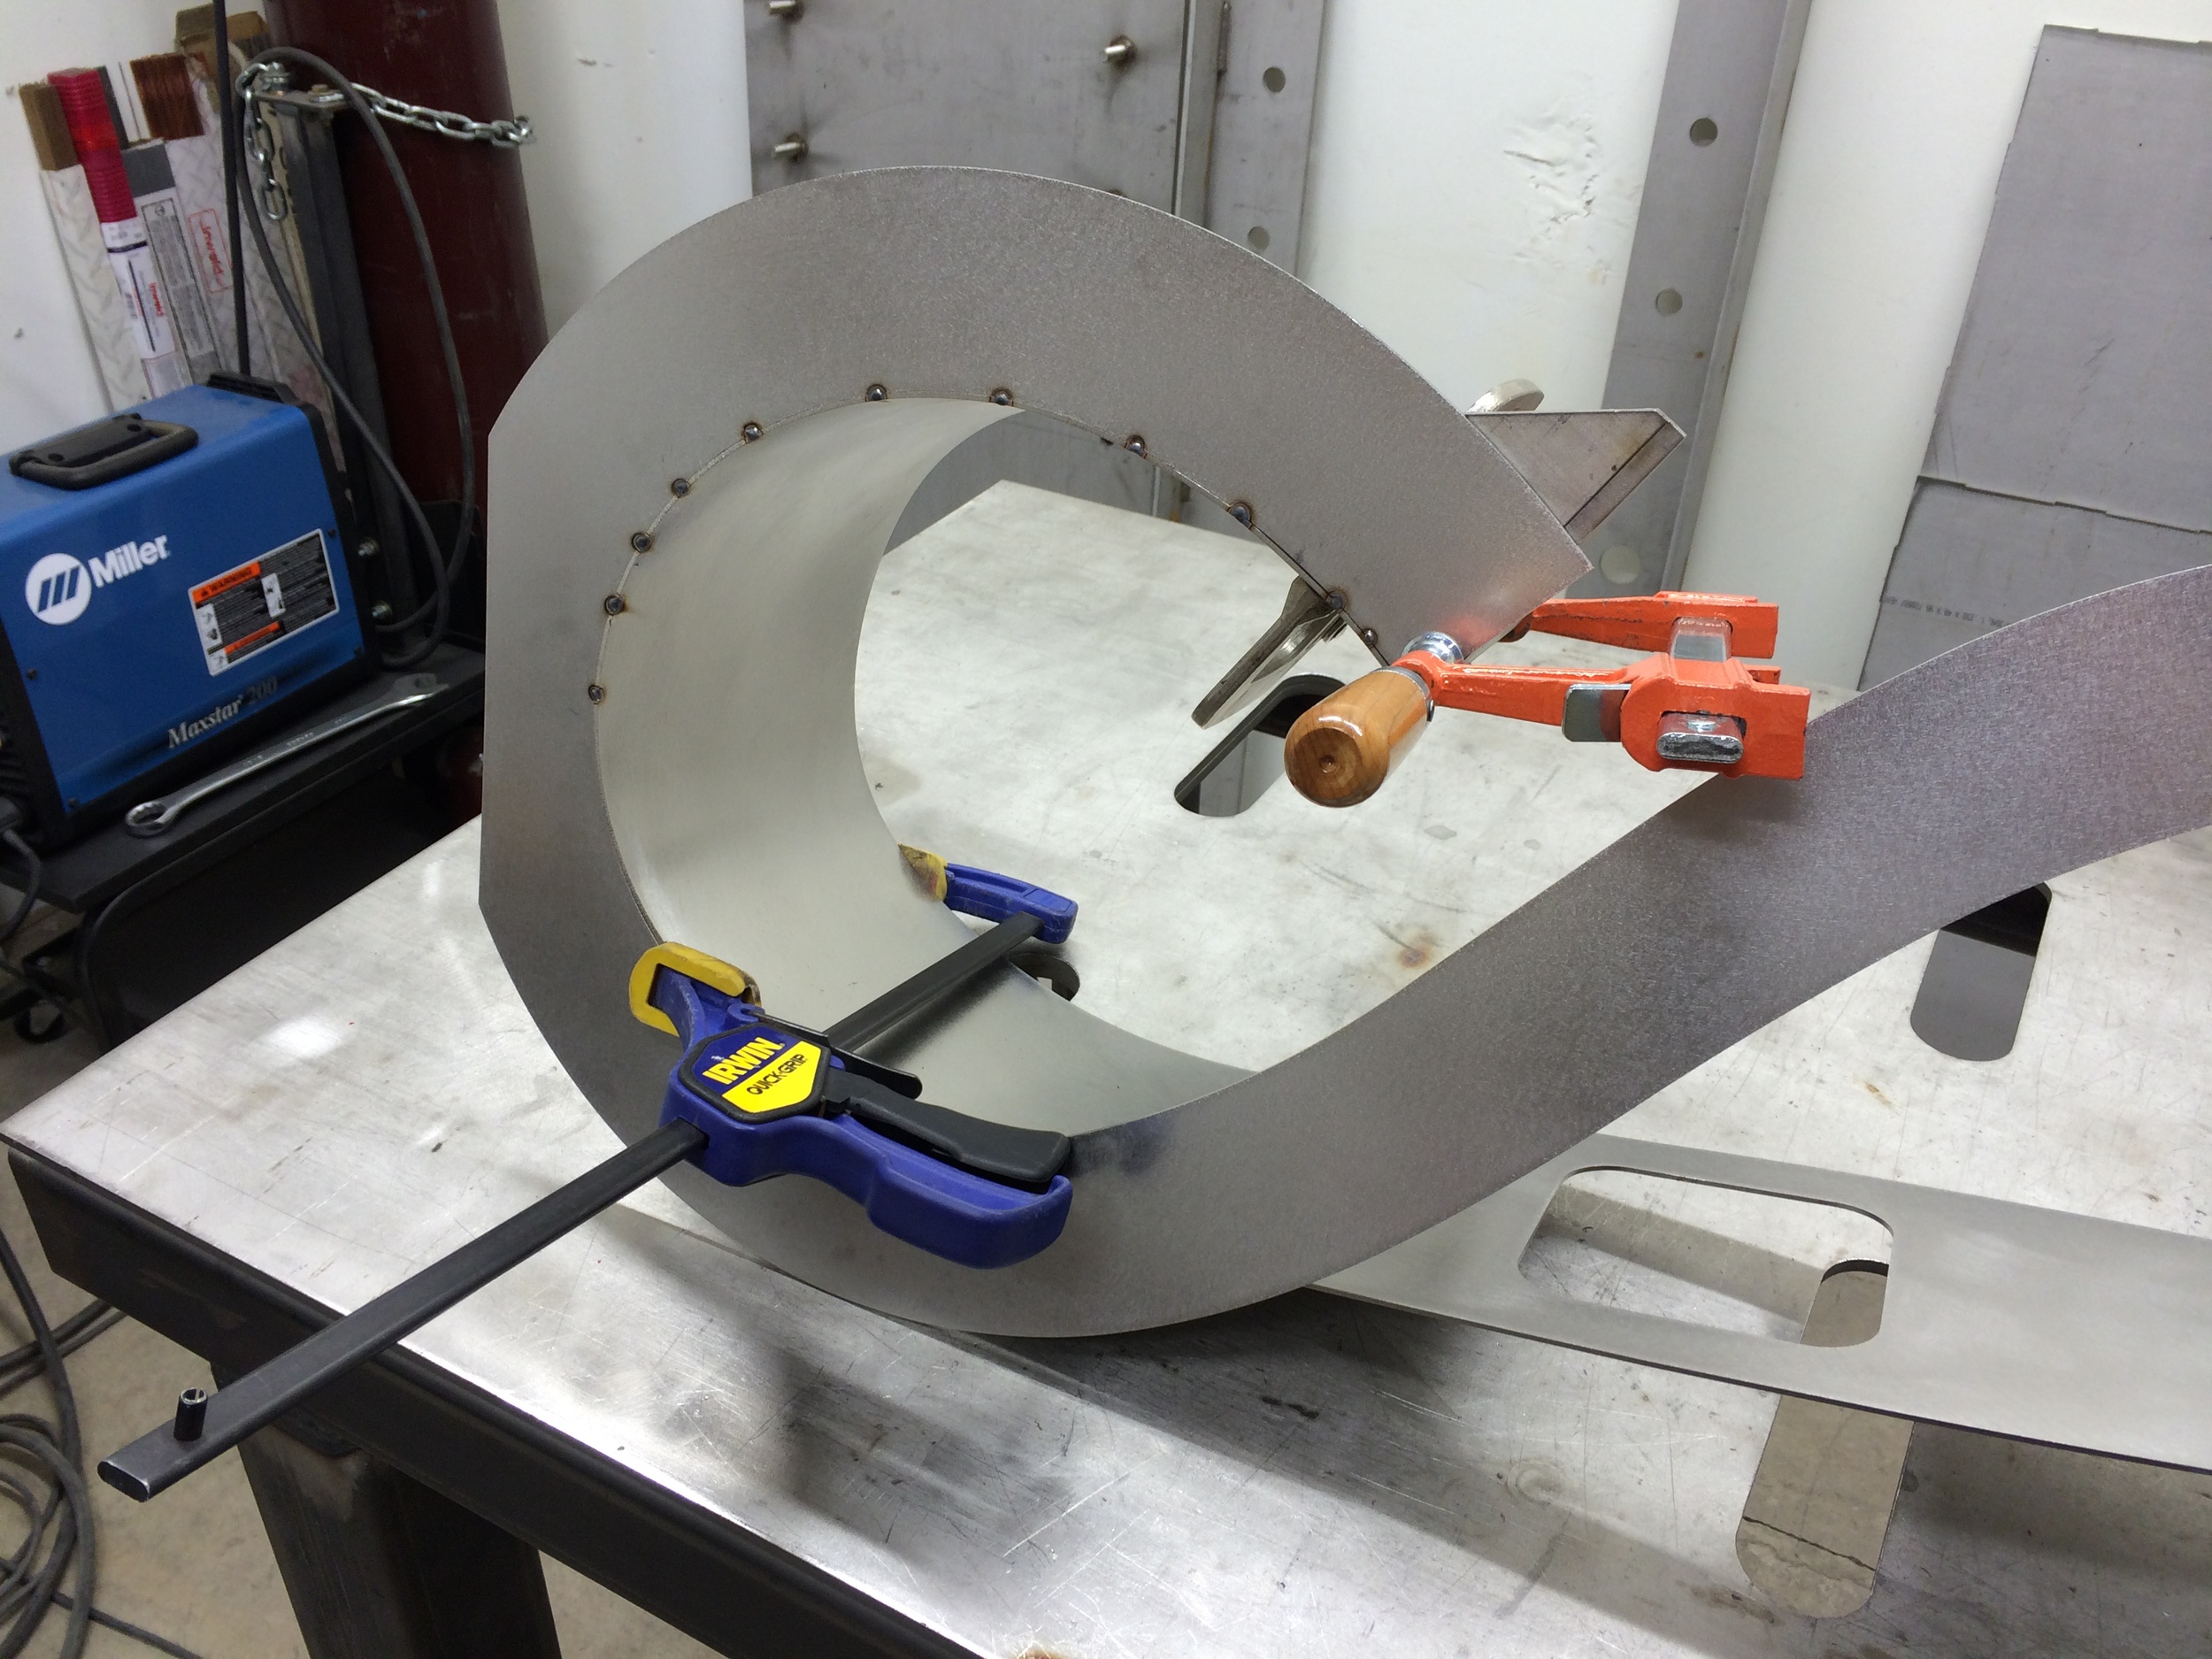
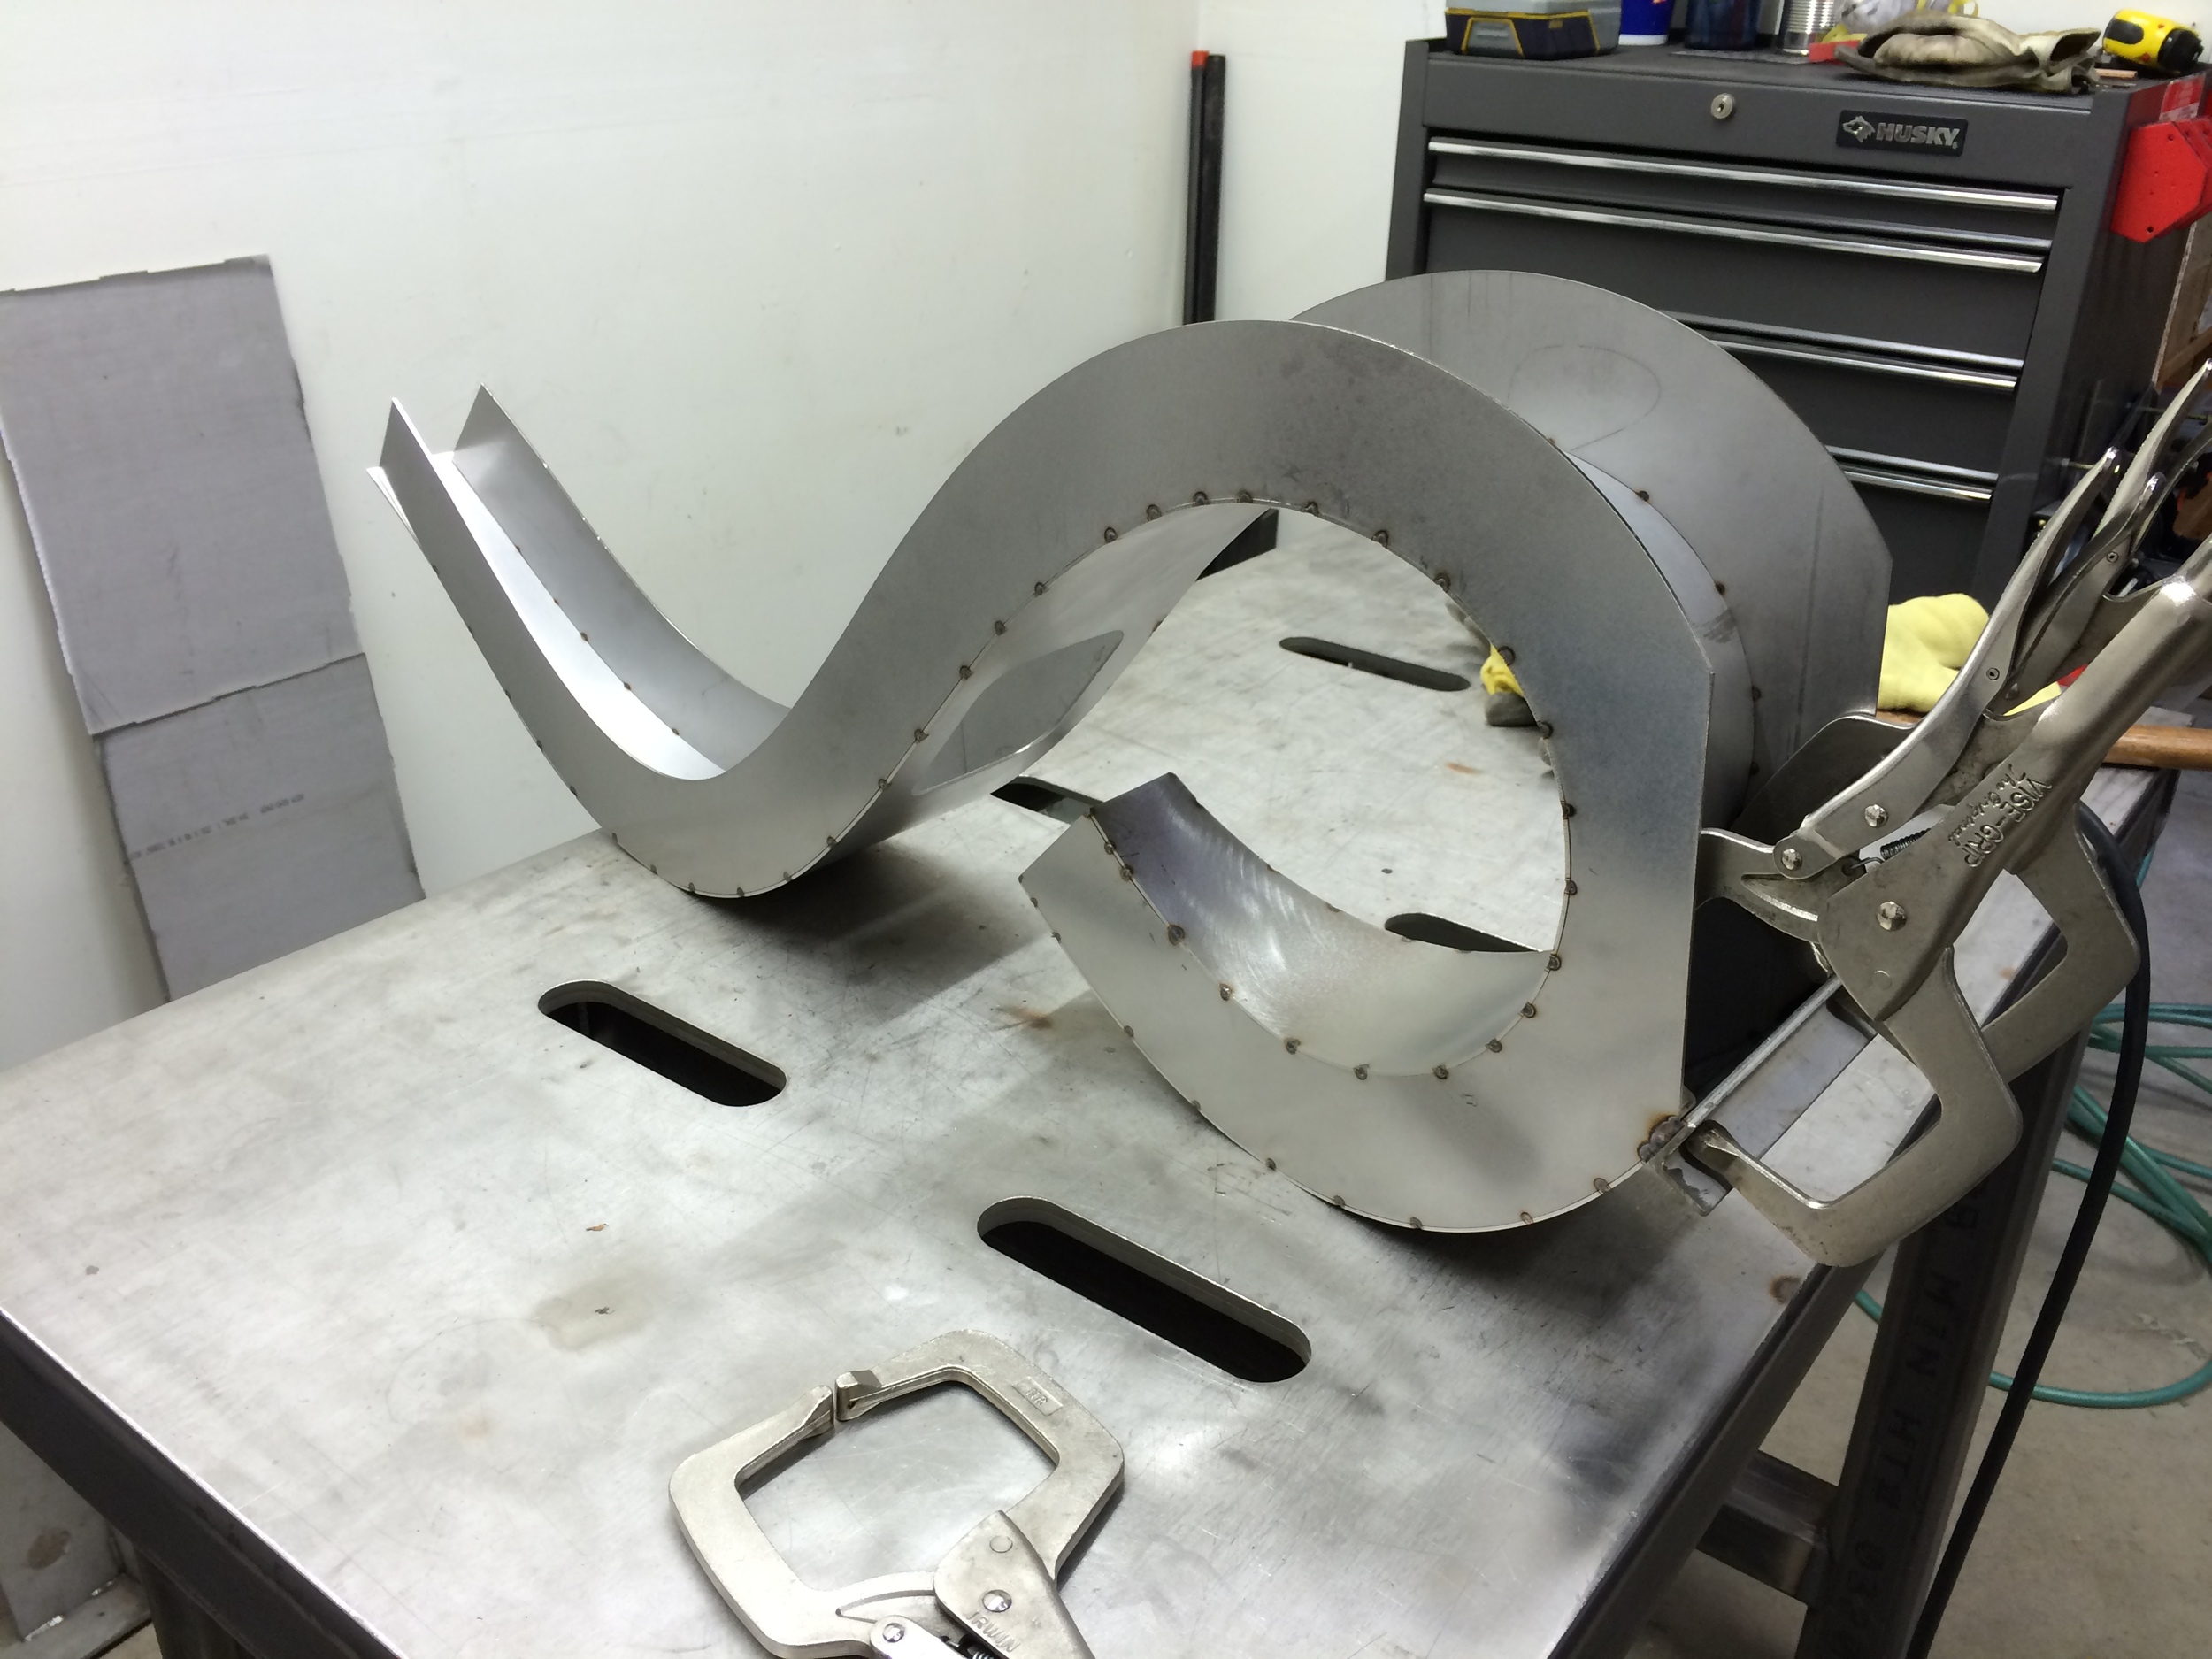
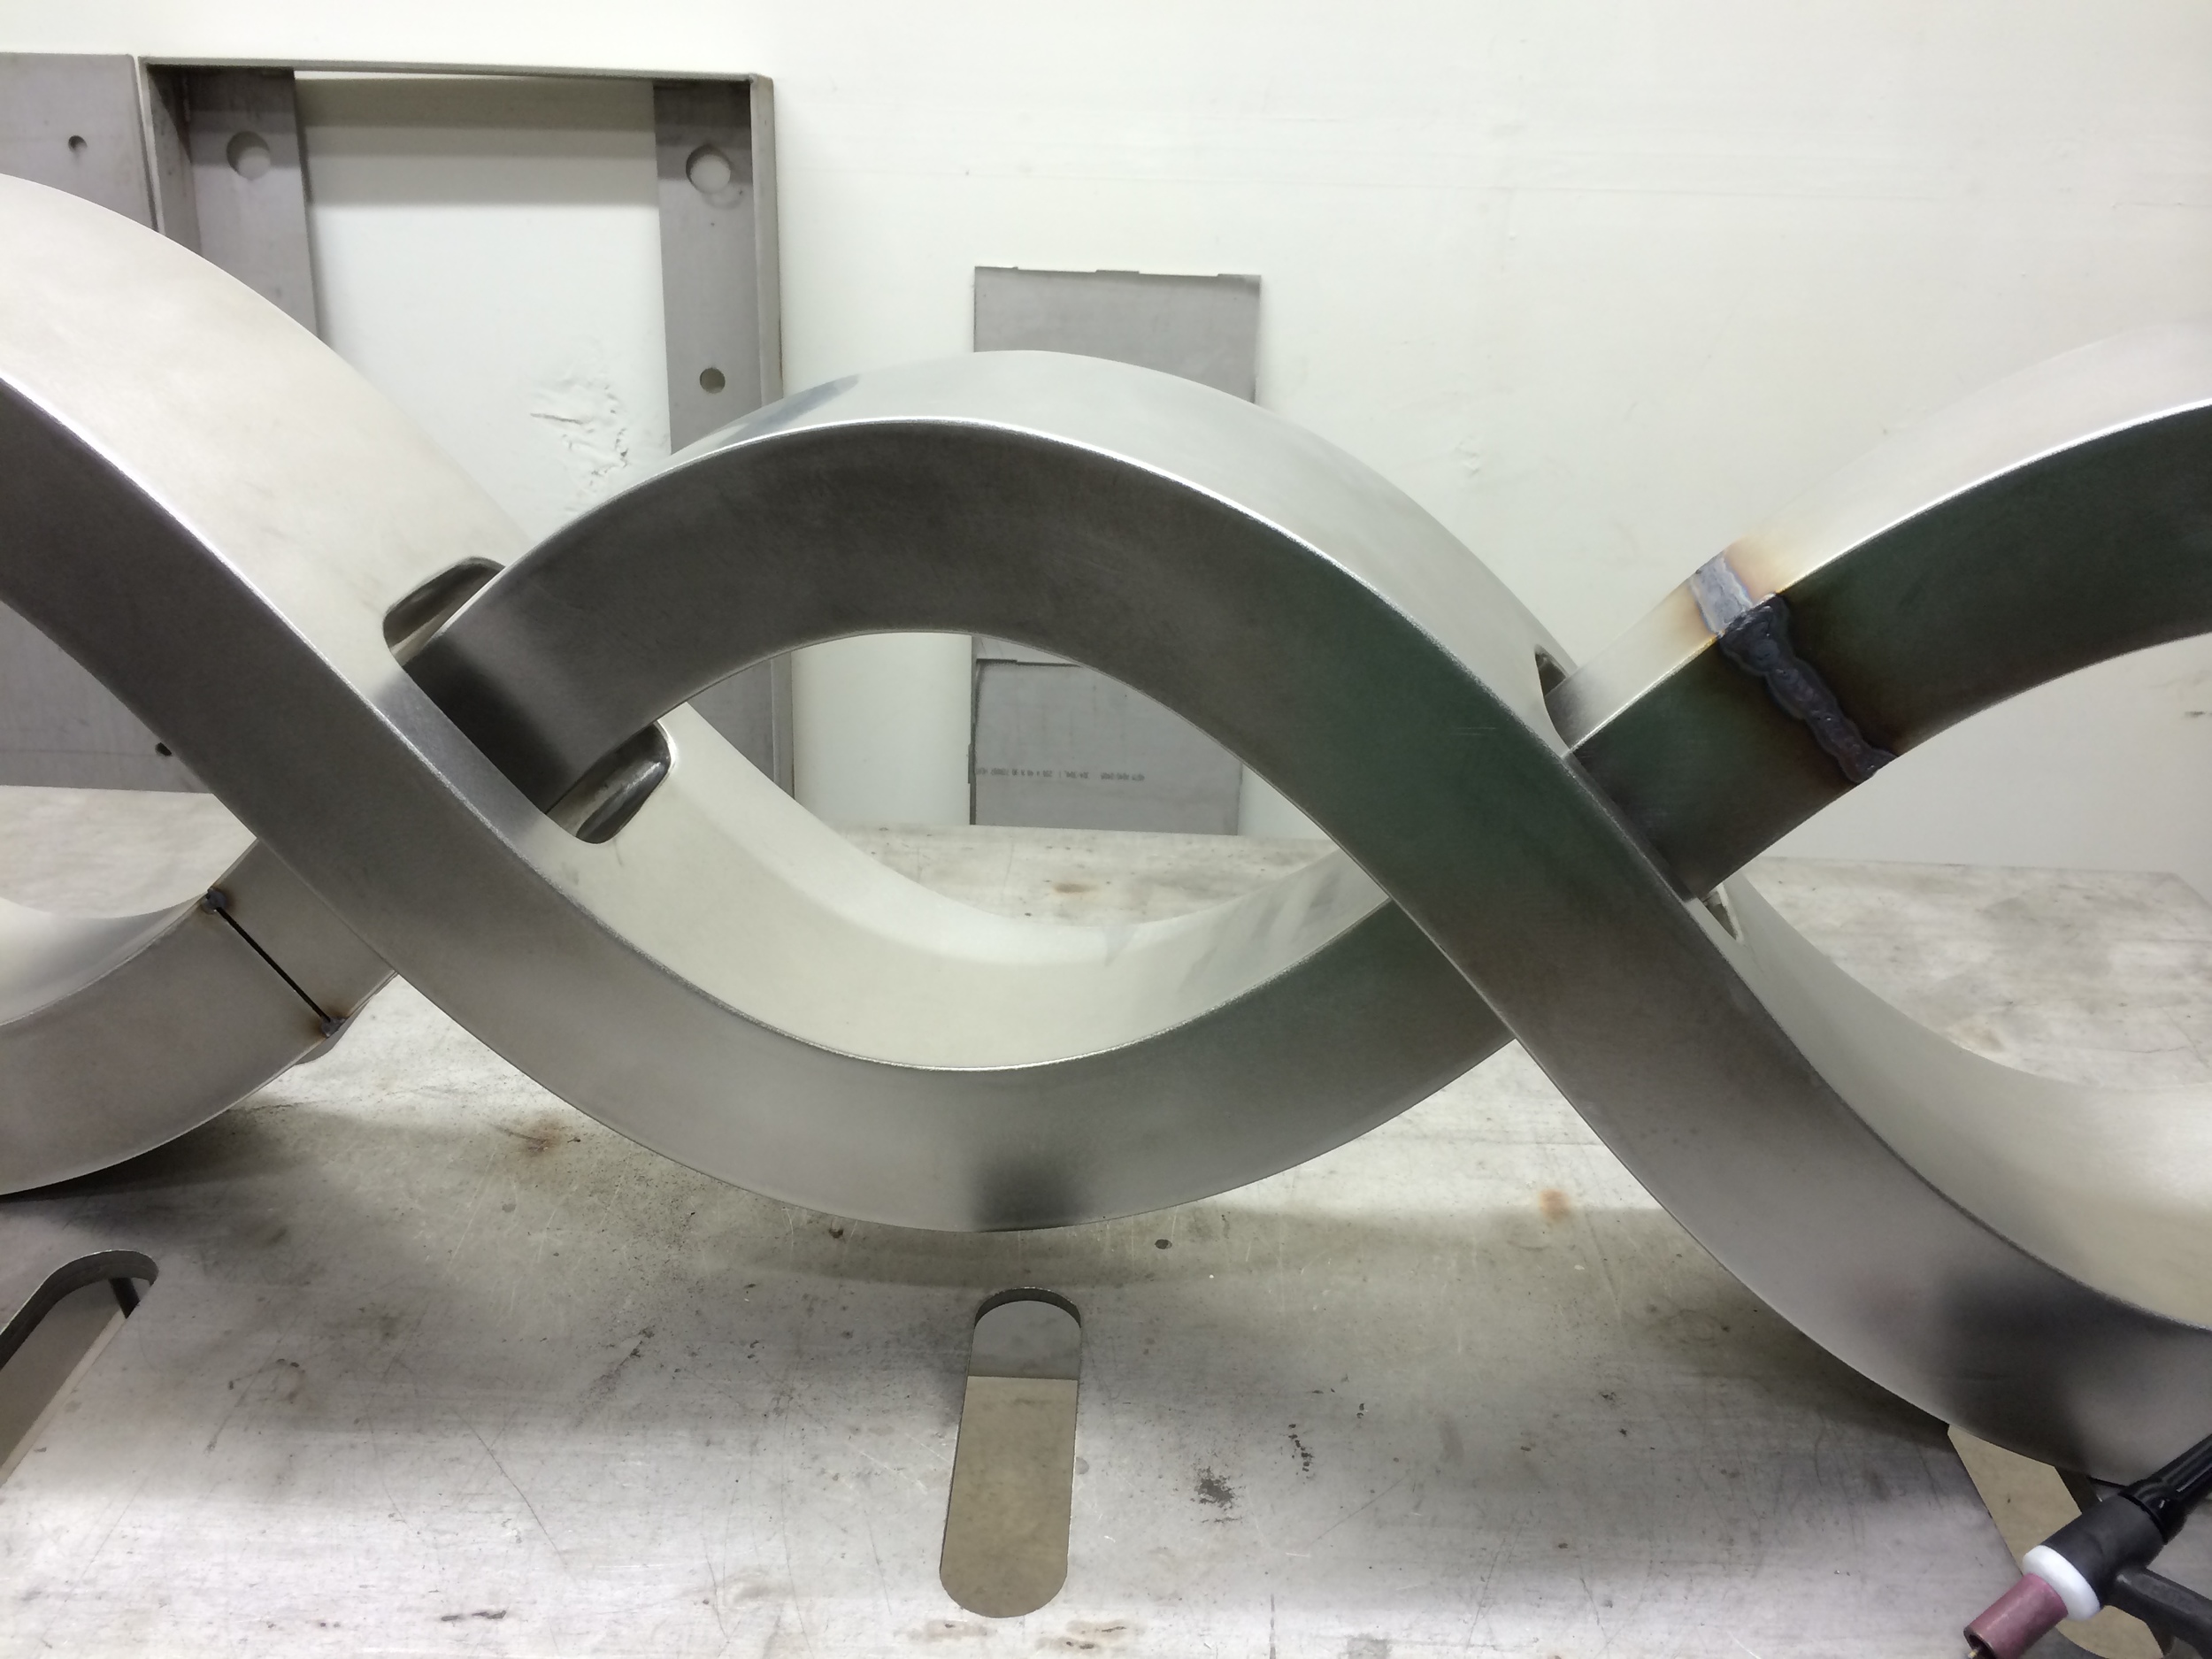
Once I had all the strips bent into these goofy accordian-like shapes, I was able to clamp them together and get a pretty decent tack with the TiG welder to glom them together. This was by far the most labor-intensive sculpture I've made so far.

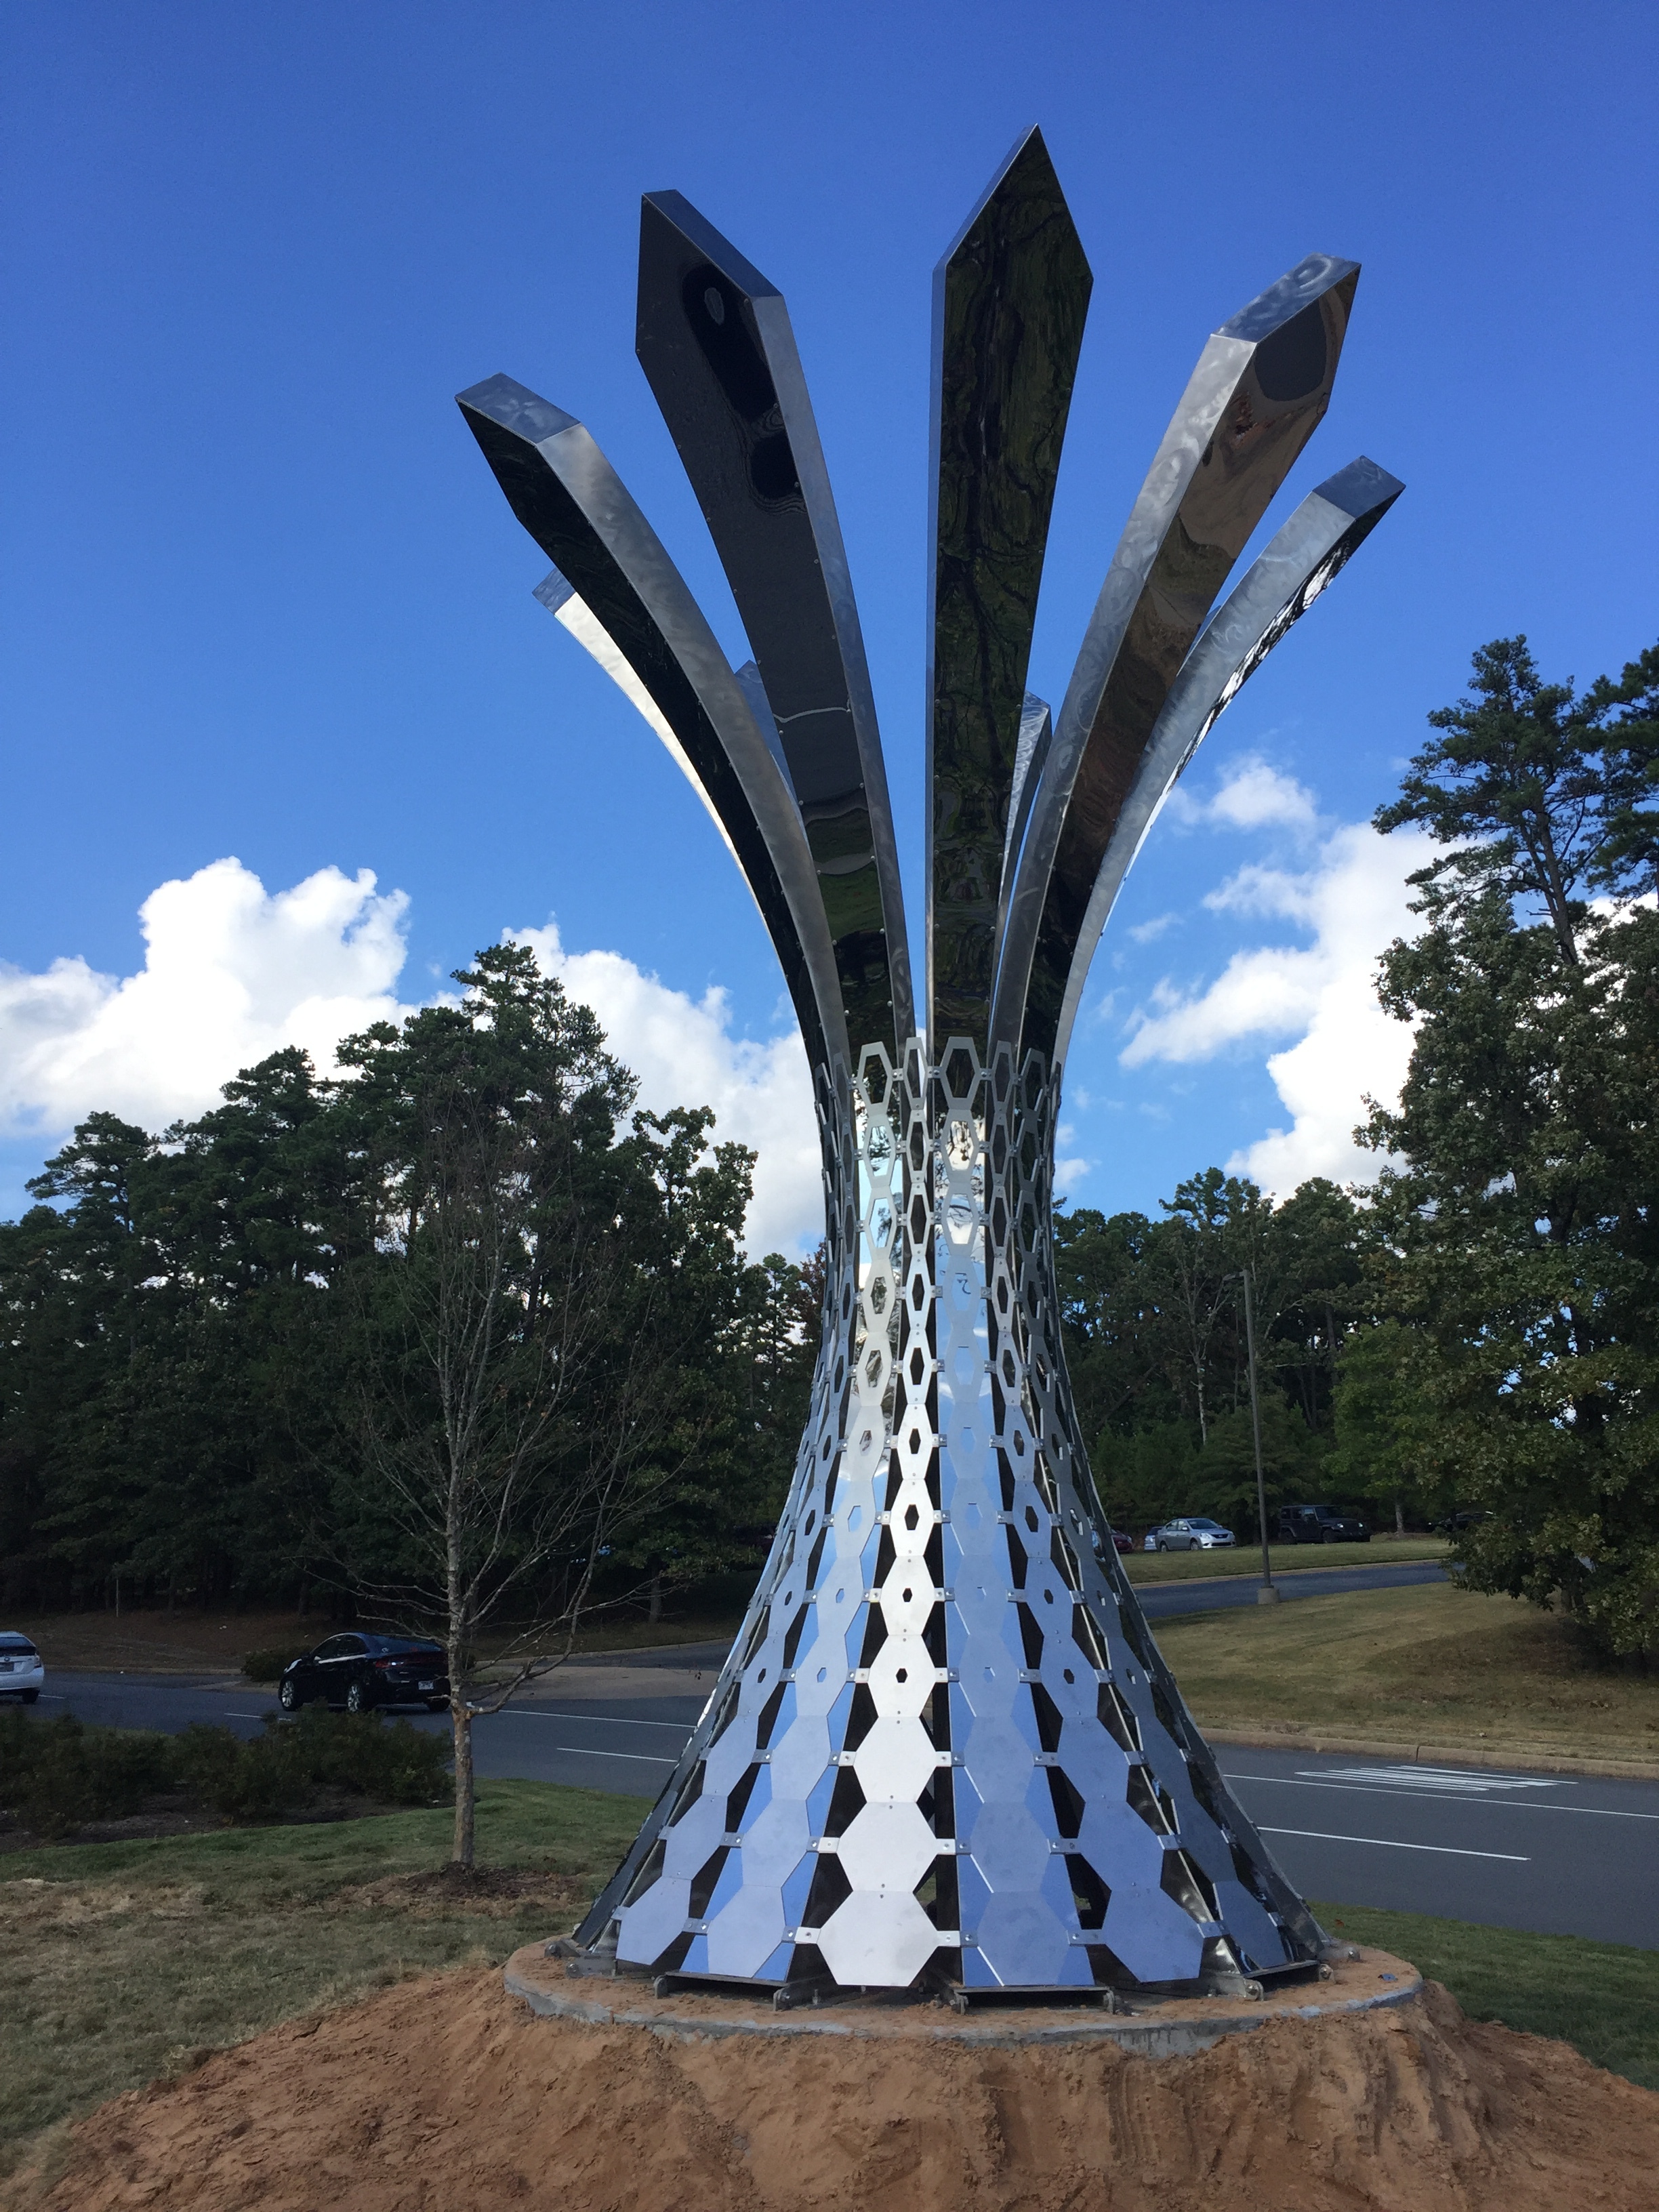
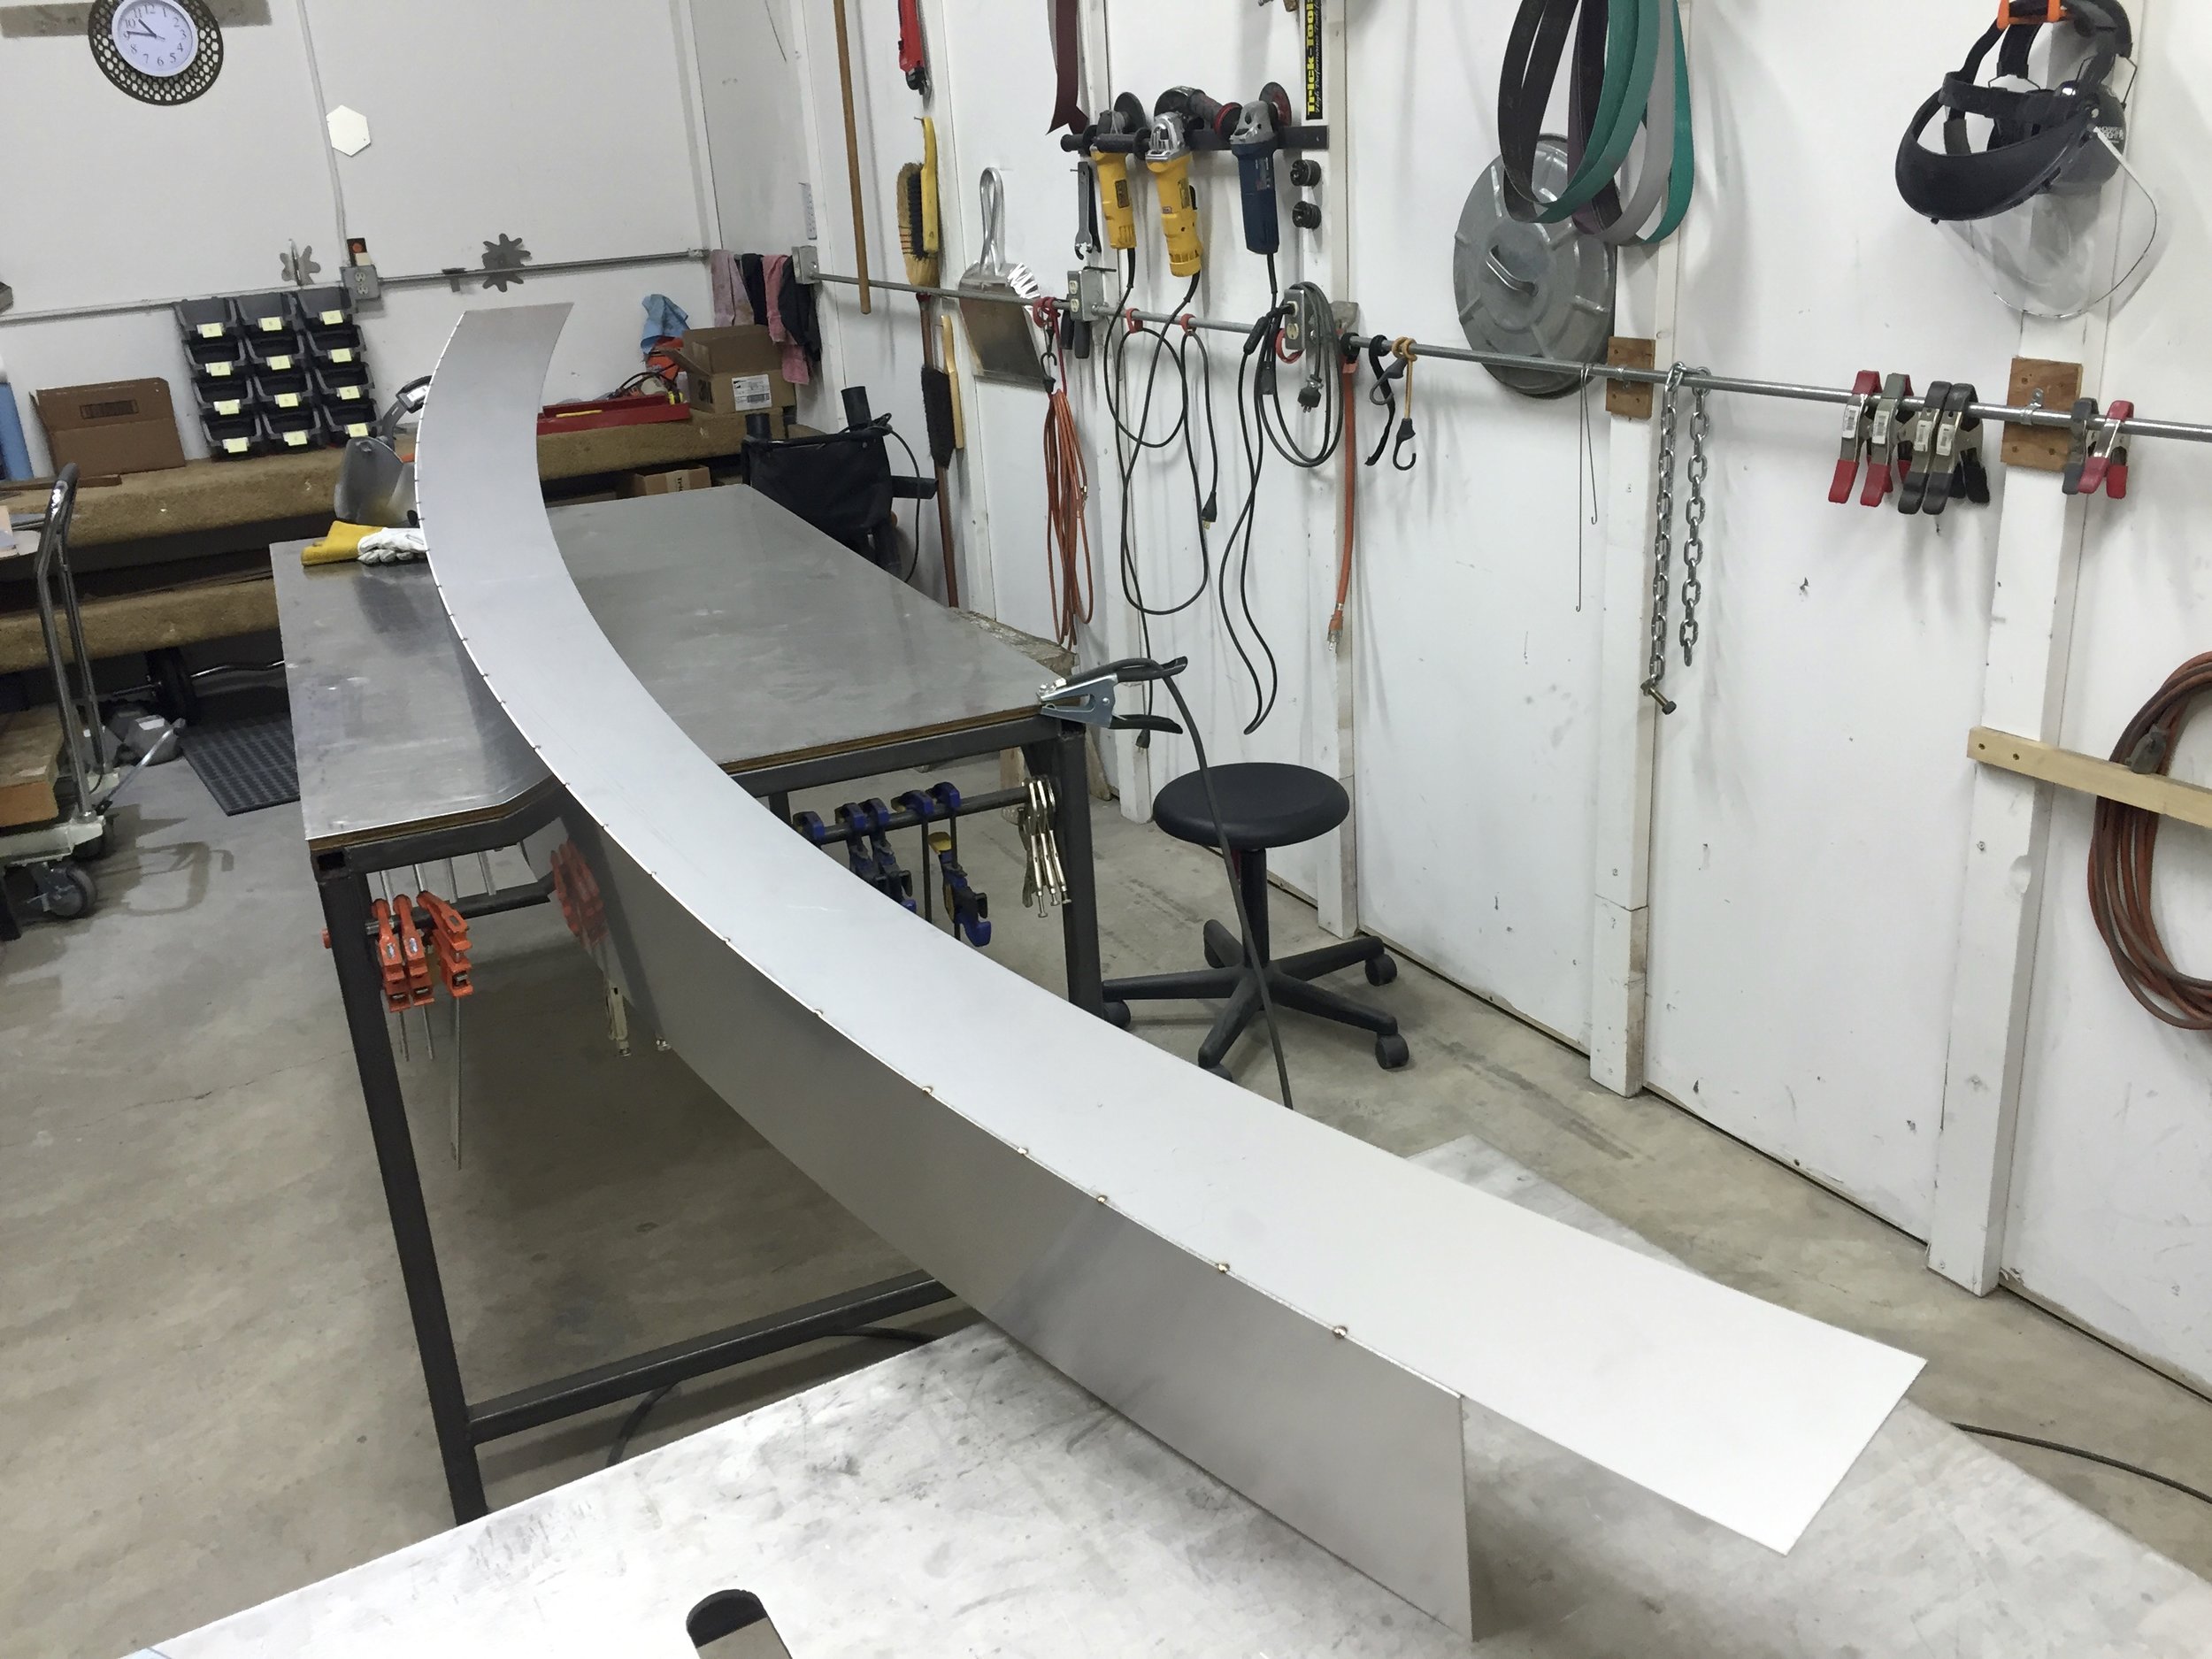
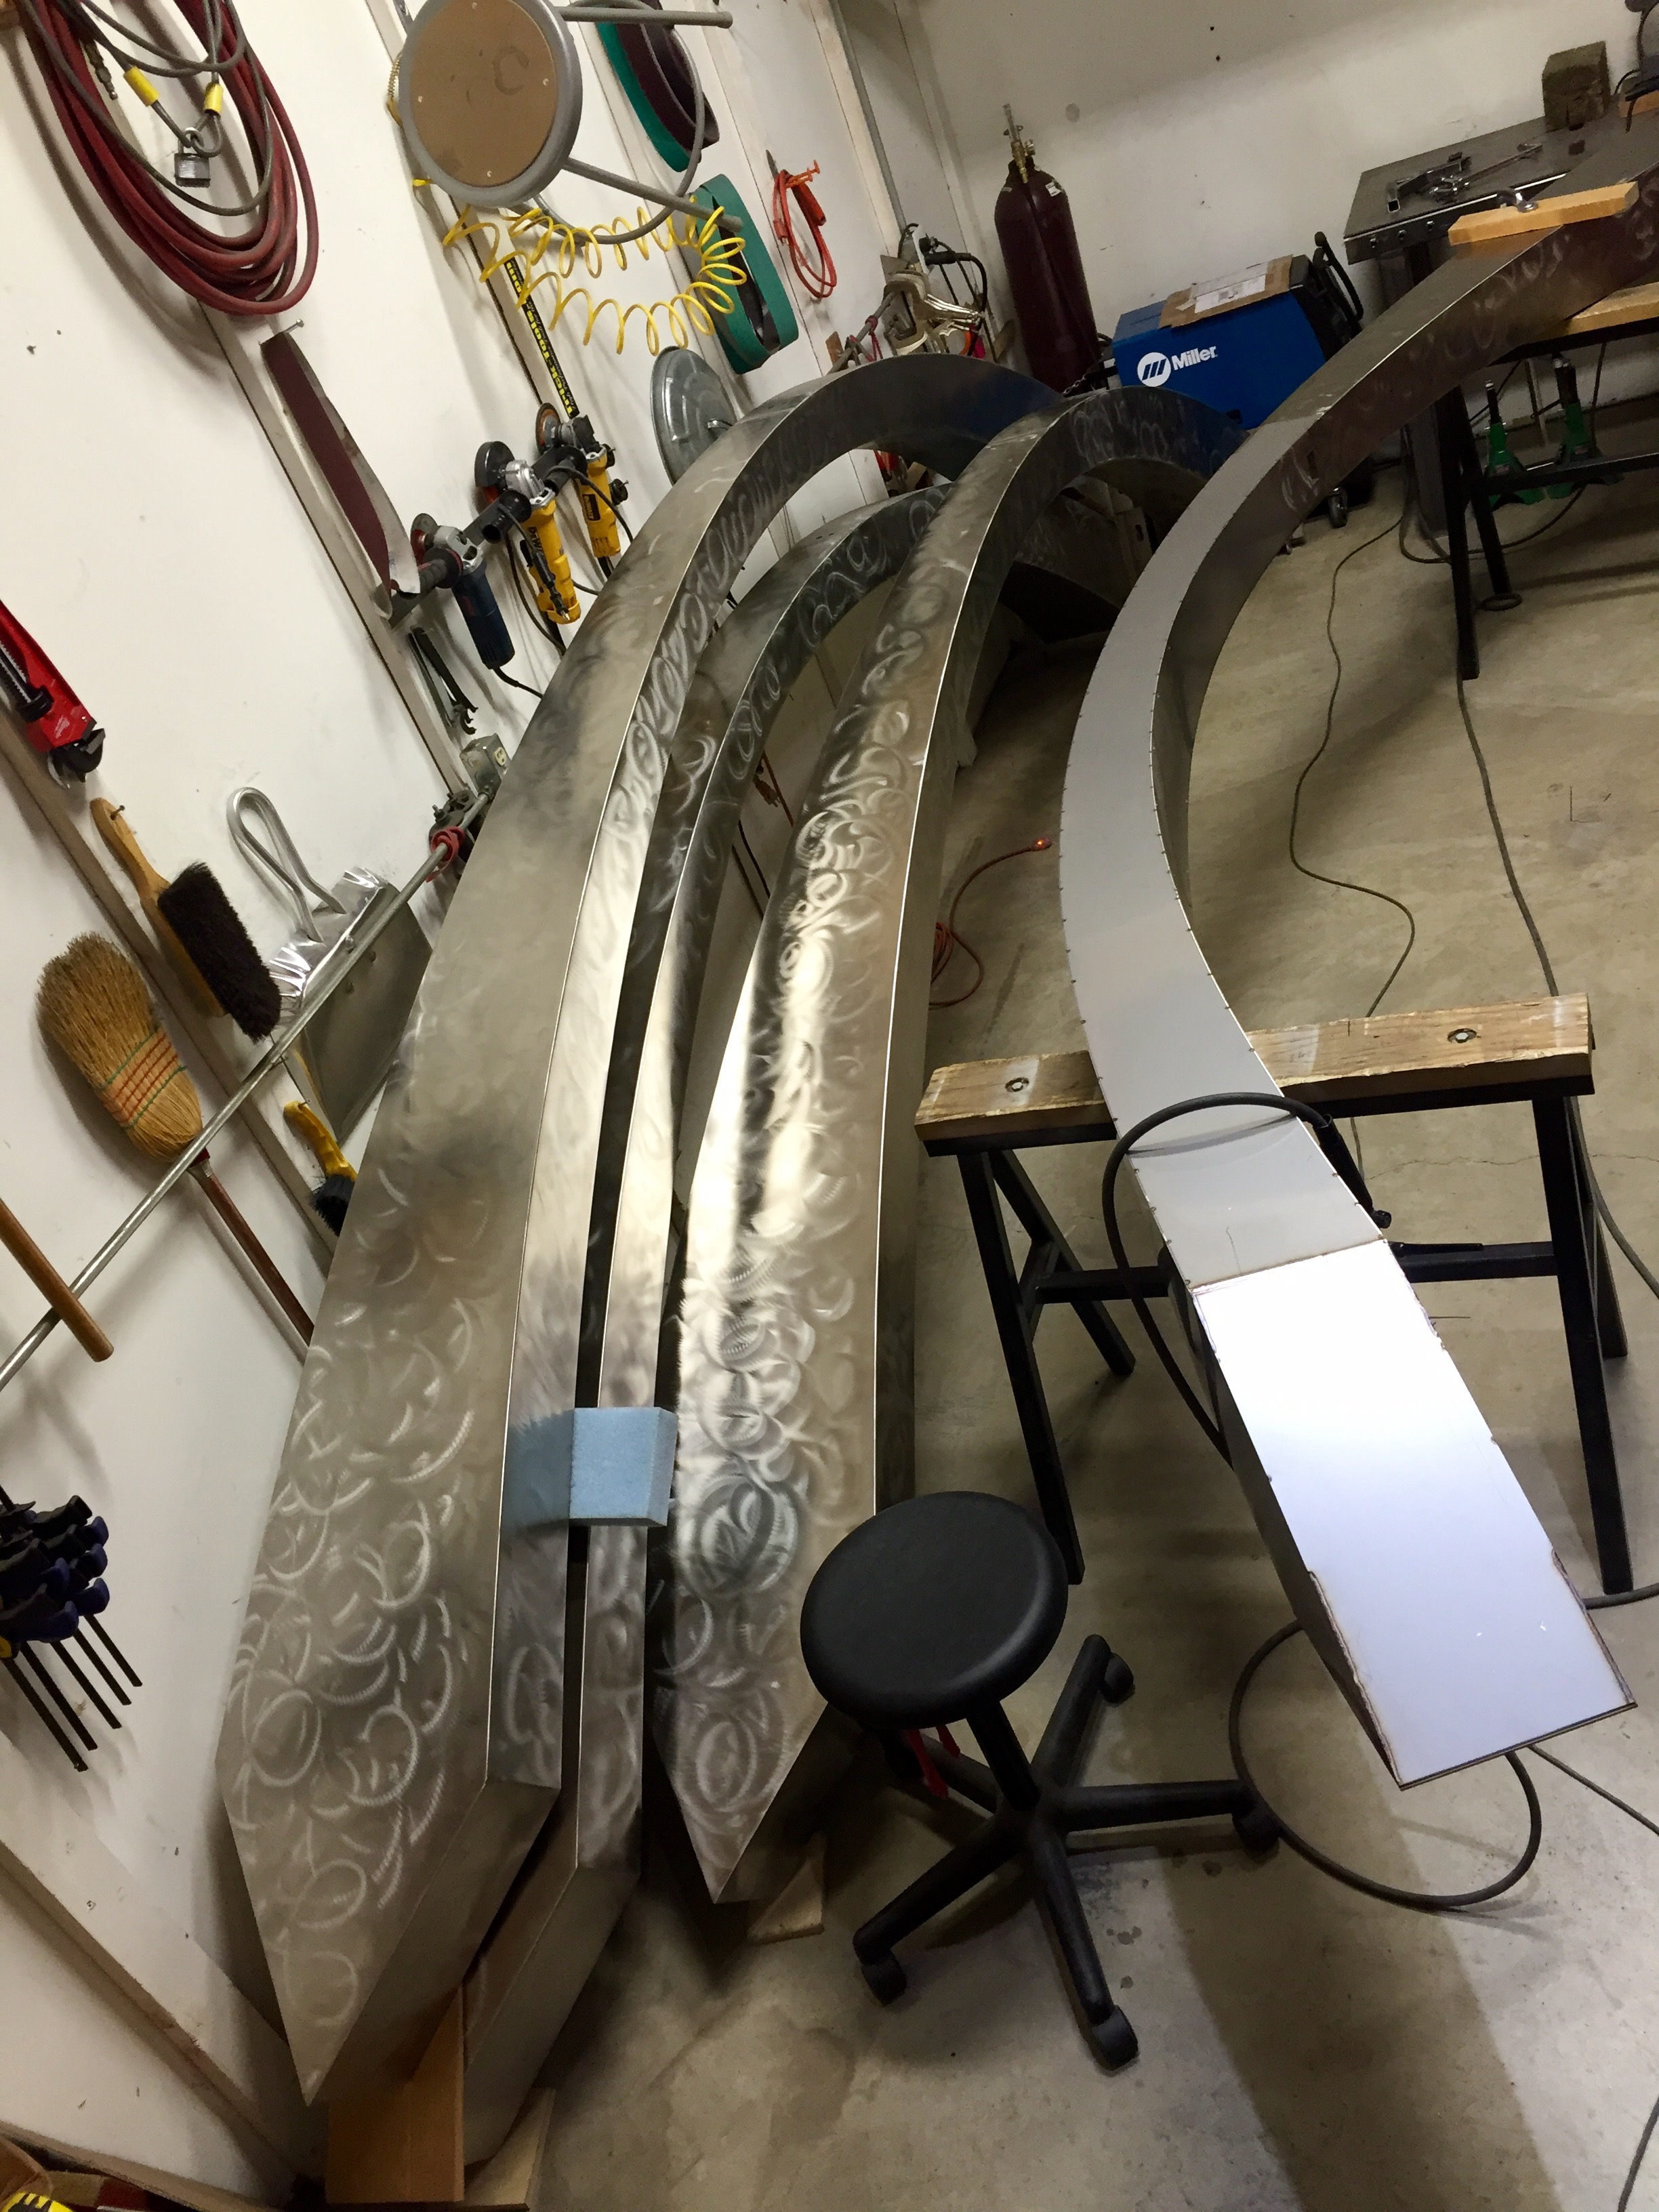
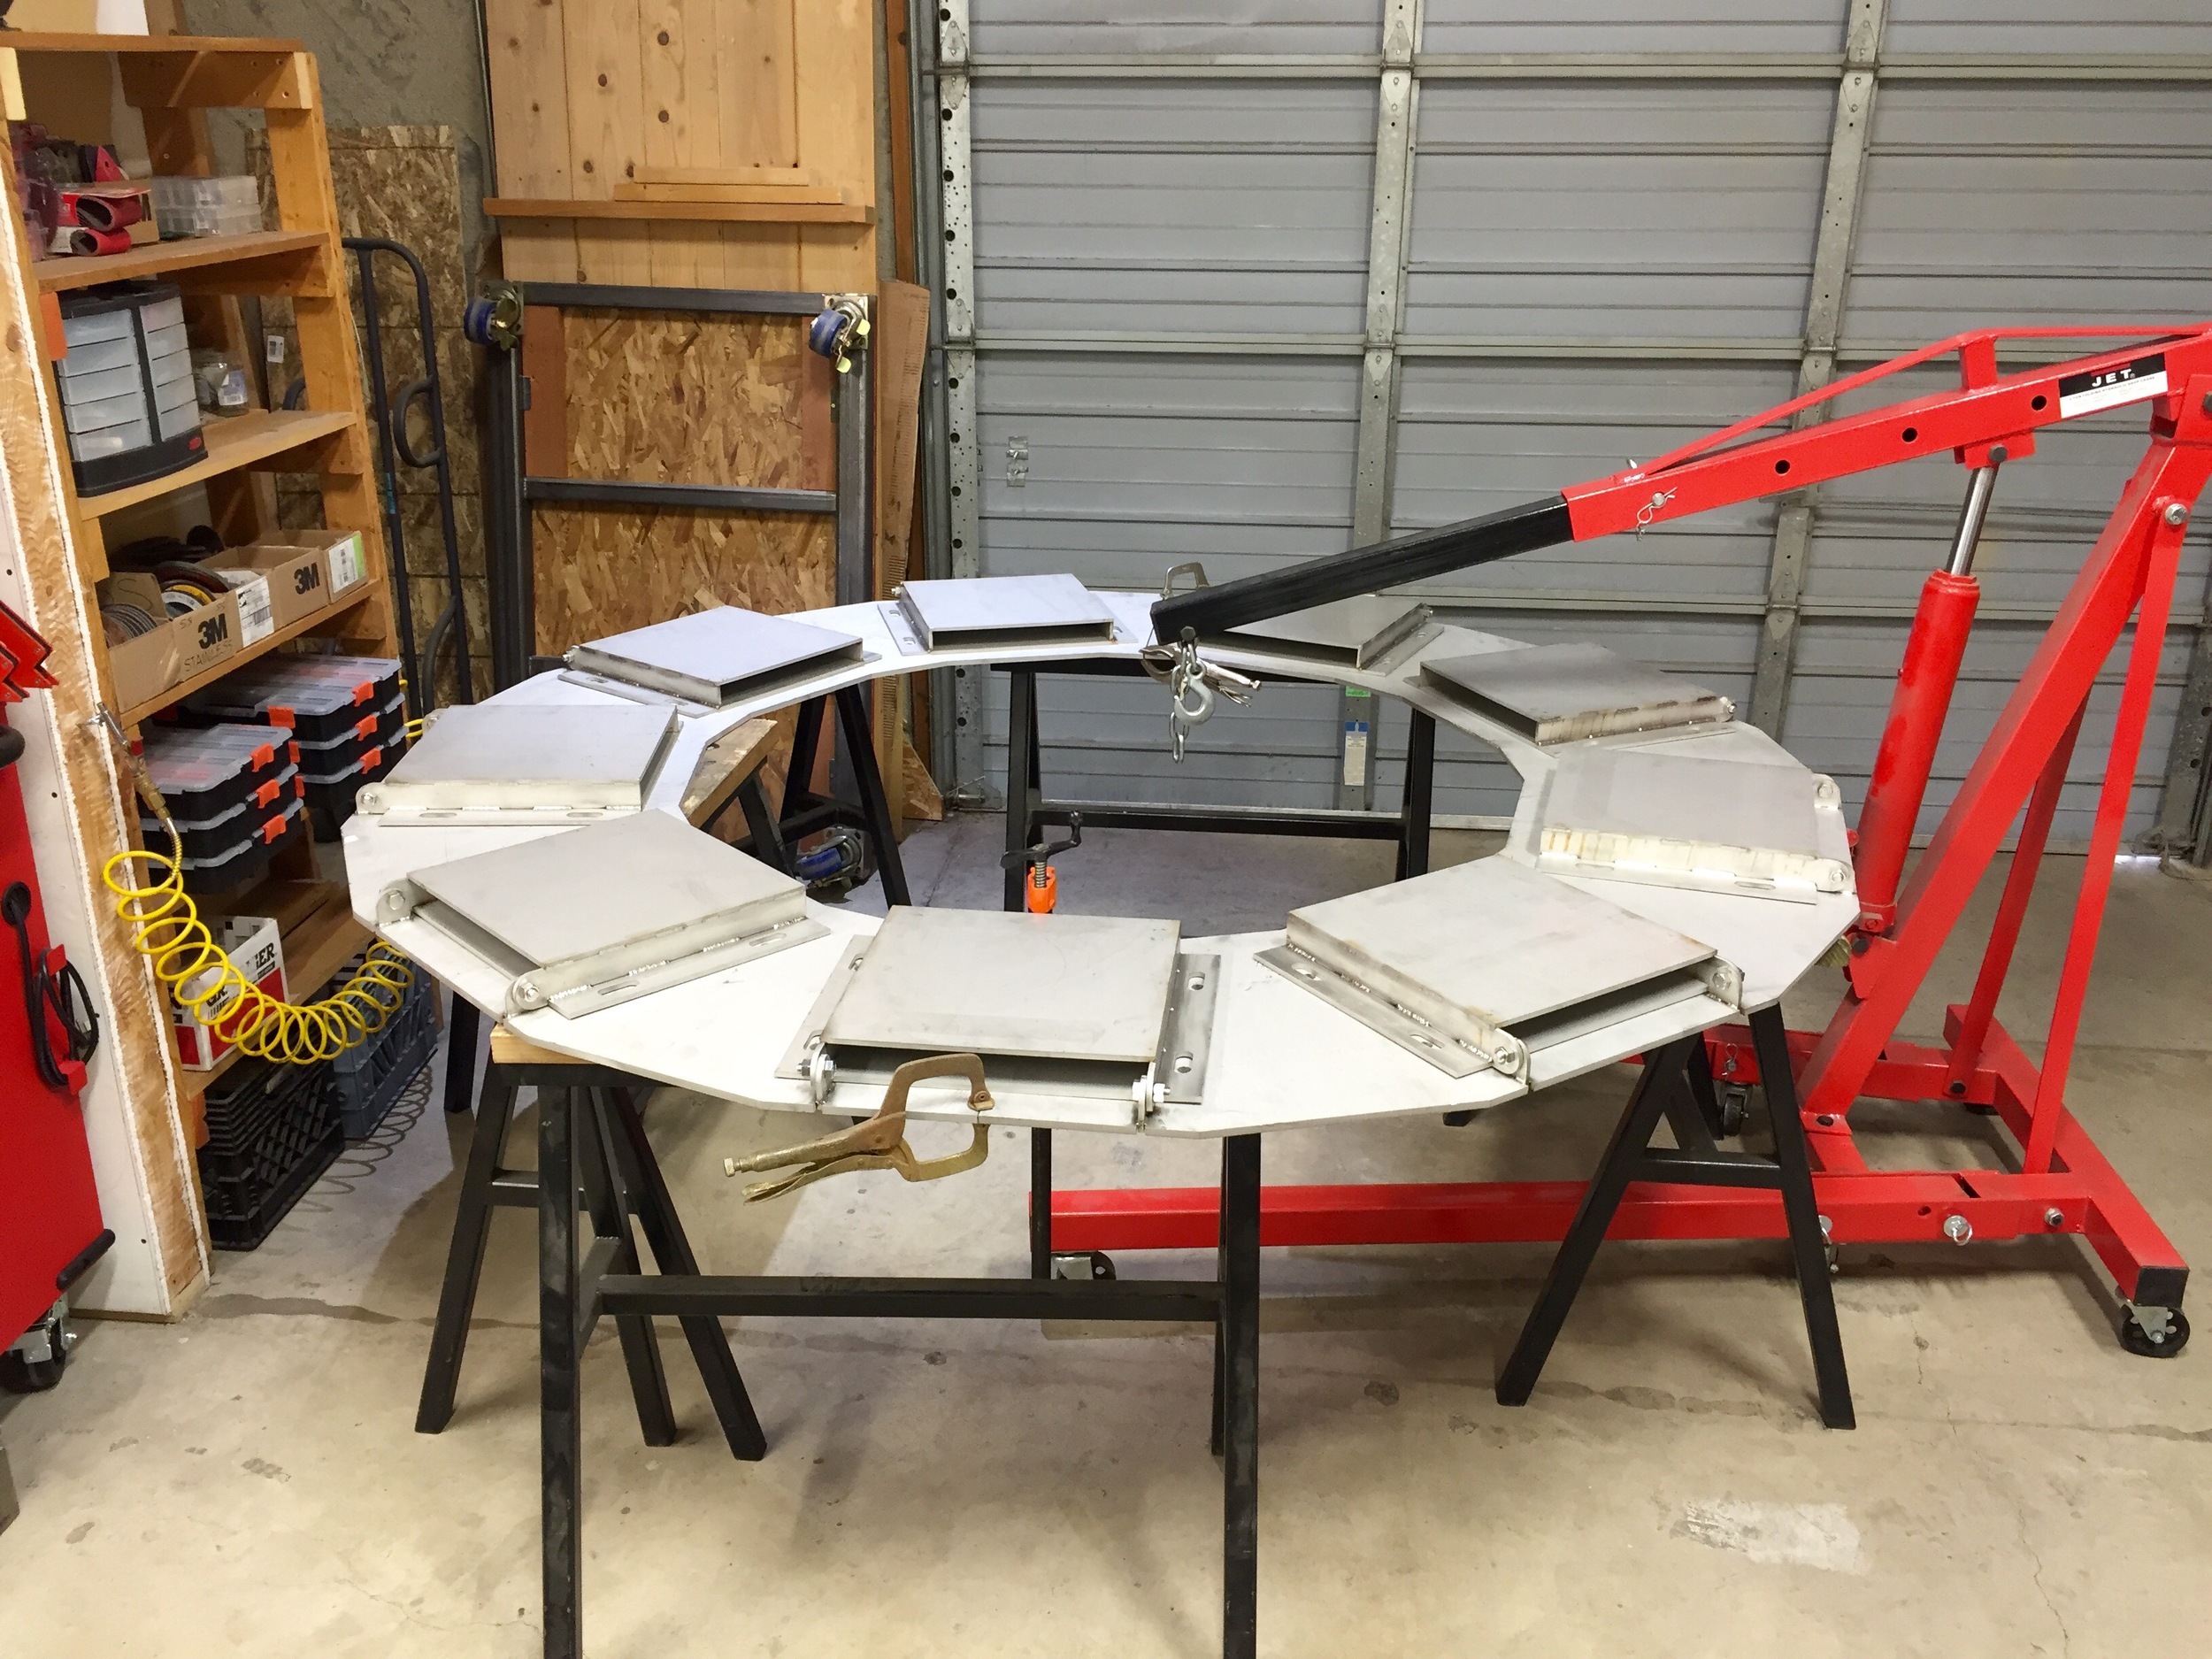
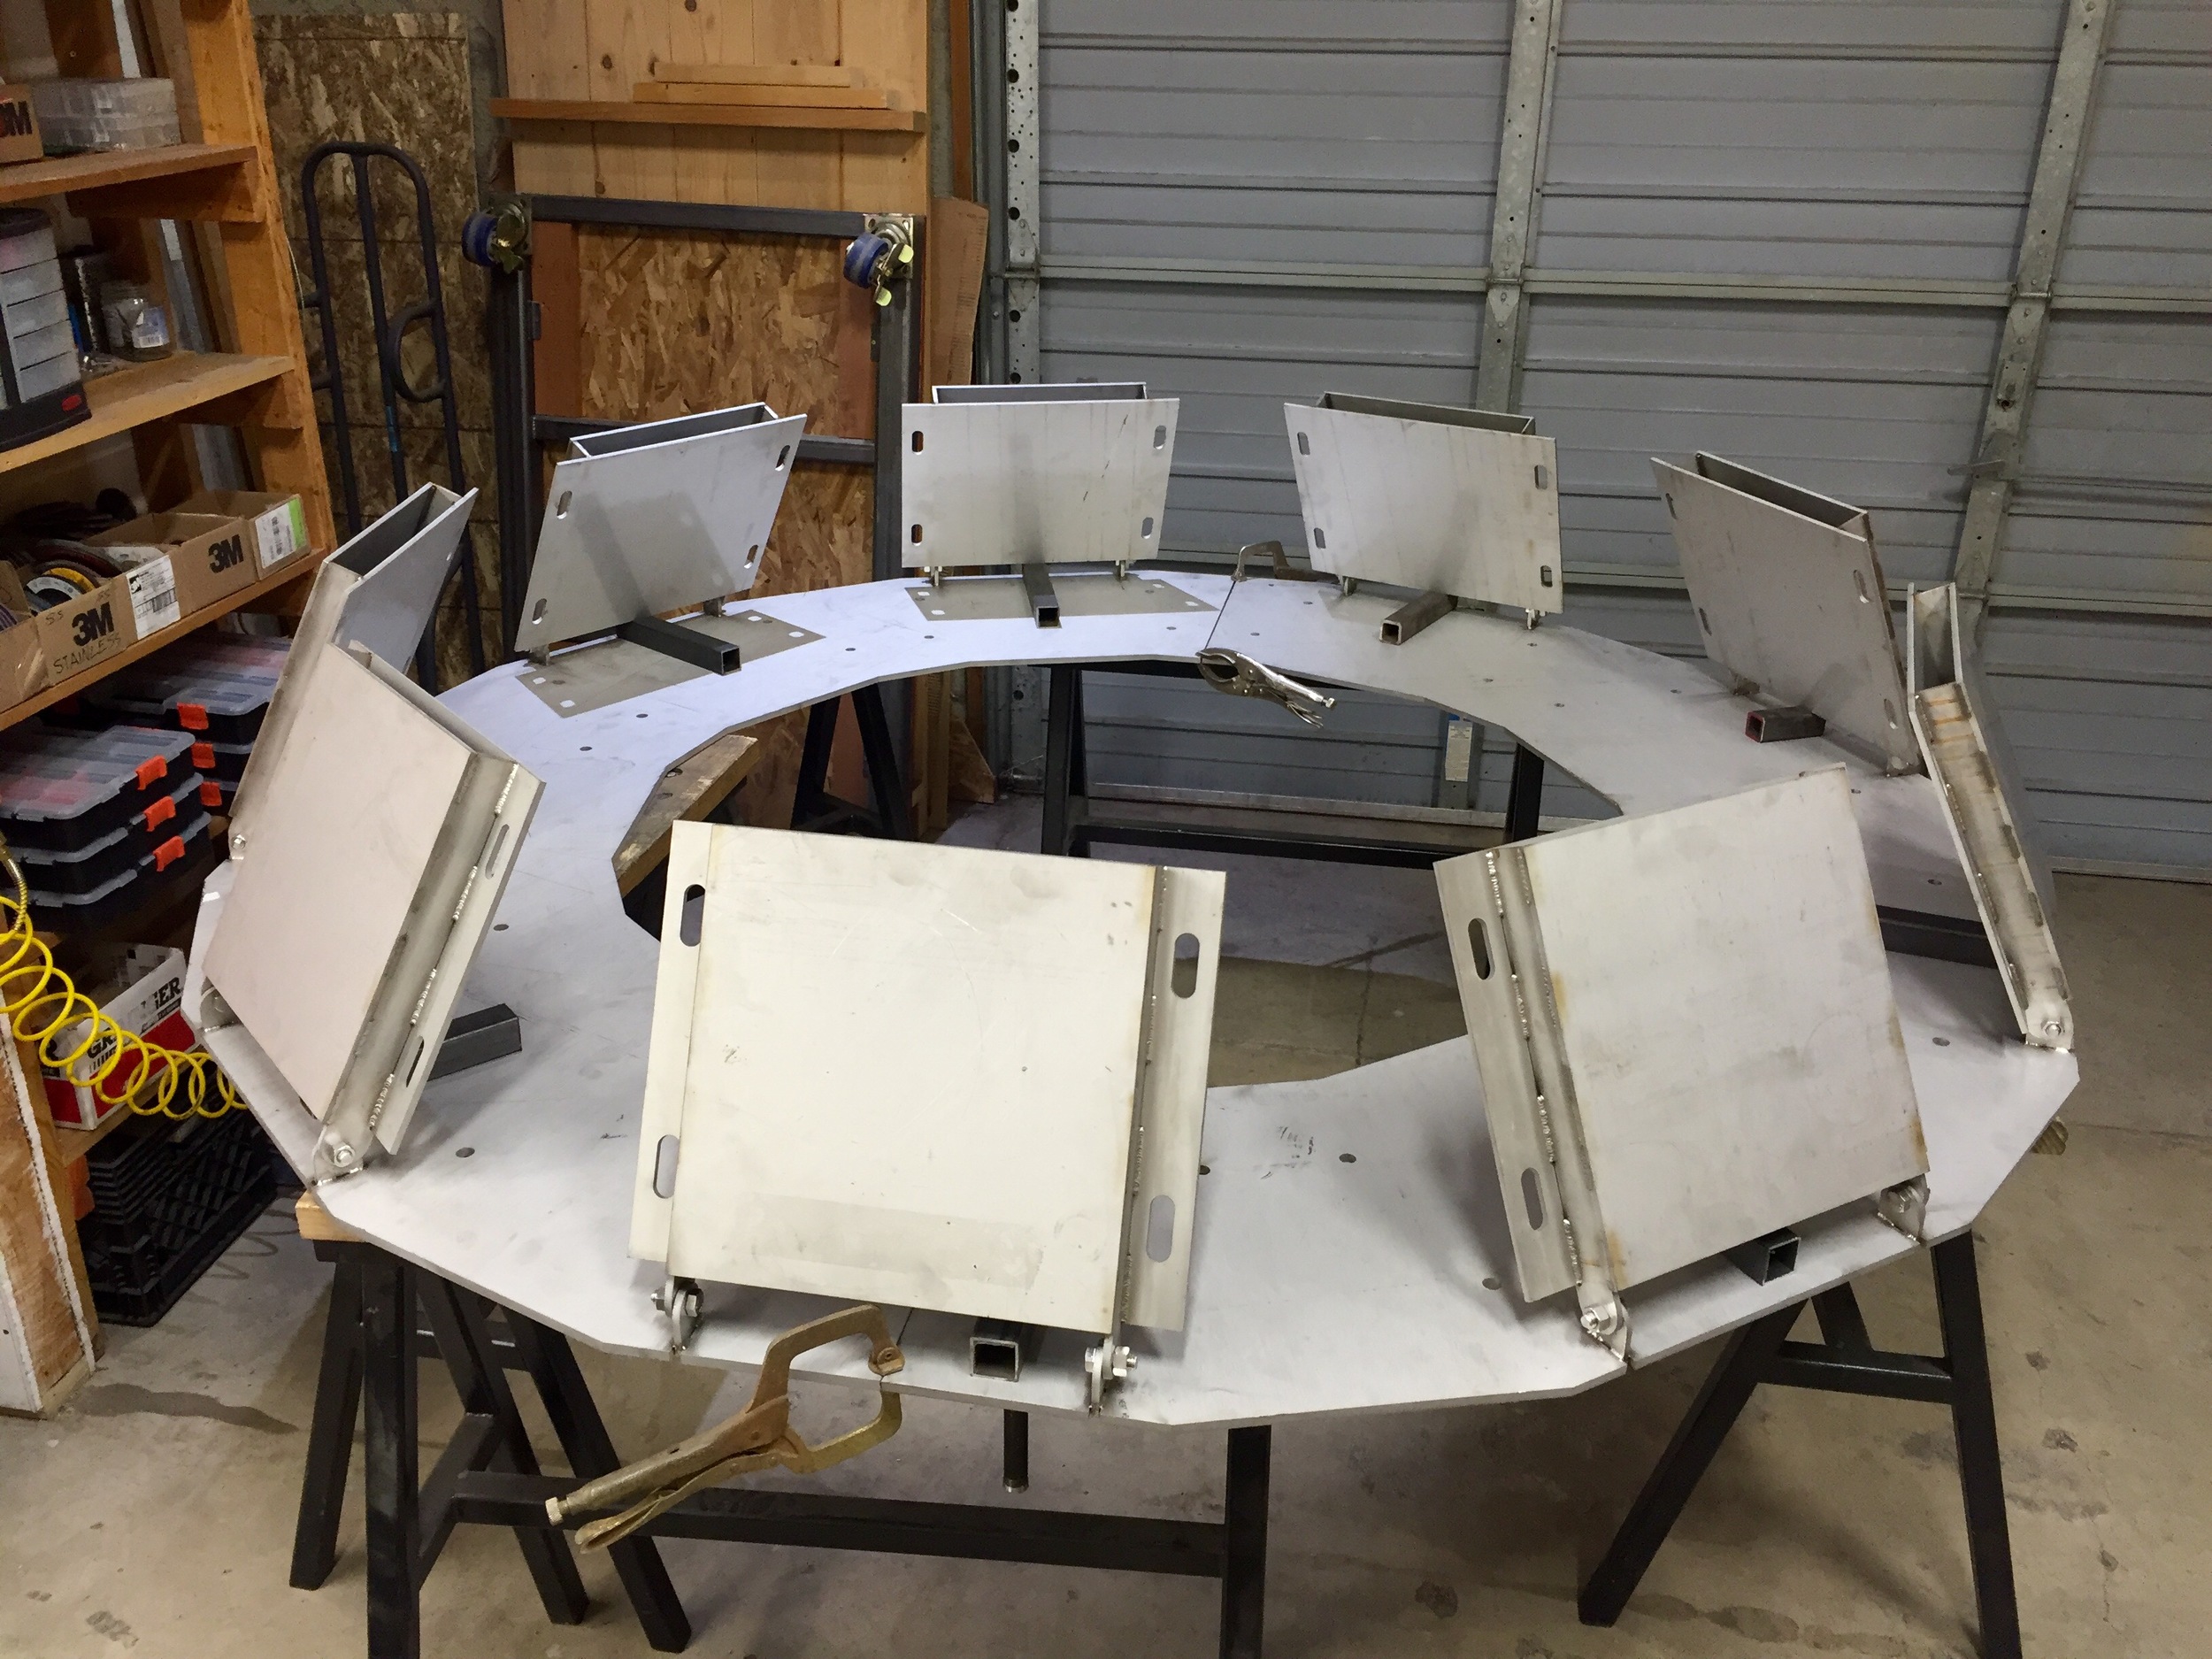
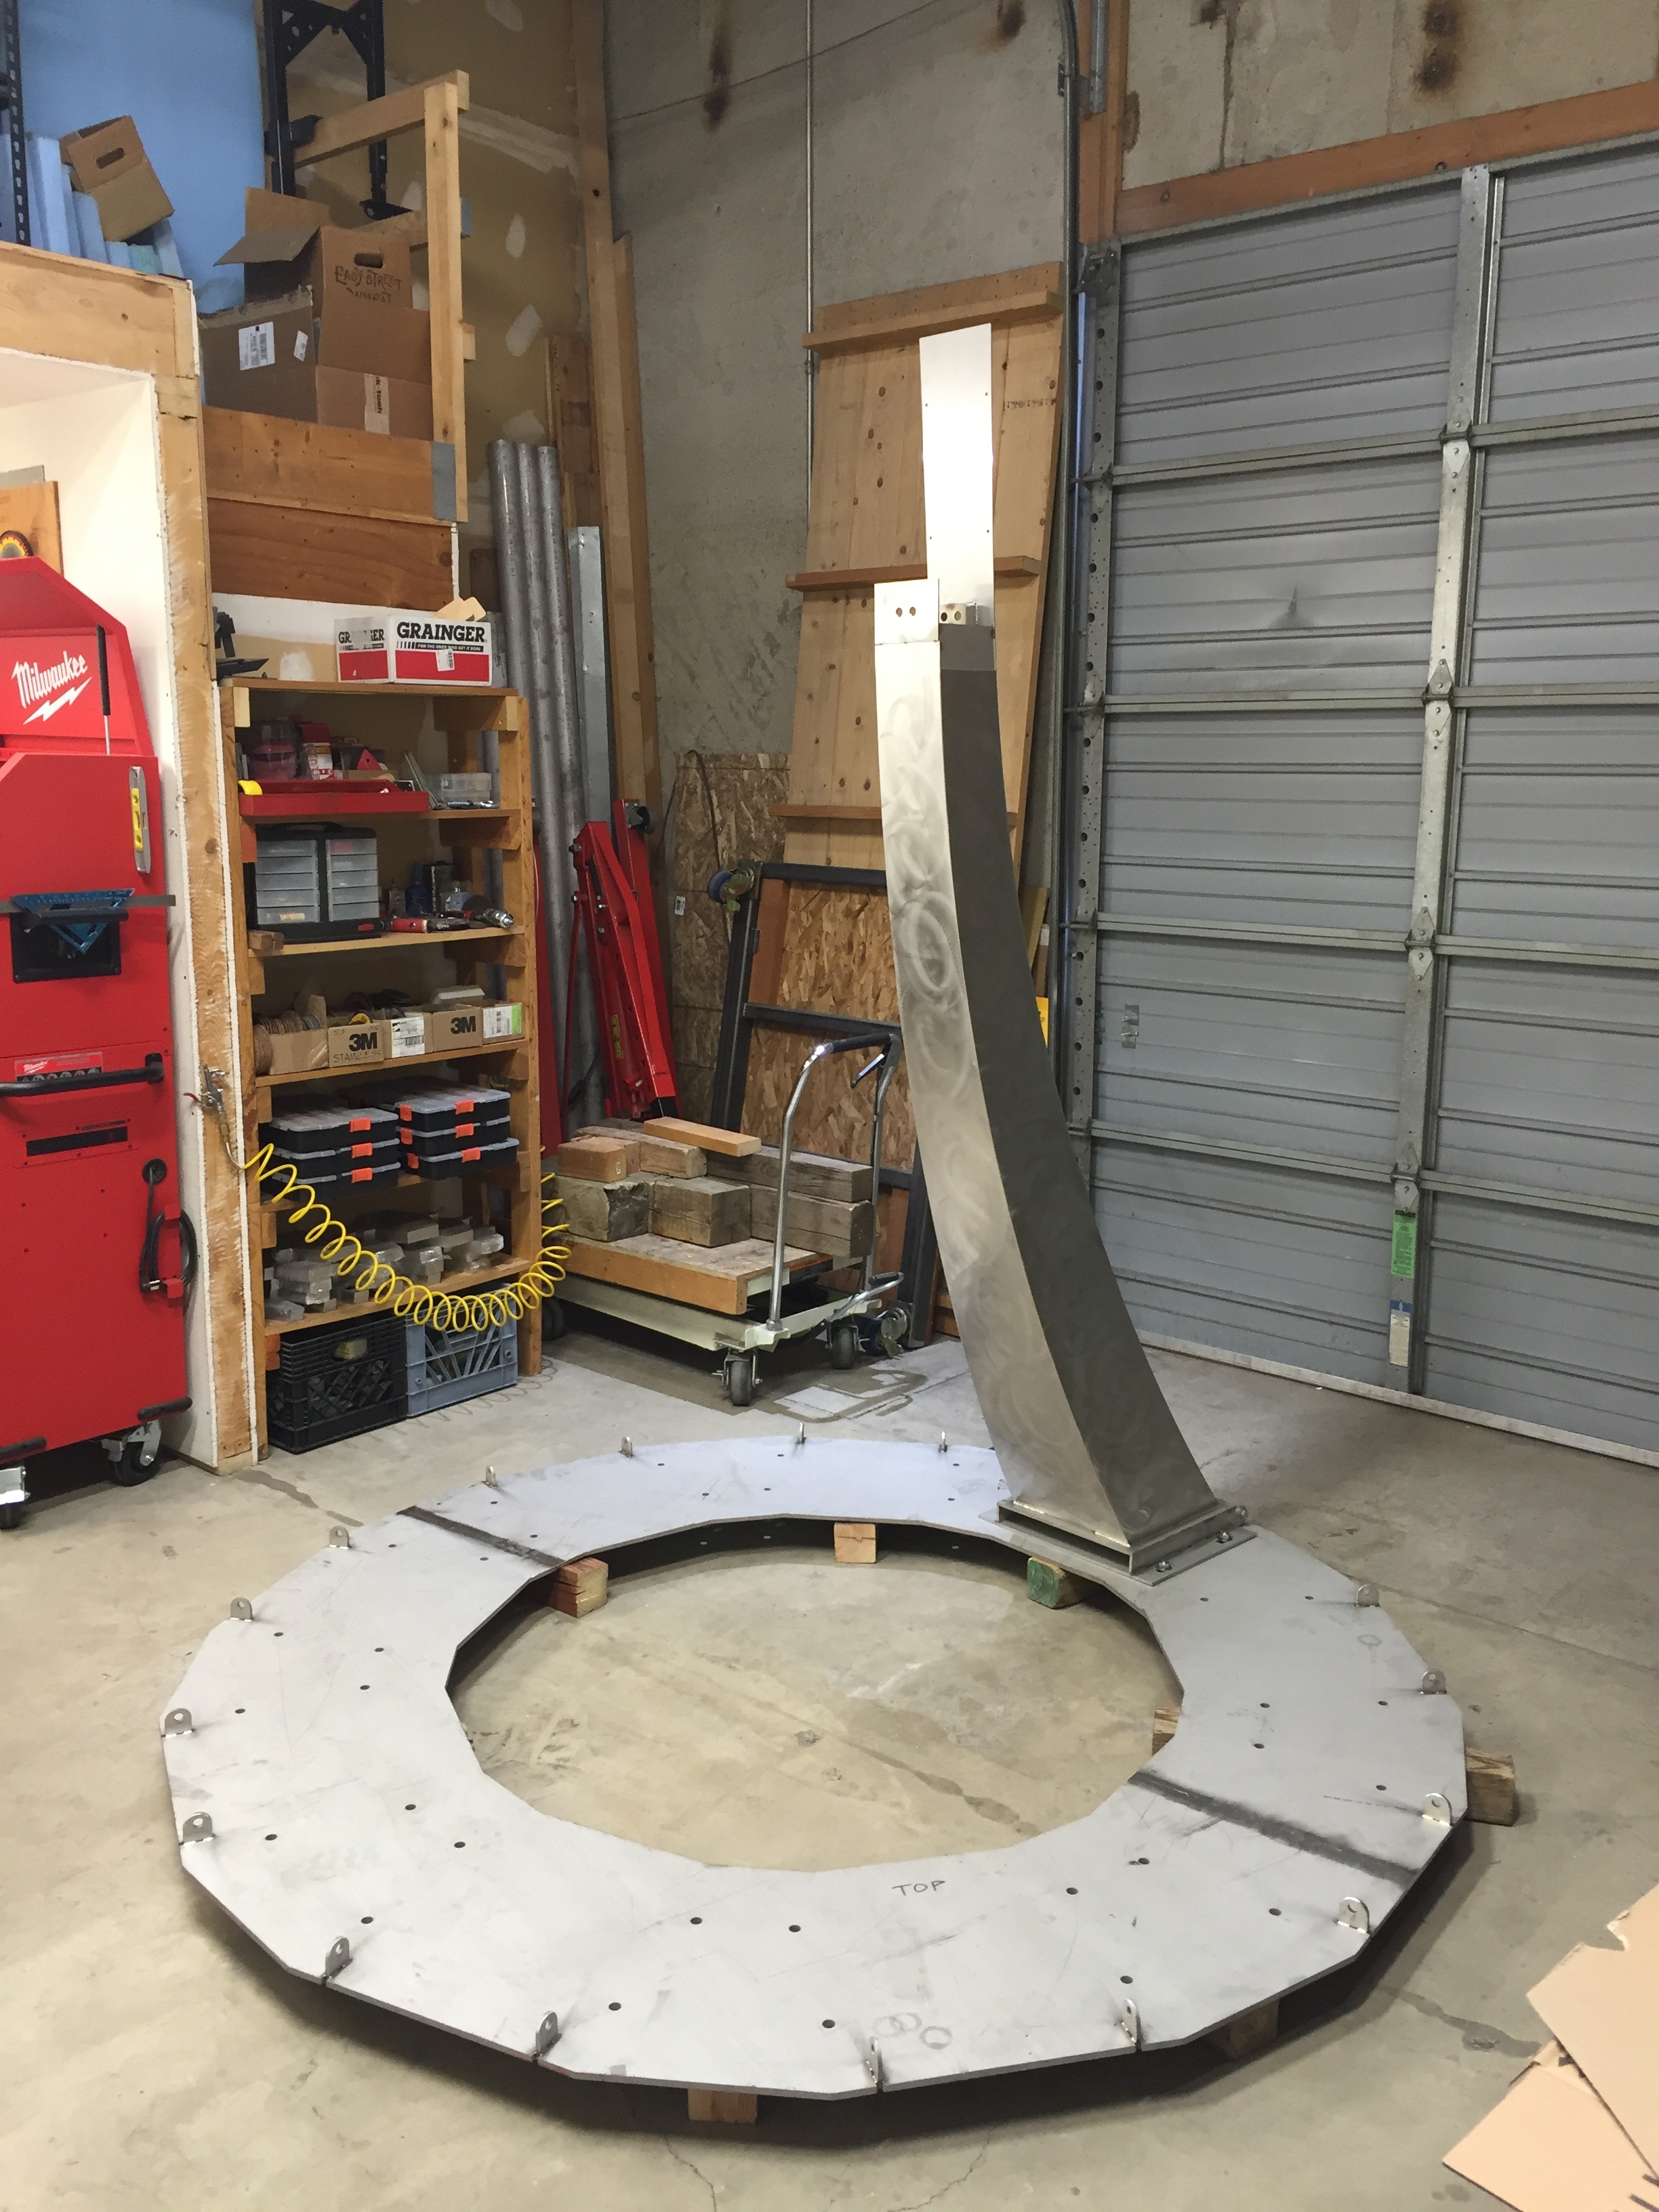
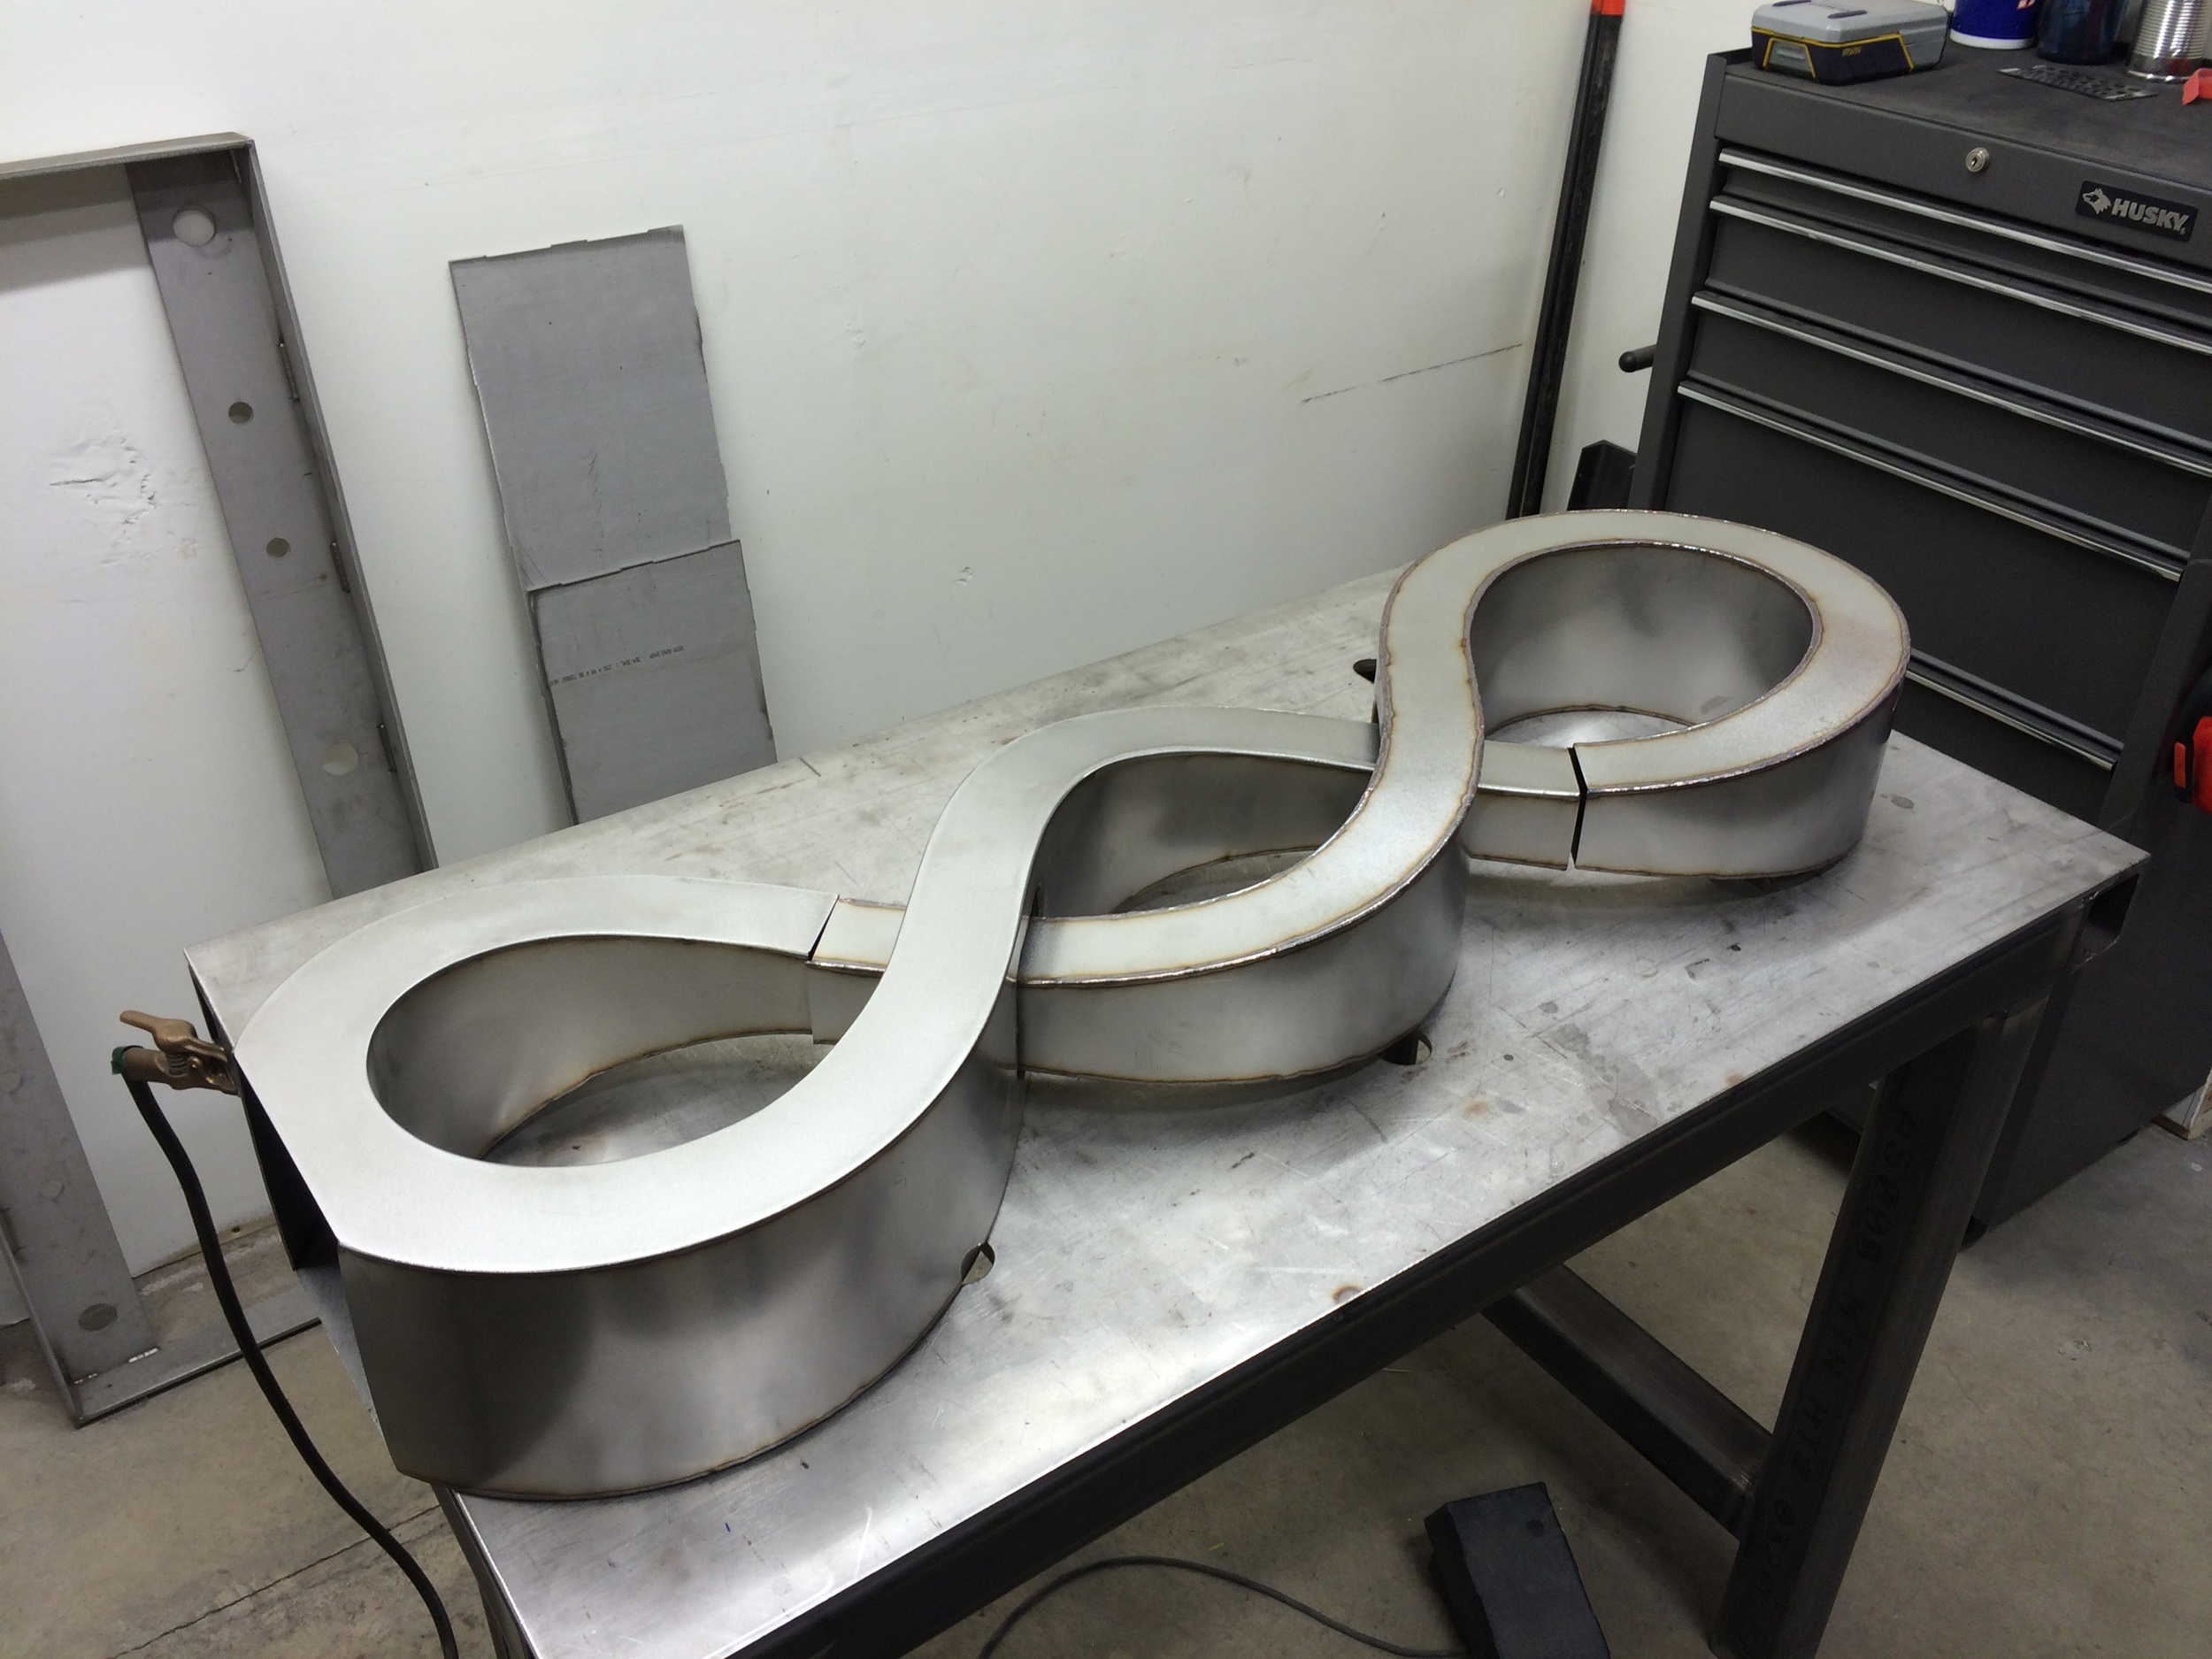
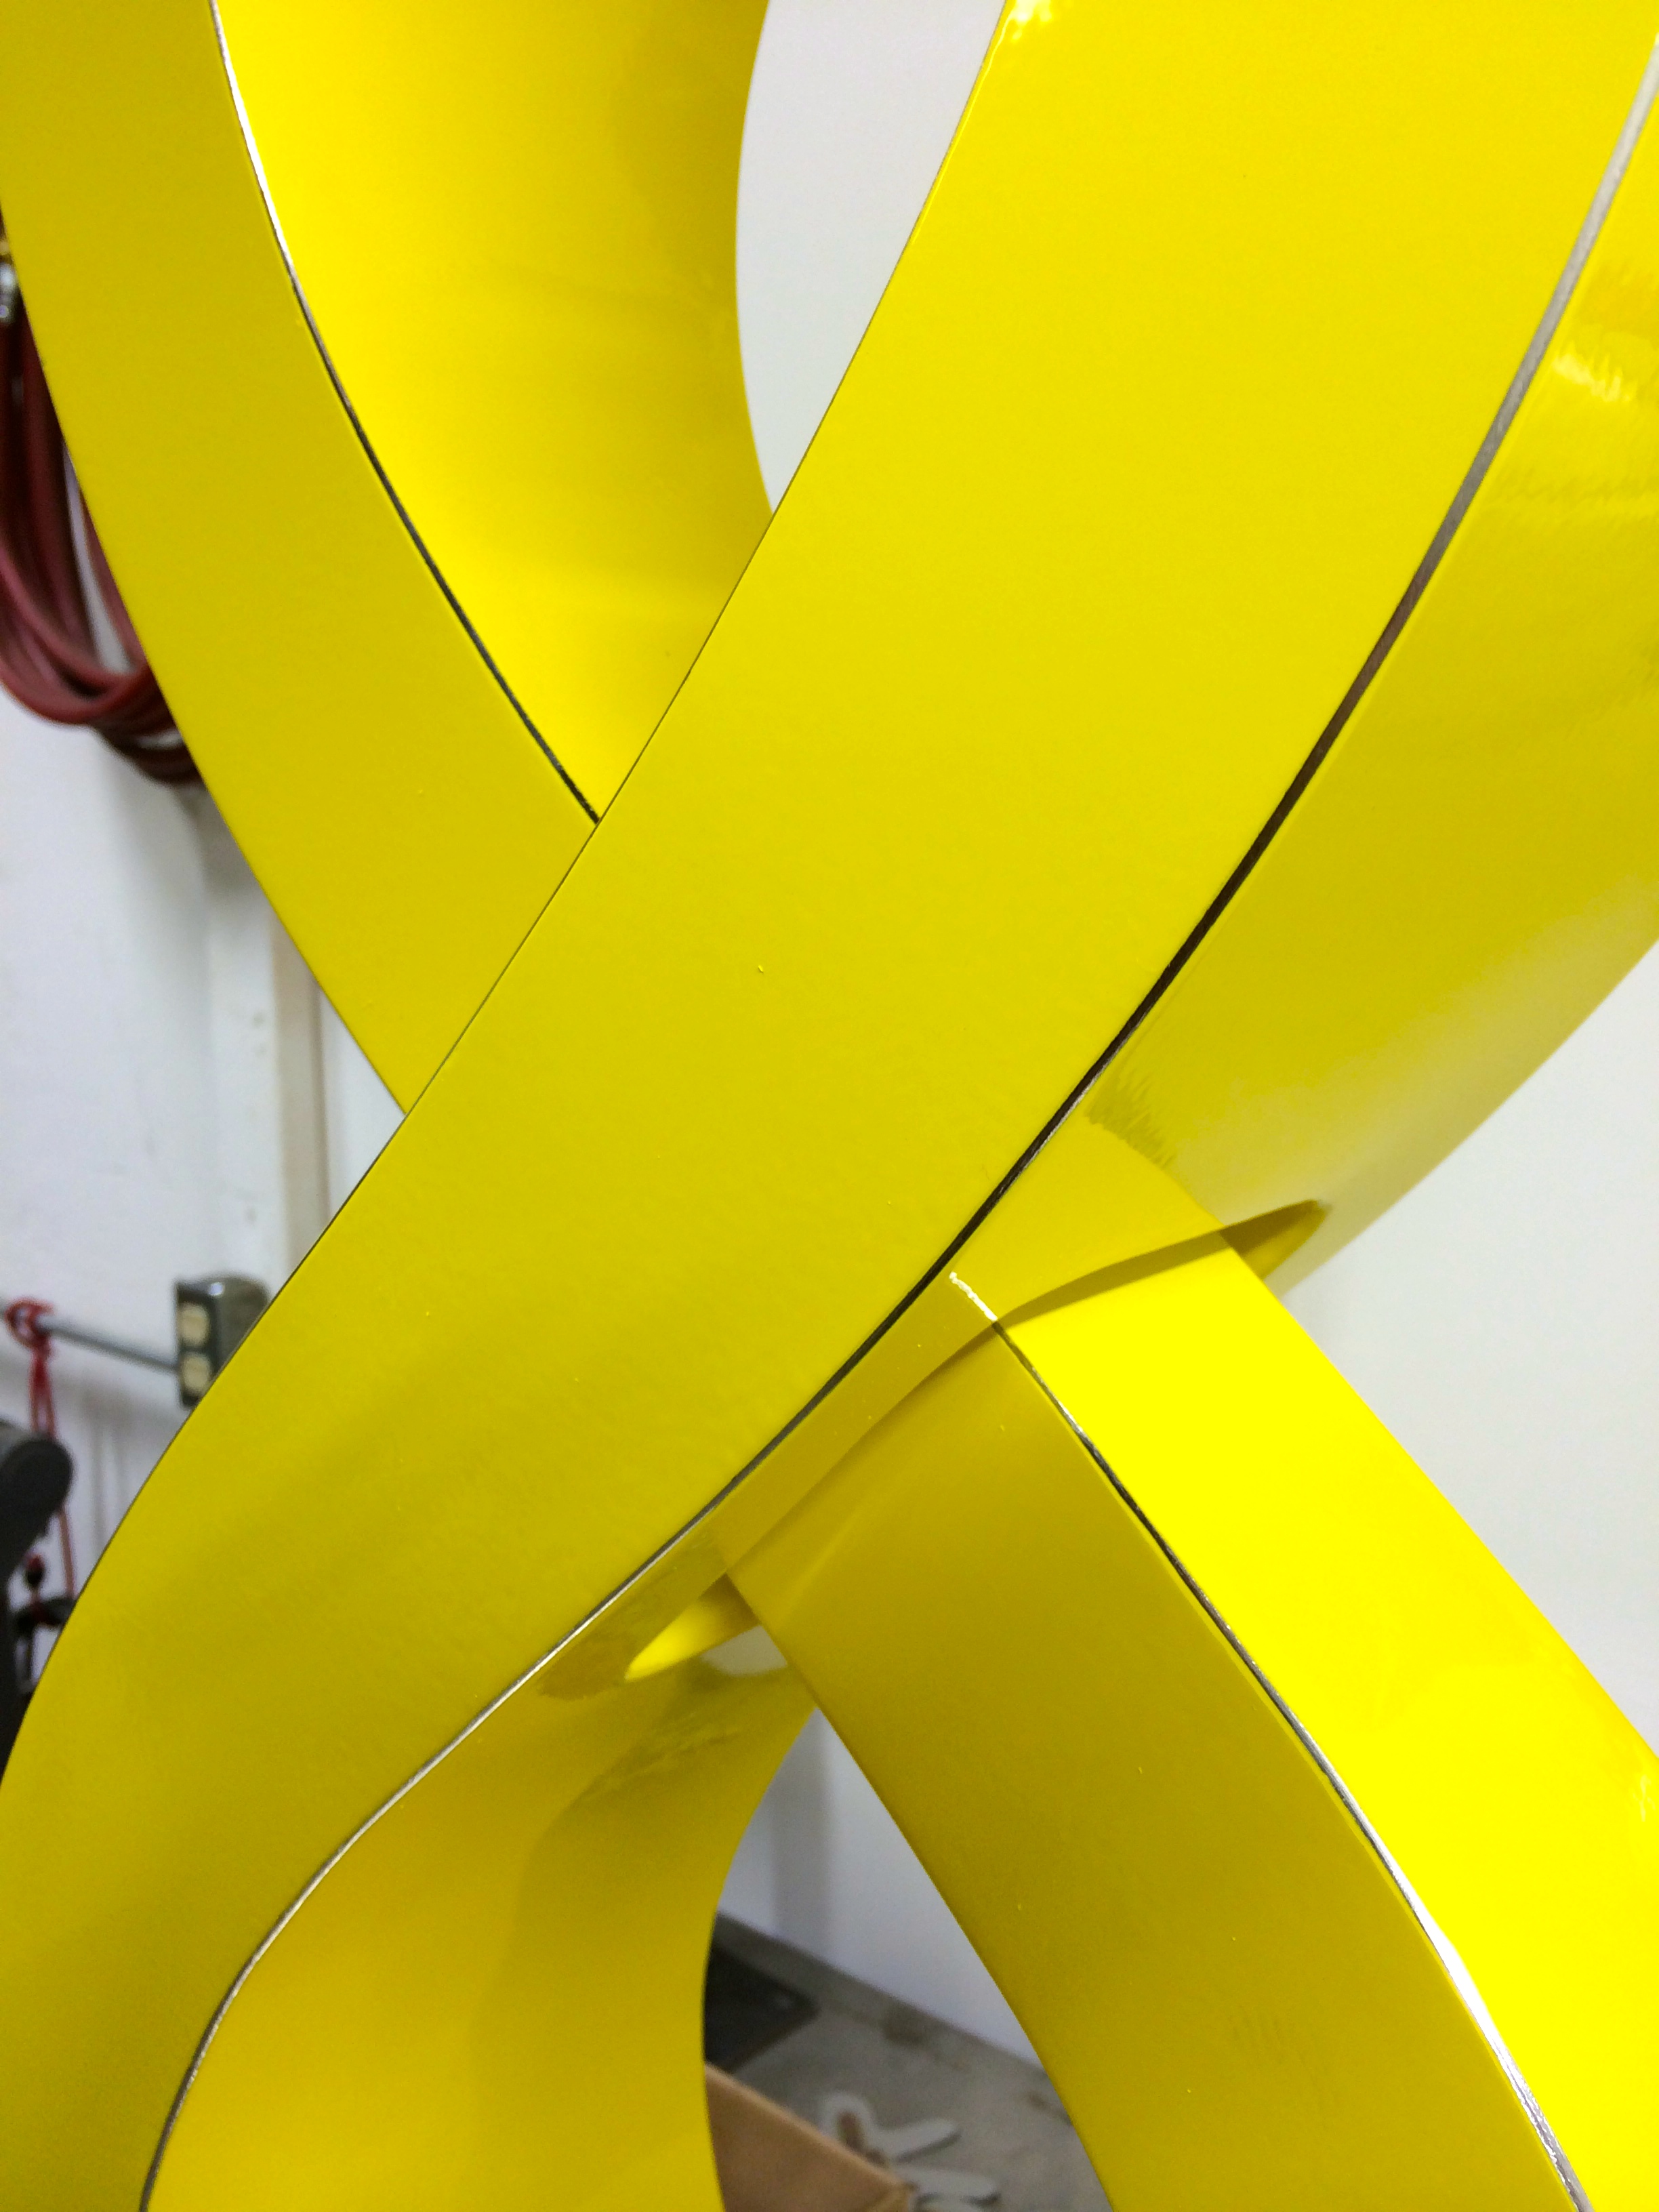
As the strips went on, they gradually forced themselves into the desired egg-shape. I did have to tweak and clamp and swear and complain to compensate for small erors that grew larger over time, but it actually formed up pretty well.

This one was a real learning experience, forcing me to come up with all kinds of new techniques and procedures to get the job done. In other words, I loved it.

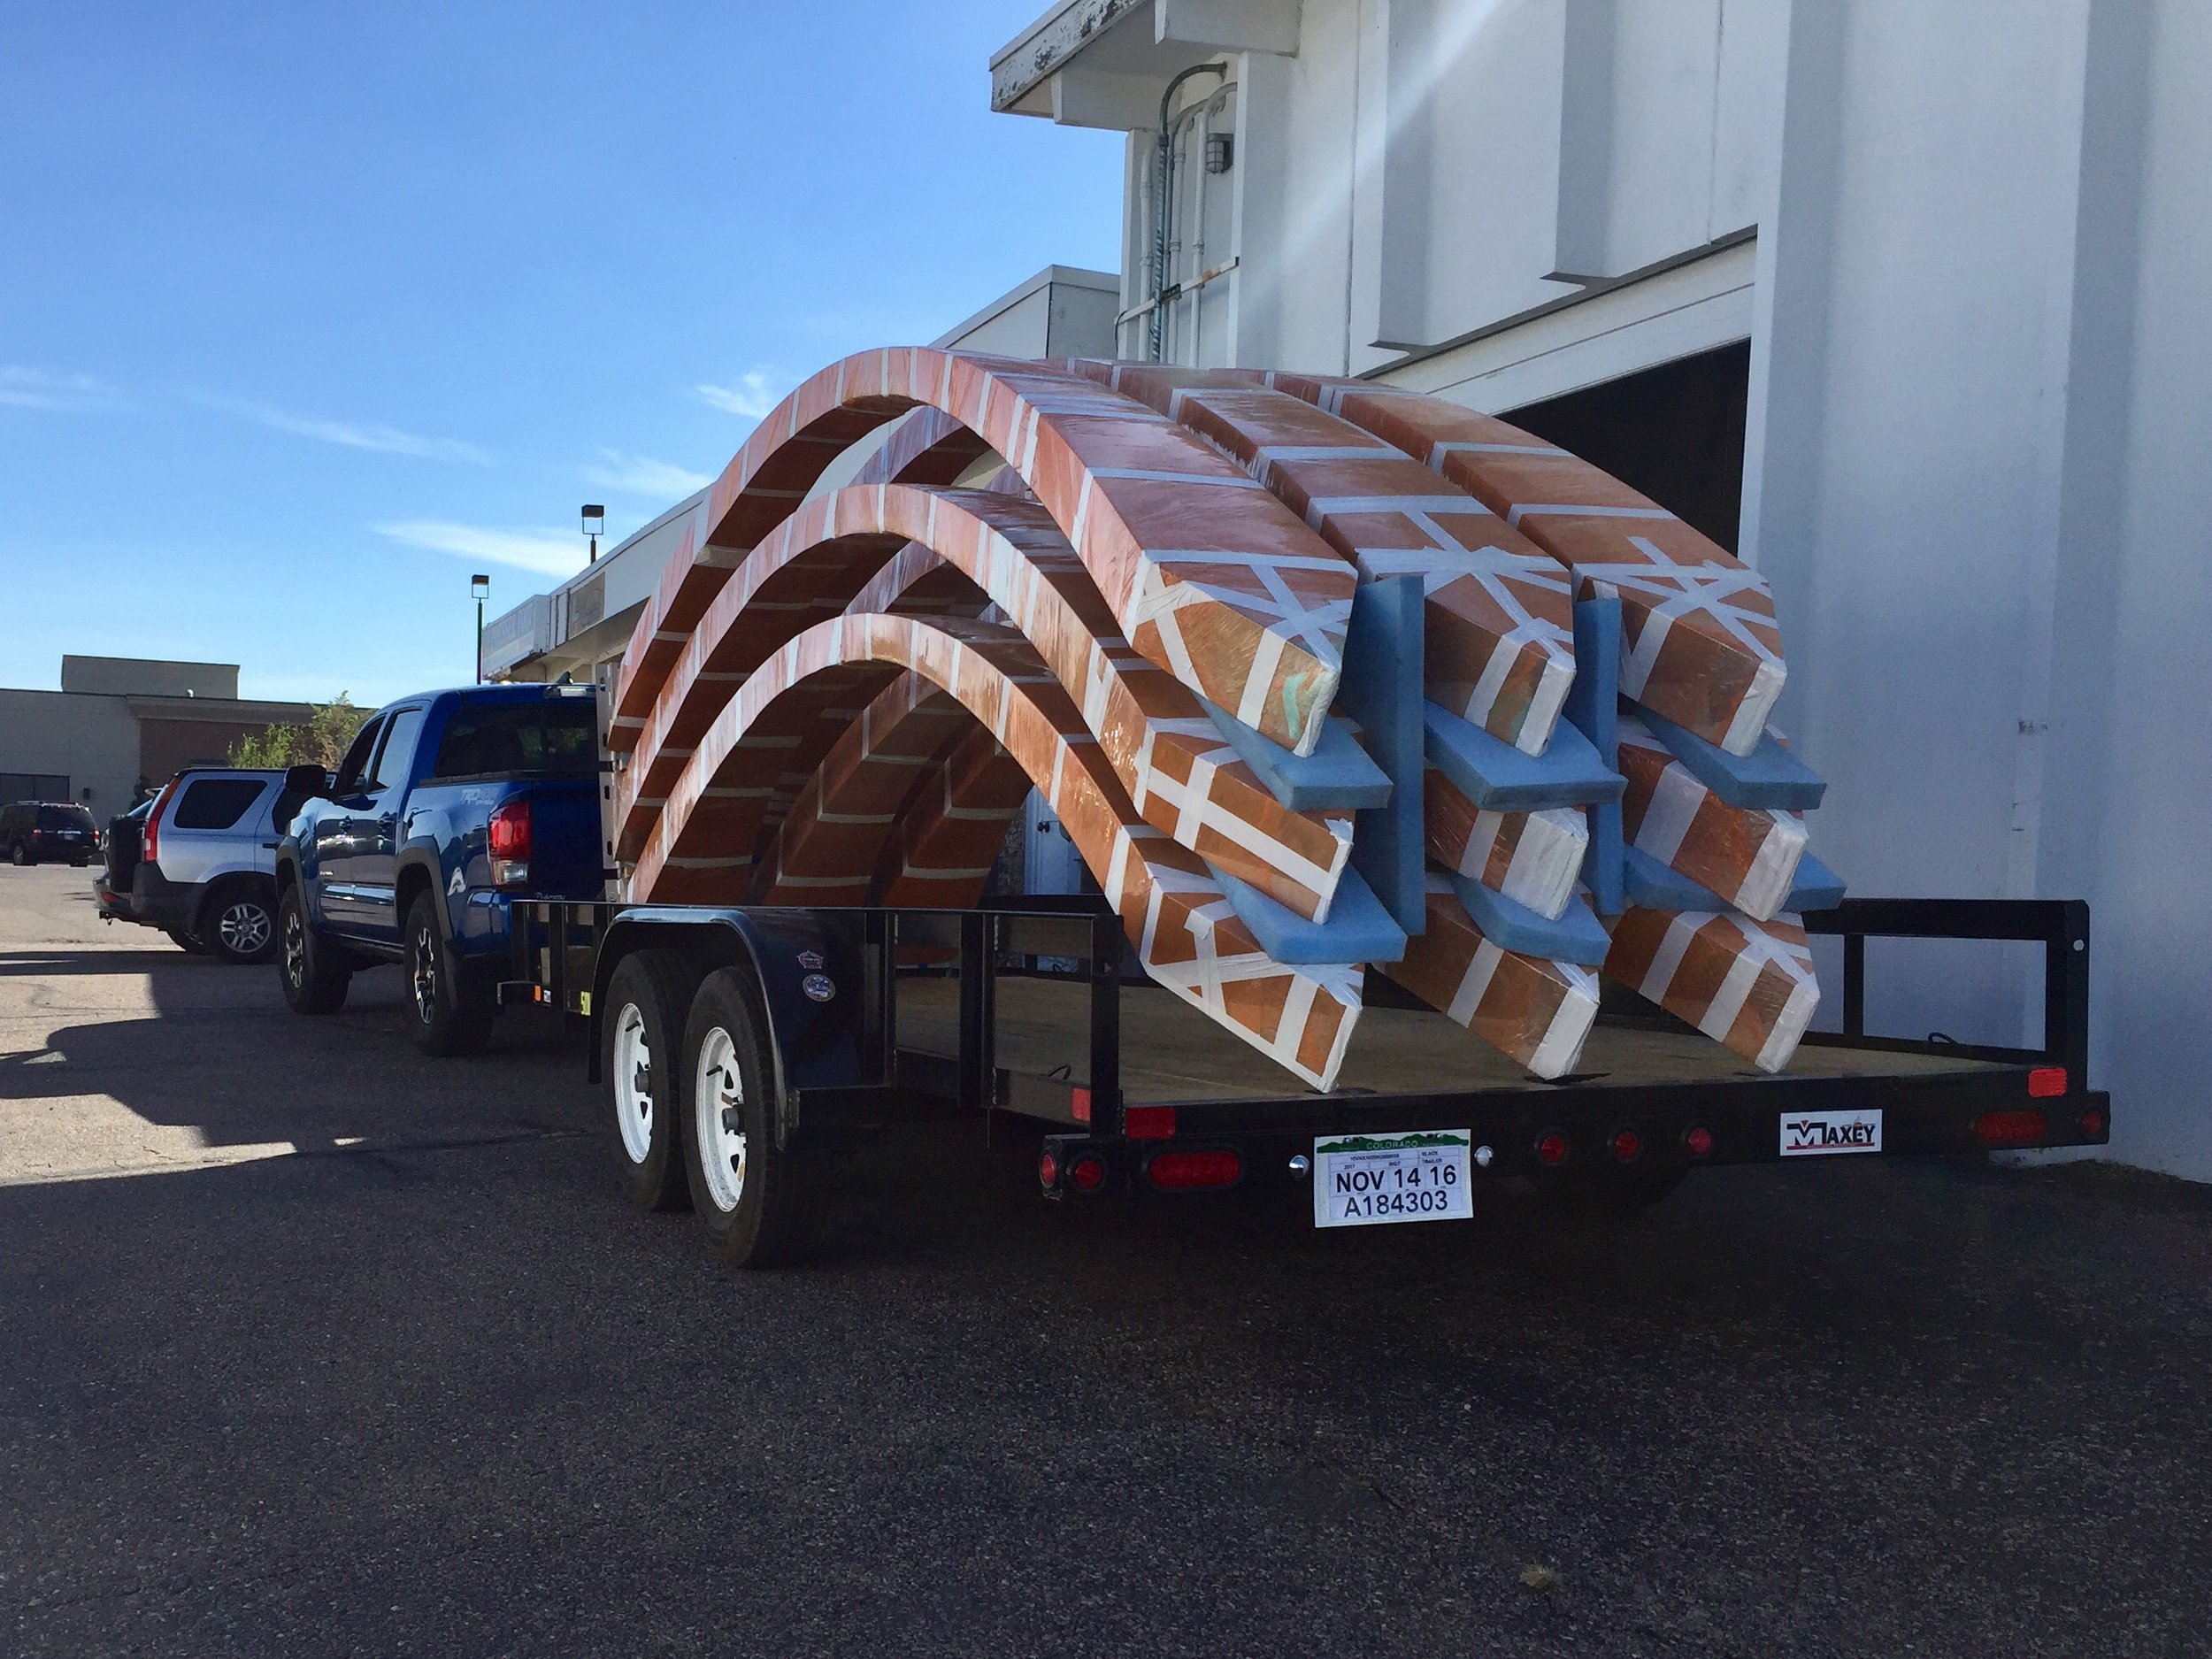
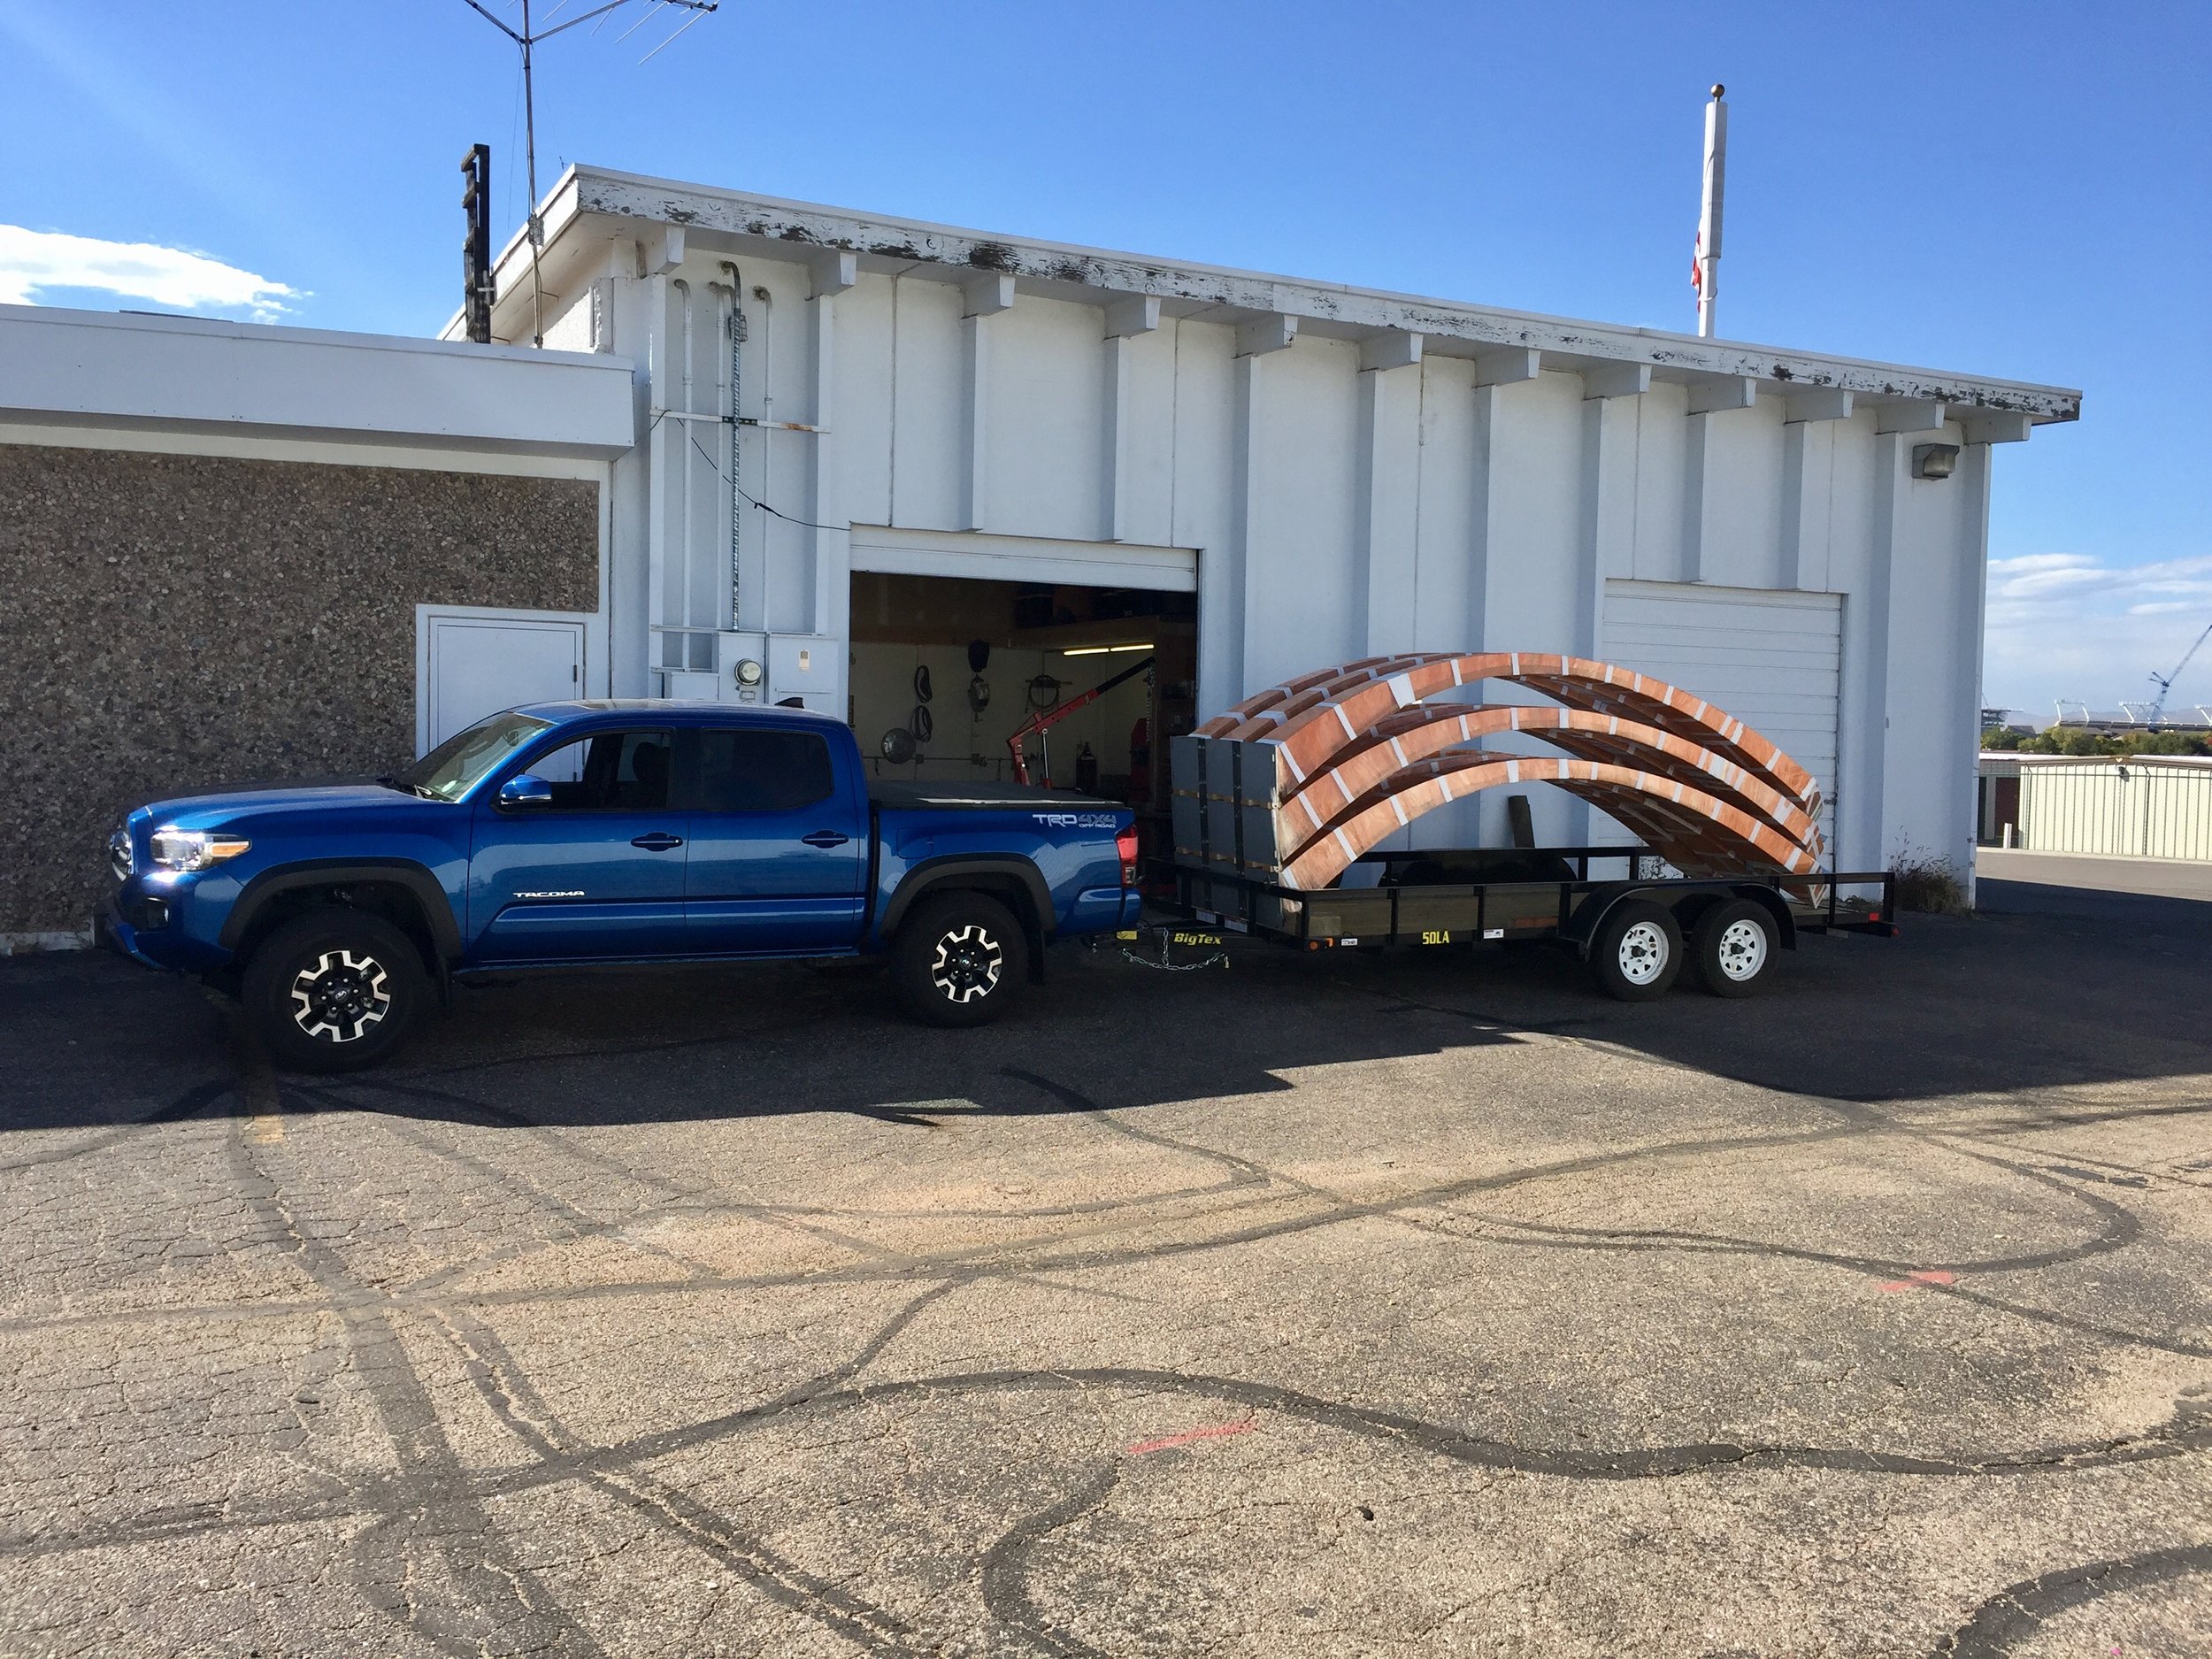
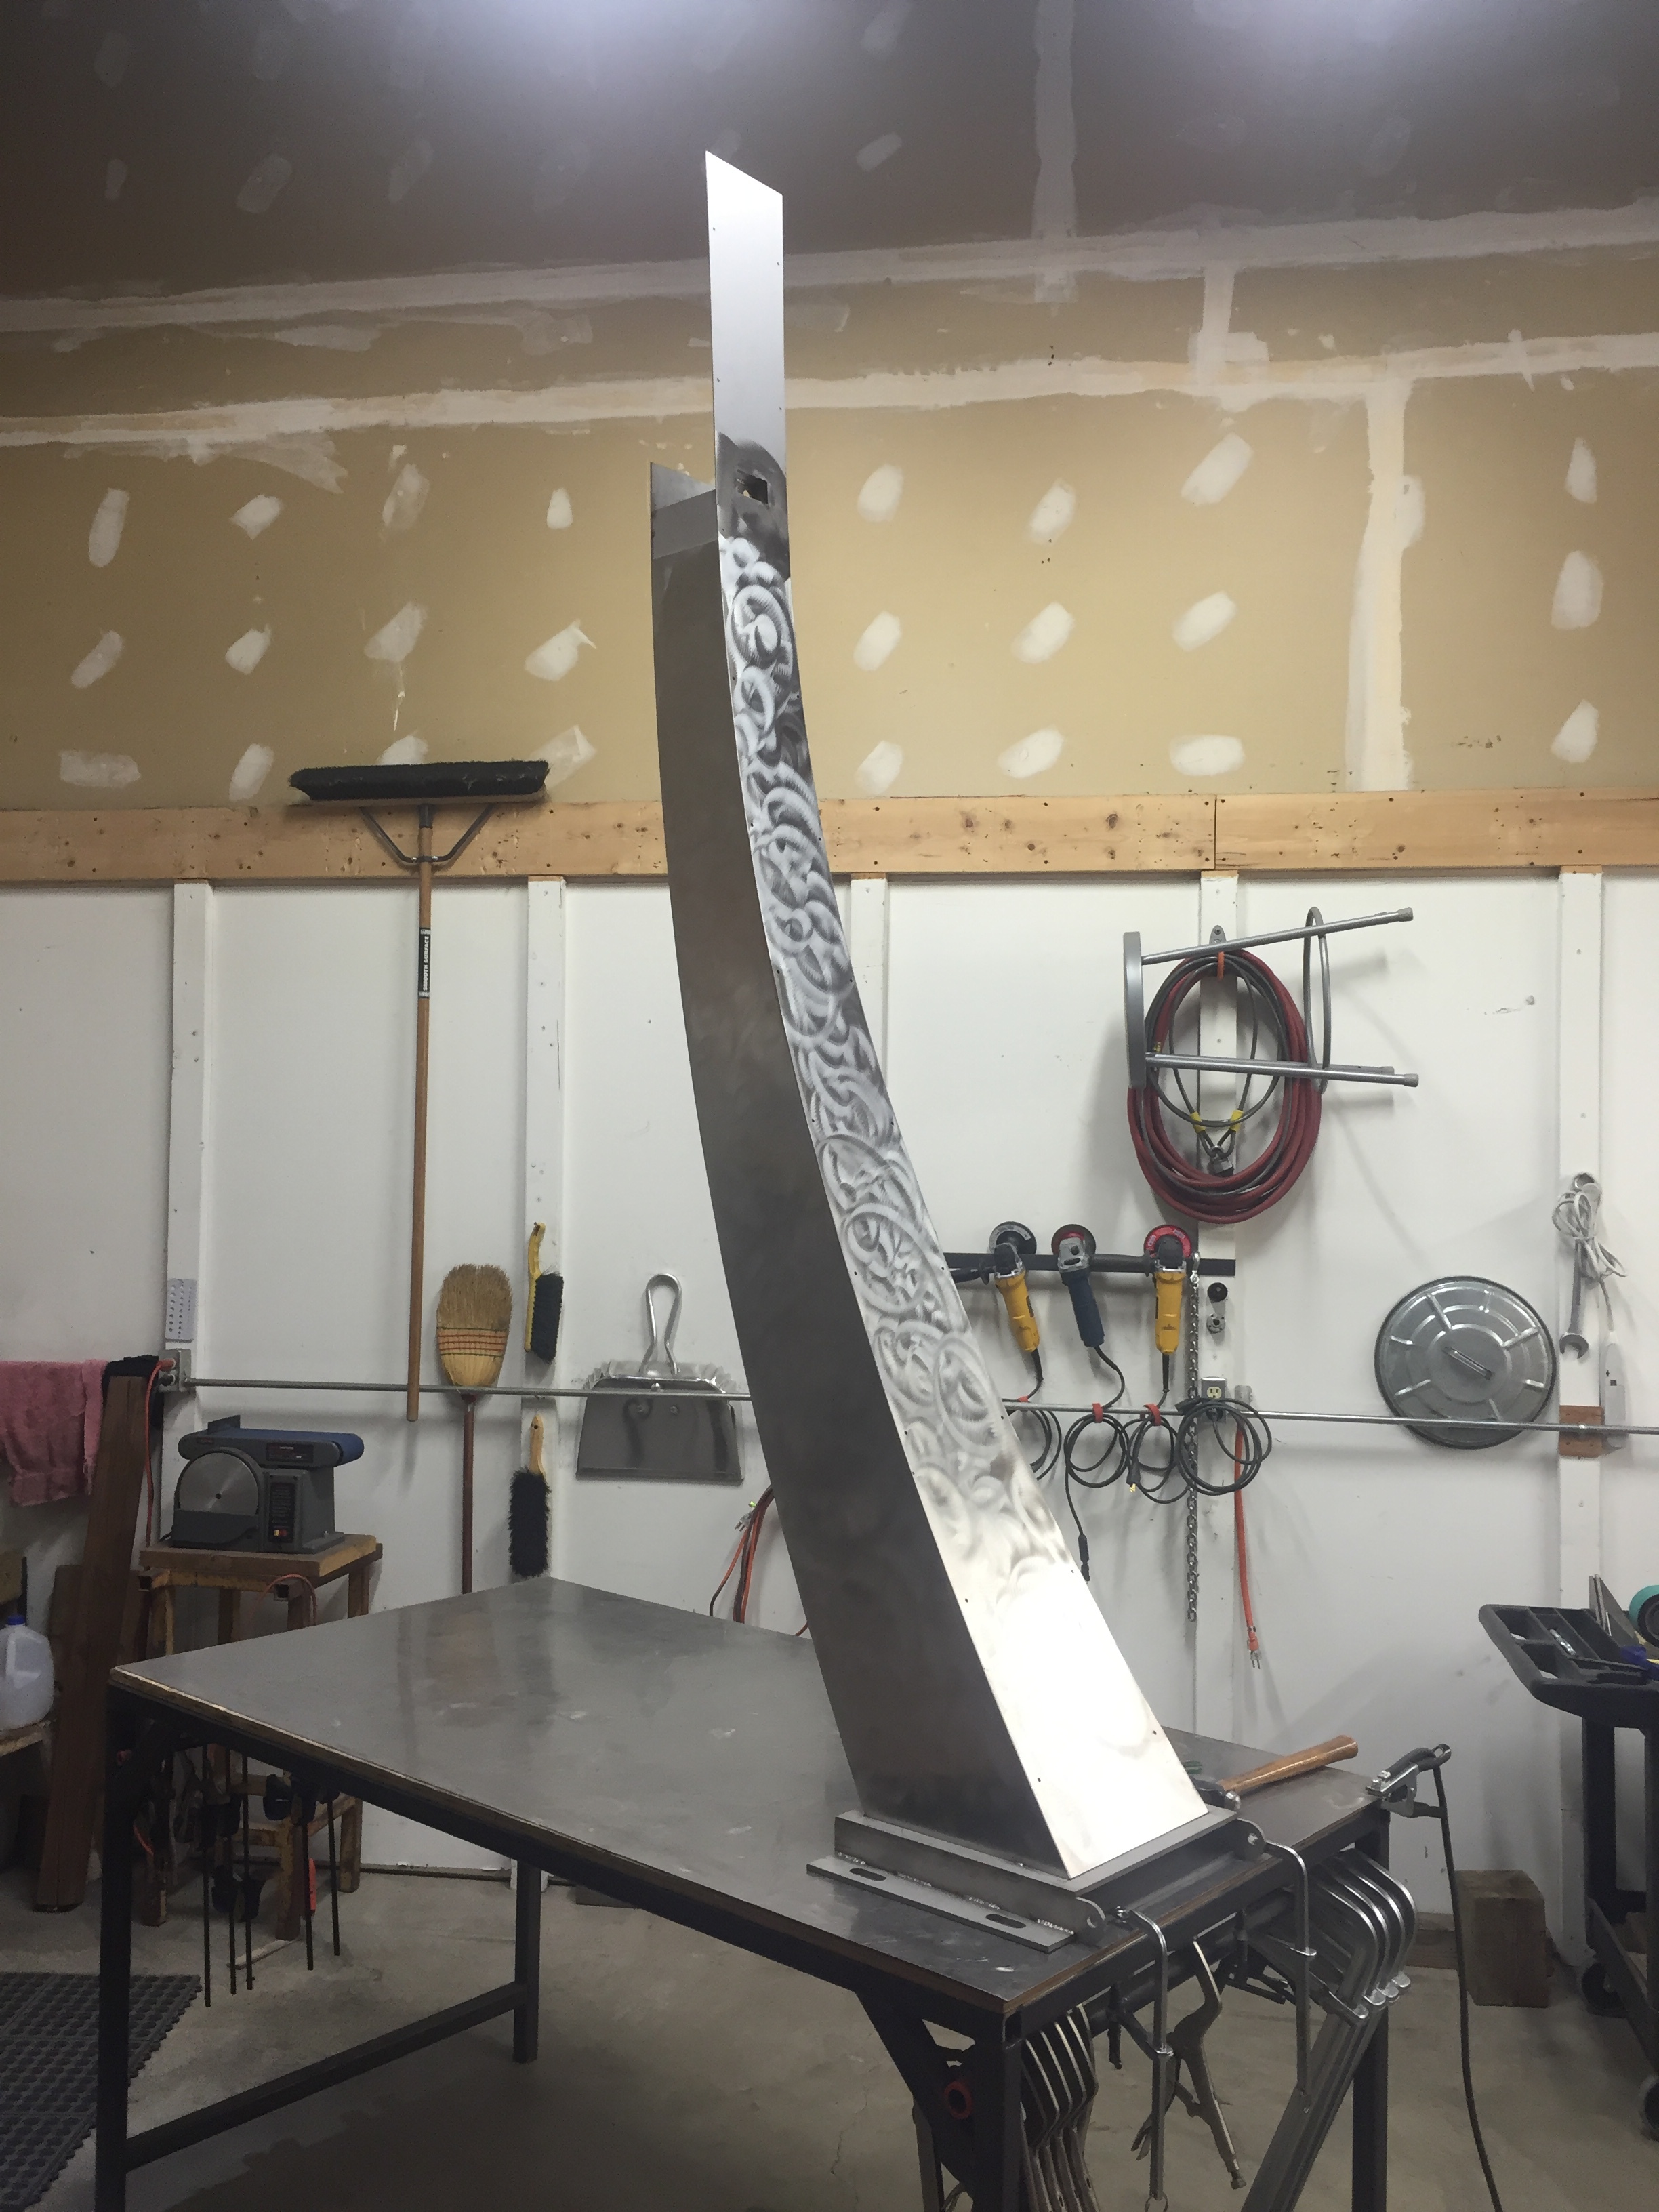
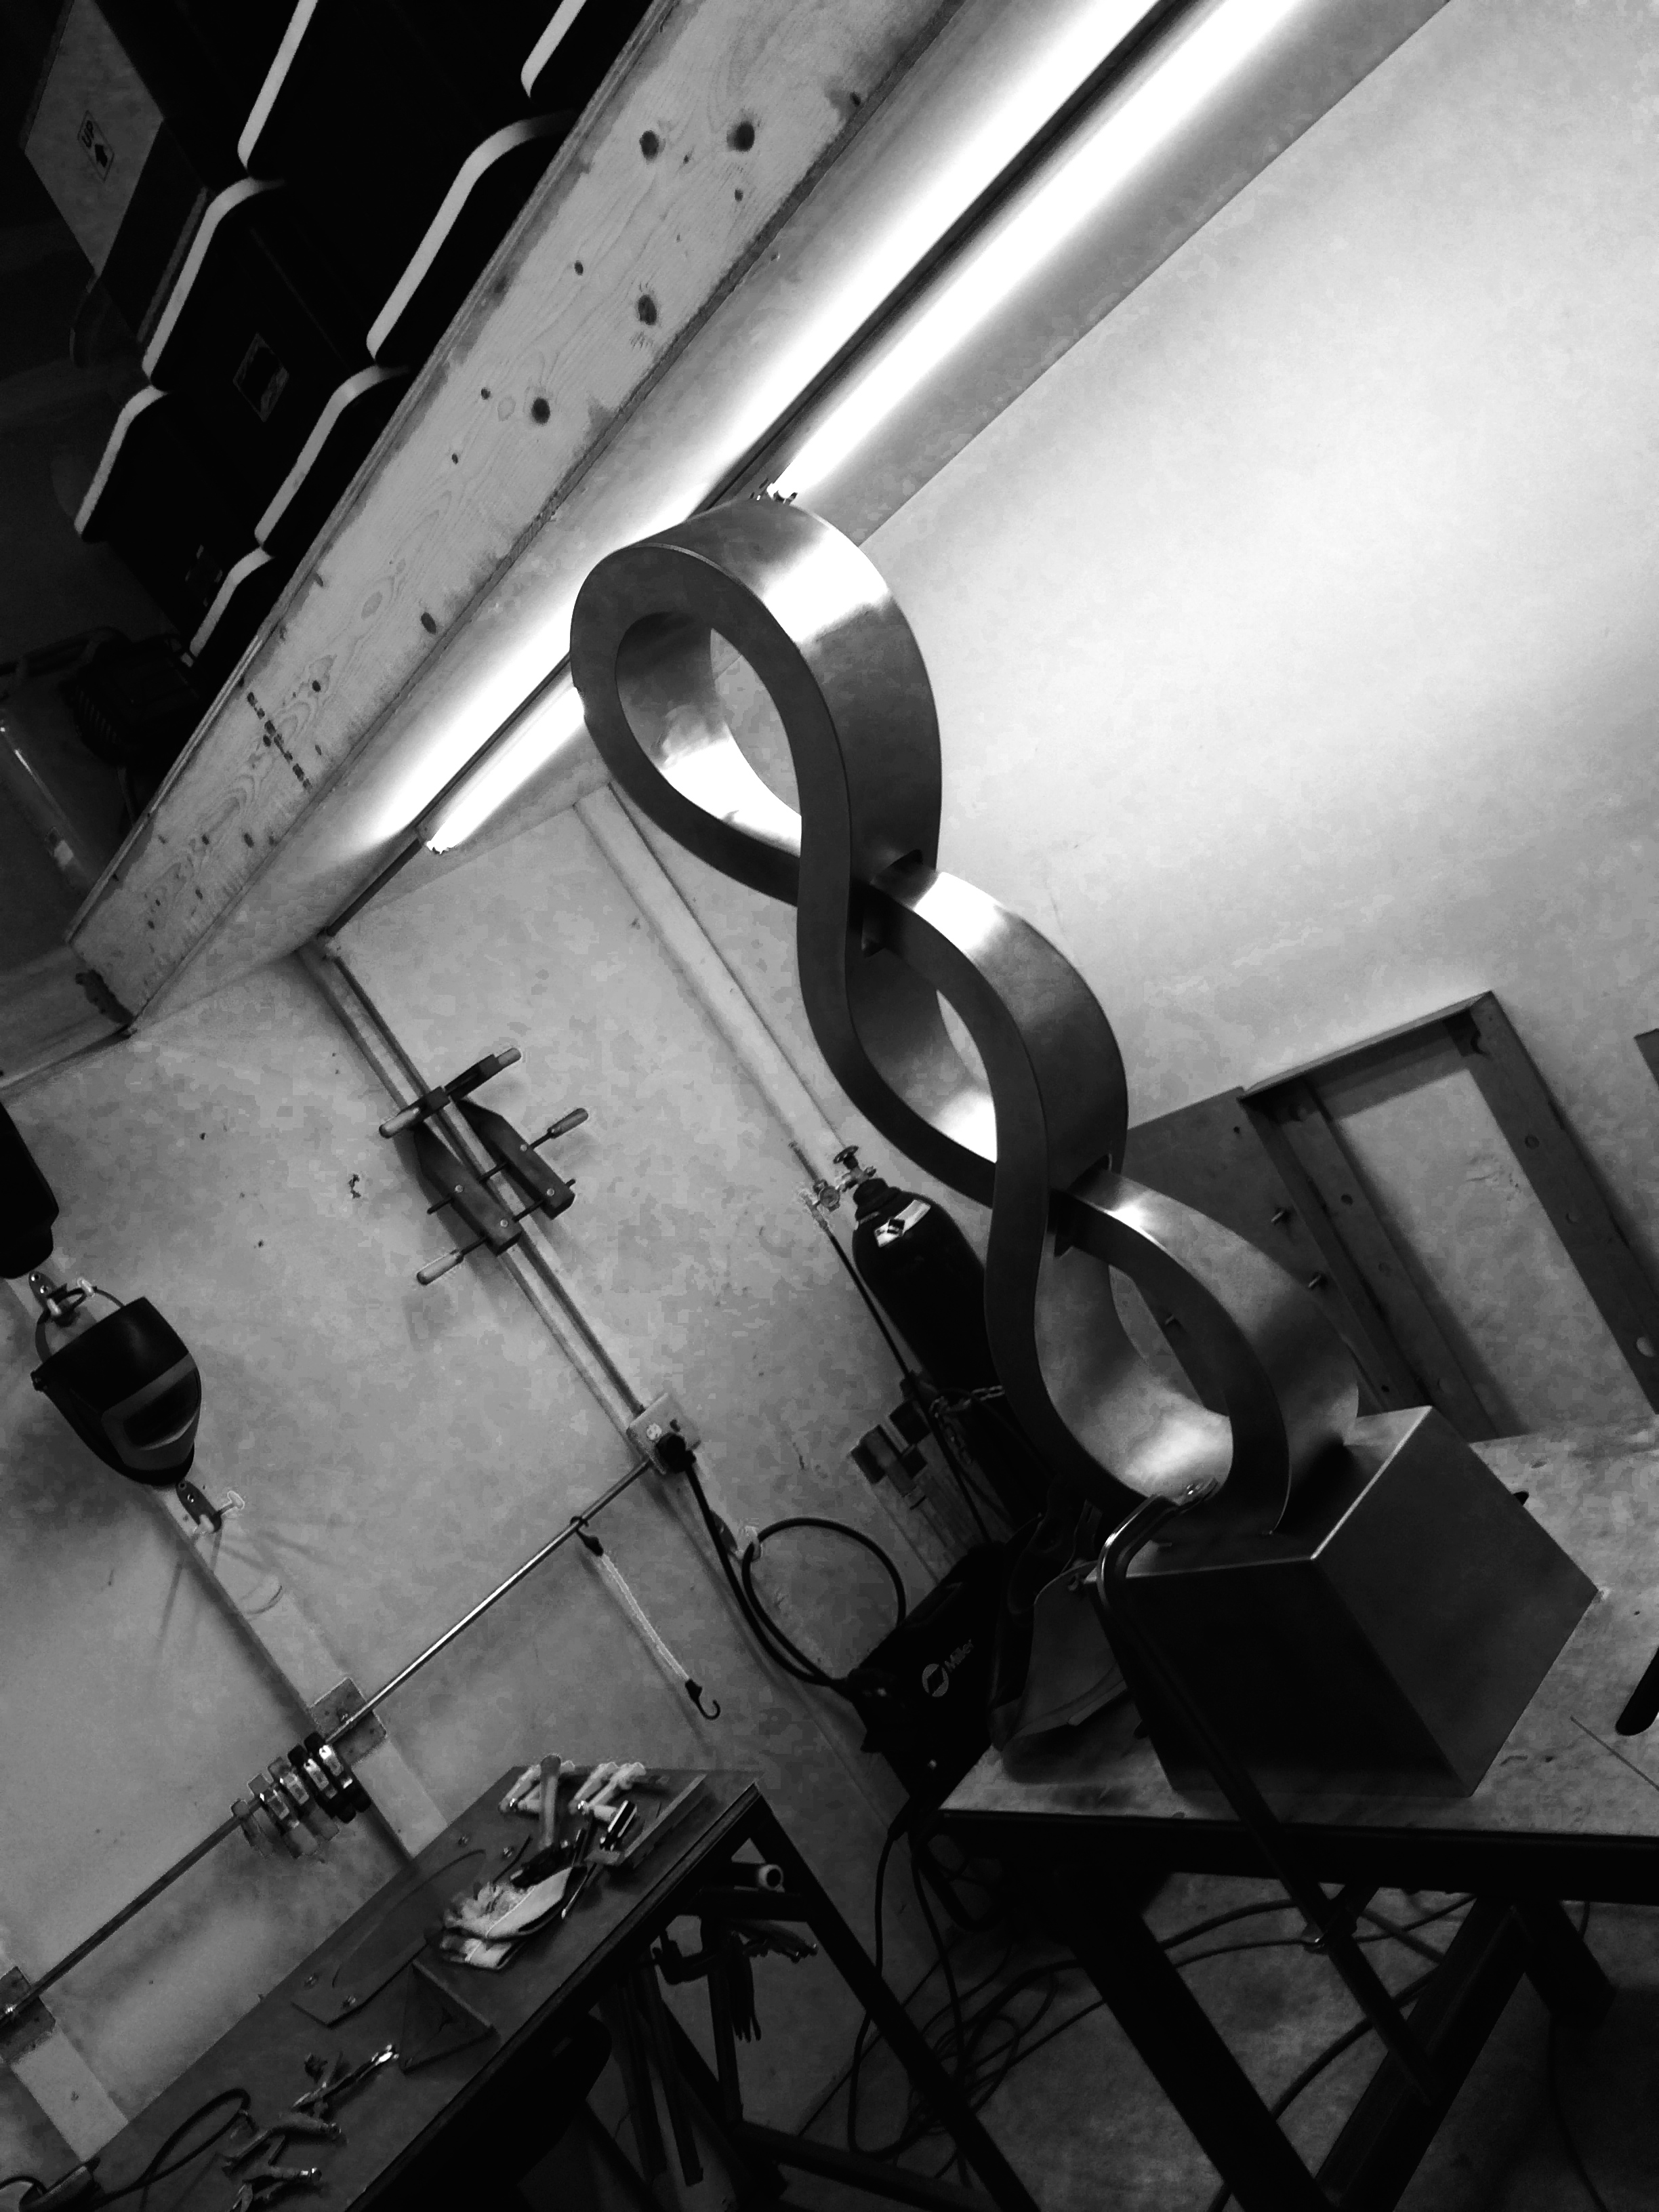
The frame you see in the top picture above is just for displaying "Beginning"; I envision this as a hanging piece in an atrium, stairwell, or foyer. The same techniques I empoyed here could be used on a much larger scale. I'd love to give it a whirl.


"Wellspring" creation, Part II by Mark Leichliter

The sculpture sat, unloved, in the studio for quite a while as we sorted out a good install date. Eventually, it was time to load it up, haul it to Adams County, and install it. Getting it onto the trailer seemed to be a fearful task to a lot of my cohorts, but it ended up being a matter of a simple plan, well executed. I bought some heavy-duty casters (600 lb. load rating) and bolted them onto the exposed "legs" of the superstructure. This simplified the act of moving it into place on the trailer's deck, and it also made lifting the piece into a vertical orientation with the crane much easier. Next, I picked the base end up high enough to allow the trailer to roll underneath, and supported it that position with a crossmember of leftover square tubing and two of my super-badass "saw" horses.

Backed the trailer under the piece, removed the crossmember, picked up the top end, and rolled the sculpture to the fromt of the trailer. Wah. La. All that was left was strapping it down, slapping some hazard flags on it, and loading up the tools for the install the next day.

My little Tacoma did a fine job of hauling this rig, despite the weight - "Wellspring" tips the scales at just 850 pounds, but the trailer is a beefy one at around 3K. (Thanks go to fellow Guild member and all-around good guy Denny Haskew for the use of his trailer.) An hour and a half later, and National Sculptors' Guild honcho John Kinkade and I were on site, getting ready and waiting for our crane. It was a beautiful day, a beautiful crane, and a beautiful installation - we were done in less than an hour.

So, there you have it. Done.